Welcome to the English online documentation for exocad PartialCAD!
You may access this PartialCAD Help from the software by clicking the "?" icon in the lower left part of the screen, to get help on a specific tool that you're currently using.
Contents
Video tutorials
Some things are easier to explain in a video. To get started with PartialCAD, we recommend watching our video tutorials first.
Discover how to design a removable partial framework including the prosthetic parts by combining DentalCAD and PartialCAD:
Check also the following exoWebinar PartialCAD Module:
Index
Below you will find an index of PartialCAD topics sorted alphabetically. In terms of workflow, we recommend you to start with Survey, and continue with the Next button at the bottom of each page to proceed.
Add Tooth
Apply Clasps
Assemble Parts
Bar
Clone
Draw Connector
Draw Curves
Edit Blockout
Emboss with Curve
Emboss with Image
Filler
Finish Lines
Mask
Measure wax
Mesh
Mesh and Connector
Paint Filler
Apply supports/Pipe
Post
Retention Bead
Save for Build
Blockout
Select Wax
Smooth
Smooth Area
Survey
Trim scan
Tug
Hardware/Software Requirements
The PartialCAD software has stronger hardware requirements for the graphics card than the classic exocad DentalCAD software - for optimal performance, a lot of data processing is done by the graphics card. Please check this page for further information.
Introduction
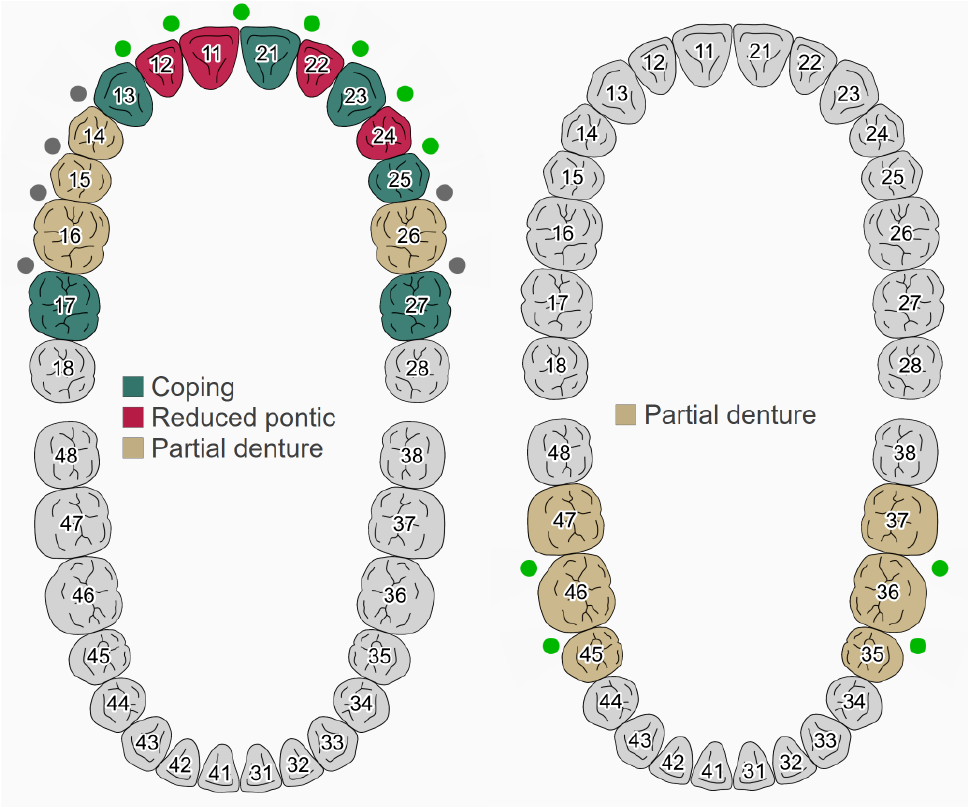
To generate a case, simply complete the prescription in the DentalDB (Client and patient name are required), then define one or more "Partial framework" teeth on one arch. If you wish to use an antagonist scan, set up "Antagonist" in the opposing arch.
The "Partial Framework" definition can be combined with Crowns/Copings, Bridges, and other types of restoration, as shown in the left example. However, Partial Frameworks can currently only be designed in one arch at a time; to design frameworks for both upper and lower, you need to set up two distinct cases - one for the upper, and one for the lower.
Once the case is set up, scan as usual by clicking the appropriate button in DentalDB to launch the scan software. For combined cases, that include both Crown/Bridge restorations and a Partial Framework (or if you'd like to virtually set up teeth, as a guide for the partial framework design), click "Design" to start exocad's CAD application. Follow instructions to proceed with margin line detection, tooth setup, etc.
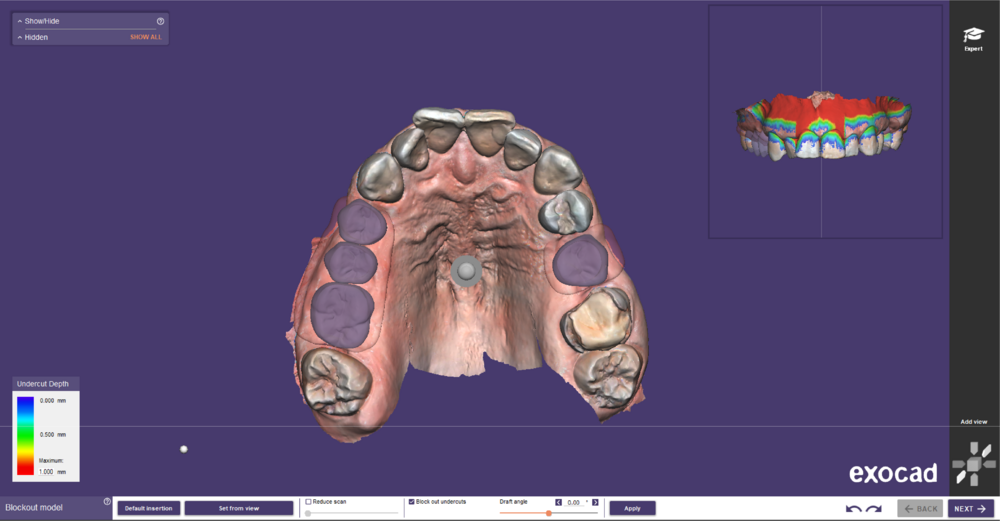
Next, launch the PartialCAD button in your database. The scanned arch should appear in a window, as shown below (upper example):
The PartialCAD software uses the exocad mouse interface (3D Connexxion 3D mice are also supported).
- Mouse Click and Hold – Select, Draw, or Paint (depends on current tool)
- Right Mouse Drag – Rotate the view
- Right Mouse Click – Show Properties of the object (right click in background to save, load, help, save, etc...)
- Left and Right Drag – Translate the view (move)
- Scroll wheel – Zoom
- Scroll wheel click – Re-center view
Like other exocad products, PartialCAD uses a guided, Wizard-based workflow, where clicking 'Next' in the bottom window will take you to the next logical step in the design. This workflow initializes with the Survey tool. Other tools and modes can be accessed by clicking on the "Expert" icon on the right hand side of the screen. Hover your cursor over these icons to see their name. In the right click menu (a short right click anywhere in the CAD window background), a number of options for "saving" generate a .partialCAD "scene" file that can restore a particular state of the Partial software (scan + all free-forming changes. As ususal in exocad, all files associated with this job will be in the project folder accessible through the DentalDB.
Keyboard shortcuts
The PartialCAD software uses the exocad mouse interface (3D Connexxion 3D mice are also supported).
| Add Part | Y |
| Add Post | A |
| Back | Ctrl + Backspace |
| Bar | U |
| Clasp tool | G |
| Clone | C |
| Clone thickness presets: (in clone tool only) | 1,2,3,4,5 |
| Draw Curve | D |
| Edit Blockout / Secondary blockout | K / SHIFT-K |
| Edit Curve | CTRL-D |
| Emboss with Curve / Emboss with Image or text | L / SHIFT-L |
| End / Close a curve (in curve tool only) | E |
| Filler / Paint Filler | N / SHIFT-N |
| Finishline | J |
| Increase / Decrease Tool Size (in any tool with adjustable tool size) | Q / W |
| Increase /Decrease Tool Strength (in any tool with adjustable tools trength) | ALT-Q / ALT-W |
| Increase/Decrease tool size | SHIFT-mousewheel |
| Increase/Decrease tool strength | CTRL-mousewheel |
| Mask | M |
| Next/Done | Ctrl + Spacebar |
| Pipe | P |
| Prepare for build | . |
| Retention Bead | I |
| Ruler | R |
| Save | CTRL-S |
| Save as | CTRL-SHIFT-S |
| Select Wax | S |
| Smooth | V |
| Smooth - Smudge toggle (in edit wax tool only) | ALT-1 |
| Smooth Area | SHIFT-V |
| Smooth modes (in edit wax tool, smooth mode, only) | ALT-2, ALT-3, ALT-4 |
| Smooth toggle hide wax | Z |
| Smudge | B |
| Snap auxwindow window to top / side views | F6-F9 |
| Snap main window to top / side views | F2-F5 |
| Toggle auxwindow on/off | F10 |
| Toggle Show/Hide window | O |
| Trim Scan | X |
| Tug | T |
| Undo/redo | CTRL-Z / CTRL-Y |
| View menu | F11 |
| Zoom to show all | F |


