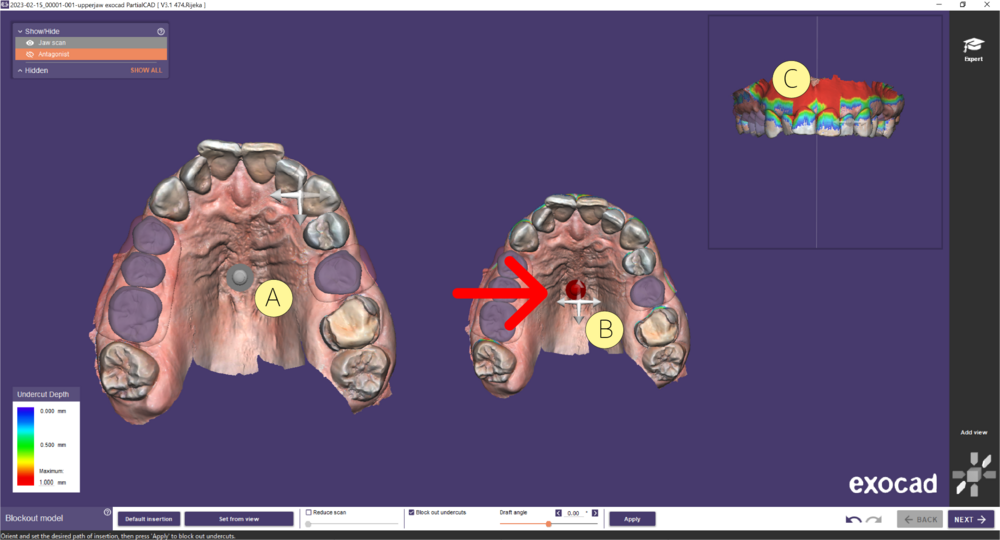
 In the Survey tool, you specify the insertion direction of partial relative to the navy-blue scan. Left-click anywhere on the scan and the insertion path arrow changes from white [A] to red [B], and the cursor changes to a 4-arrow cross. Left-drag to rotate the model to the desired insertion path, when you release the mouse button, the undercut colors [C] will update. If you need to determine the exact amount of undercut in a particular area, use the right-drag mouse button to rotate the model so the area in question is visible. You can continue to change the insertion angle to adjust to the desired undercut depth.
 Alternatively, you can rotate the model so that you are looking at the model from the desired insertion path and click Set From View [2]. To reset the path of insertion to the original default z-axis, click Default Insertion [1].
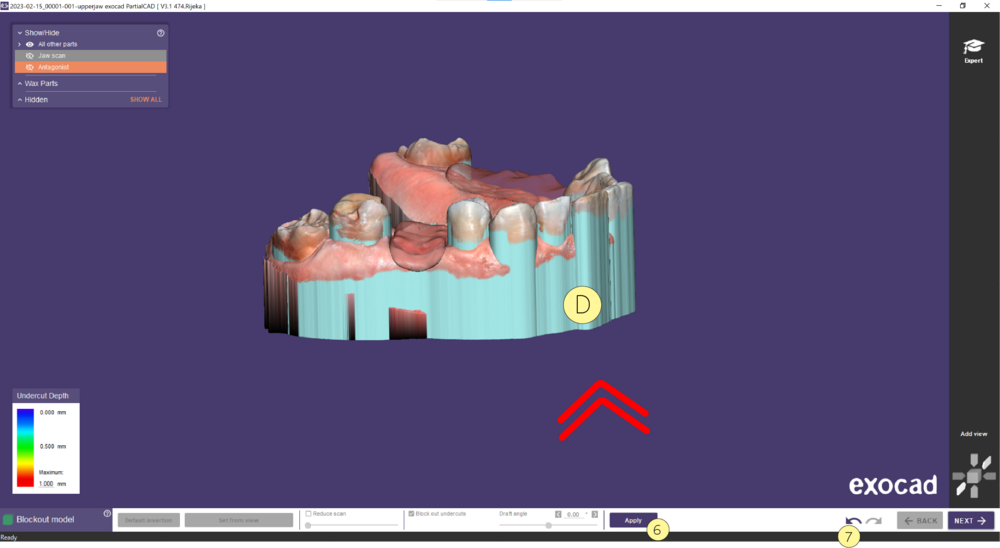
 Click Apply [6] to generate a refractory model with light-blue "blockout wax" in the undercuts. This may take a few moments. Use Ctrl-Z or [7] to undo.
You can change the view orientation of the main image with either the arrows in the lower portion of the expert toolbar, or F2 through F5 keys.
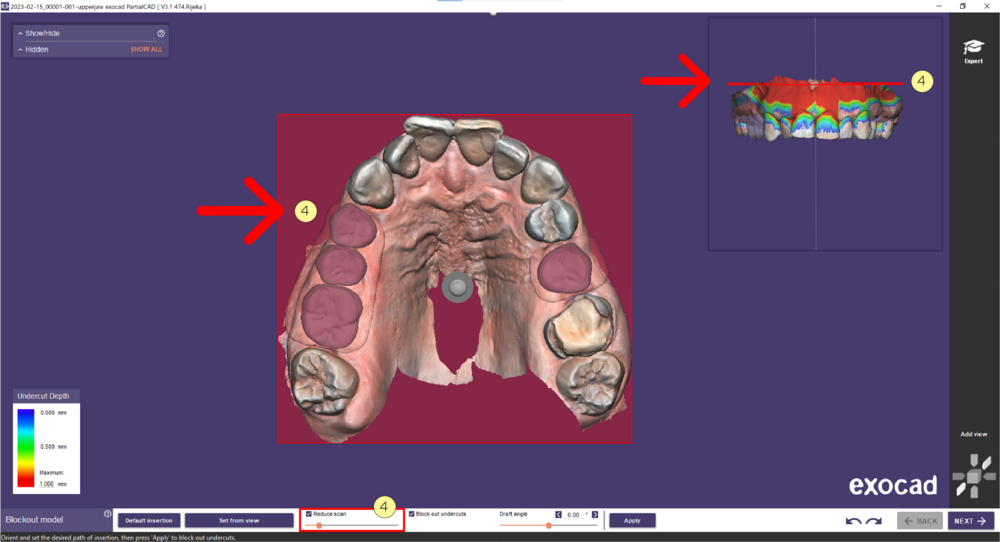
 Check the box Reduce scan [4] to cut the extra data from the bottom of the model. Use the slider to adjust the plane.
To prevent any blockout from being done, un-check the Block Out Undercuts [4] box. This is rarely used.
You specify the desired blockout wax Draft Angle [5], using the slider or by typing in a number. Typically 2-3 degrees is sufficient. Zero degrees (the default), may create tight partial frameworks.
Apply [6] takes the current path of insertion and generates a refractory model with light-blue "blockout wax" in the undercuts. This may take a few moments. If you are unhappy with the results, use Ctrl-Z or [7] to undo and re-set the parameters.
Click Next to proceed to the next step.
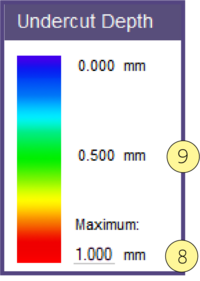
Undercut Depth
You can adjust the undercut color scale depending on your preference.
Left-click on the bottom number of the scale [8], and edit it to adjust the maximum value. The mid-scale [9] will adjust accordingly.


