Smile Creator


Contents
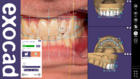
Start Smile Creator
With DentalCAD Engine Build 9036 or later, you can now streamline your workflow using cloud operations. The Segment Teeth option is now available when you enter the Start Smile Creator wizard step.
To start Smile Creator, click Start Smile Creator in the Smile Creator Wizard. The wizard shows the step “Start Smile Creator” if at least two neighboring teeth are reconstructed and at least one of them is an incisor.
Smile Creator automatically detects facial features with artificial intelligence to automate the smile design and get to an esthetic proposal faster. This, along with many other new features and improvements, helps save valuable time while designing cases.
Note: Smile Creator is not available if the reconstruction type is a waxup with a waxup scan.

Alternatively, start Smile Creator from the main toolbar (Tools > Smile Creator)

Note: The Smile Creator module first needs to be activated. Also note that Smile Creator is optimized for single groups of neighboring teeth.
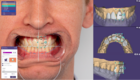
Load a retracted image


Click Load a retracted image to load an image from your file directory, or take a picture directly from your device:
1. Click the camera symbol.
2. Click Take image in the window that opens.
Alternatively, you can drag&drop an image file into the main view, or copy&paste an image file into the main view.
 To use the automatic face feature detection, you will be prompted to accept the Supplemental Terms & Conditions of Additional Online Features due to the new Cloud Features.
 Once you confirm and agree, the Smile Design Segmentation will begin.
If you choose not to, proceed as usual with the Manual alignment.
Once you confirm and agree, the Smile Design Segmentation will begin.
If you choose not to, proceed as usual with the Manual alignment.
| Check this page to get more information about the Smile Creator Photo Protocol |
Smile Design Segmentation

The Segmentation will be performed automatically.
 Both jaws will be segmented.
Smile Creator images
 In the next step, the alignment between the smile image and the jaw scan was performed automatically. Check the result and click “Next” if acceptable. To modify the result, use manual alignment.
Manual alignment
Set corresponding points and adjust DentalCAD automatically aligns the image to the scan data. If this process fails, the patient’s photo is displayed on the right side of the screen. Match the scan and the photo by setting alignment points.

Set two corresponding alignment points on the left and right image. First click two points in the scan and then click the corresponding alignment points in the corresponding positions in the photo.

Adjust the point positions as required by left-clicking and dragging them. Hover the mouse over the images and scroll to magnify them for better adjustment. Click Next when the points are optimal.
| SHORTCUTS |
In the next step, the scanned jaw and retracted image are placed on top of each other.


Click Next when done.
Load a smiling image
 Next, load a smiling image of the patient by clicking Load a smile image and selecting an image from your file directory, or take a picture directly with your device. Alternatively, you can drag&drop an image file into the main view, or copy&paste an image file into the main view.
 The image is automatically aligned. Fine-tune the alignment by moving the two points to correct image scaling and position.
Set corresponding points and adjust


Load a face scan
To load a face scan, use the option Select face scan and continue setting the registration points on the face and jaw scan.


After loading a 3D face scan instead of 2D images set two corresponding registration points on the face scan and the jaw scan. Then, by clicking Next, you can manually align the jaw scan to the face scan.
Move the jaw scan using both mouse buttons. Rotate the jaw scan using the right mouse button. In the Orientation section [1], you can set the view from the Left, Front, or Right. In the Visual Properties section [2], choose whether to display Teeth & Pre-op or the Outline of the jaw scan/pre-op scan.
Show alignment controls [3] in the main view by activating the corresponding checkbox.
Activating the checkbox Allow navigating in 3D view [4] enables you to rotate all objects in the main view.
Draw a lip line
 DentalCAD automatically detects the lip line with artificial intelligence. If this fails, draw a lip line to cut out the mouth by clicking points along the inner lip line, as shown in the screenshot below. Adjust the line as required by dragging the points.
Guidelines and curves
 Also using artificial intelligence, DentalCAD automatically detects the patient’s eyes. If this fails, follow these steps:
1. Click the patient’s right eye.

2. Click the patient’s left eye. Guidelines and curves appear.
 Helpers

3. In the wizard, select a proportion guide by clicking the drop-down menu [1] .
4. To add more guidelines, expand the Add lines and curves section [2] in the wizard and click the corresponding symbol.
5. Adjust guidelines and curves as required by dragging and dropping their control points. Click a control point and press DEL to delete the guideline.
6. Align the image by enabling Lock Rotation and align image to lines [3].
7. Click Next when done.
Modeling
Next, adjust your design. The main window shows the retracted image with the 2D outlines of the tooth models. In the upper right corner is the front view of the 3D model. The top view is shown below and the image in the lower right corner represents the side view of the model. You can activate the Show Distances function in the main toolbar.
 The Smile Creator Wizard is shown in the left part of the screen. The four areas of the window will be explained in this section.
 Select a dental library in the Library section [1].
Note that it is important to begin the modeling process with this step. Changing the dental library resets any modifications you have made.

Check the Mirror Movements [2] box to apply all changes in position, scaling and rotation symmetrically.
In the Tools section [3] of the wizard you can click a tooth to view and change its dimensions in all views. You can select several teeth by holding CTRL while clicking an additional tooth. All teeth in between two clicked teeth will also be selected when holding SHIFT while clicking. Select either Free-Form or Measurements to perform advanced modelling.
Click Free-Form to edit the tooth shape. Check this page for further information about this tool.
Check the Lock view [6] orientation box to lock the current view. Check the Auto hide view obstructions [7] box to automatically hide parts of the scan obstructing the view in the three secondary views.
In the Visual properties [5], select one of the following modes:
- Full tooth: displays all teeth in their entirety with the tooth necks in realistic rendering
- Preview: displays a preview of the teeth above the cervical border (useful for so-called “gum smiles”) in realistic rendering
- Outline: displays an outline of the teeth above the cervical border.
Click Undo to cancel previous changes and Redo to restore them.
Note that changes to the tooth library will also be undone/redone.
 Select Measurements [4] to view the dimensions of a tooth and the proportions. Disable the function by clicking the icon again.
Adjust the model directly in the viewer, if required, as follows:
Click a tooth in any of the views to modify its size, shape or position.
- Drag the frame that appears by its control points to change the size of a tooth.
- Drag the control point with arrows to rotate the tooth.
- Click a tooth to change its position freely. To perform this step for several teeth simultaneously, hold CTRL and click the desired teeth or click, hold and drag the mouse to create a rectangular selection area for several teeth.

- Click the compass to align to the Smile Design view
- Rotate the model freely by right-clicking and dragging it. Click the vertical arrow in the top right corner return to the default view.
- Switch between the outline view and full tooth view by clicking the 3rd icon
- The 4th icon show/hide patient teeth and the last, show/hide patient teeth intended for restorations.
- Click Next when done.
Preview
In this step, a preview of the smile is displayed. There is a before/after slider to compare the previous and the new smile with a slider dragging the arrows to the left or right.
 You can also adjust the coloring of the teeth using the following controls:

- Under the Real-time preview [1], you can adjust the Tooth color [A], Gingiva design [B] and Light/Shades [C].
- Click Use 2D color bar [3] to open a custom color window that allows you to choose the optimum tooth color from the palette. Choose the Tooth base color and Tooth highlight color with the color picker.
- Select one of the 20 standard colors in the Wizard. Fine-tune your selected color with Adjust tooth color [3] to better match the photo using the slider below.
Note that the color in the photo depends on the camera, lighting, and display configuration, so the preview is only an approximation.

- Expand Custom Color Selection [6] to give your design an individual coloration. Define the tooth base color and the tooth highlight color by using the sliders.
Use the color picker to select a color in the photo by clicking the upper pipette icon. Click a point in the photo that corresponds to the tooth base color.
Next, click the lower pipette icon to select a highlight color. Click a bright position in the original image to apply this as the highlight color for your model.

- Expand the Visual properties [7] section and select either Full Tooth, Preview or Outline mode.
- [8] Export the smile image with the new smile or the new & previous smile coping to the clipboard, or save directly in the project directory.

Select Gingiva design [B] to open this section. Choose which jaw you would like to generate and then create a gingiva, clicking Generate gingiva [2] but first adjust the parameters below [3]. If a gingiva is created the Free-Form gingiva Segmentation will become active. After generating the gingiva you will also have the Color & properties section with a 2D gingiva color bar.


With the Light/Shades [C] options you can make visual adjustments. In the Light and Image Adjustment section, start by Adjusting the tooth light [1] and fine-tuning the Image brightness using the slider [2].
In the Shading options section, you can also modify the darkening values and ambient color [3] to achieve a more natural result. Use [4] to restore the values to default.
Photorealistic preview

Selecting the Photorealistic Preview [2] button allows you to generate a photorealistic preview [A] of the upper jaw or both jaws. This process takes a few minutes. Once generated, you can adjust the image brightness, which will also affect the brightness of the smile.
 Using the Smile creator design, generate an AI-based simulation of the procedure outcome and help patients make informed decisions.
Smile Creator Report
In the last step, you can create a PDF report of the smile design. In the Page setup configuration [1], choose the Size, type of margin, Orientation, and Theme according to your preference. Below you will find an example:

- Select individually what you would like to include within the Smile Creator Report expander [2].
- You can choose to Export as file [3] or Print [4].
- There is also the possibility to Create a TruSmile Video [5]. Click here to learn more about this option.
- Click Done [6] when you are finished.

| How to add Screenshots and notes to the Smile Creator Report
|

- After finishing the Smile Creator, it is available the Smile window, a secondary view to show the patient-oriented smile design. This secondary view can always be opened again during subsequent DentalCAD workflow and it's available on the Main Toolbar. This will allow users to use advanced tools like the chain-mode tooth placement as usual, but at the same time see the outcome interactively relative to the patient's face. Use this tool within the same screen or with a multiple screens setup.
