Contents
DentalDB Mockup
The Mockup reconstruction can be used to start the treatment planning, setting up teeth, and design e.g. a new smile without previous preparation. From this set up, it can be created a "clip-on" device or a Mockup model which allows the patient to physically try out the new smile based on the Smile Creator planning. The purpose of this reconstruction type is to check the appearance of the new smile quickly in the patient's mouth for improved patient communication. Check this page for further information about how to create a project in DentalDB.
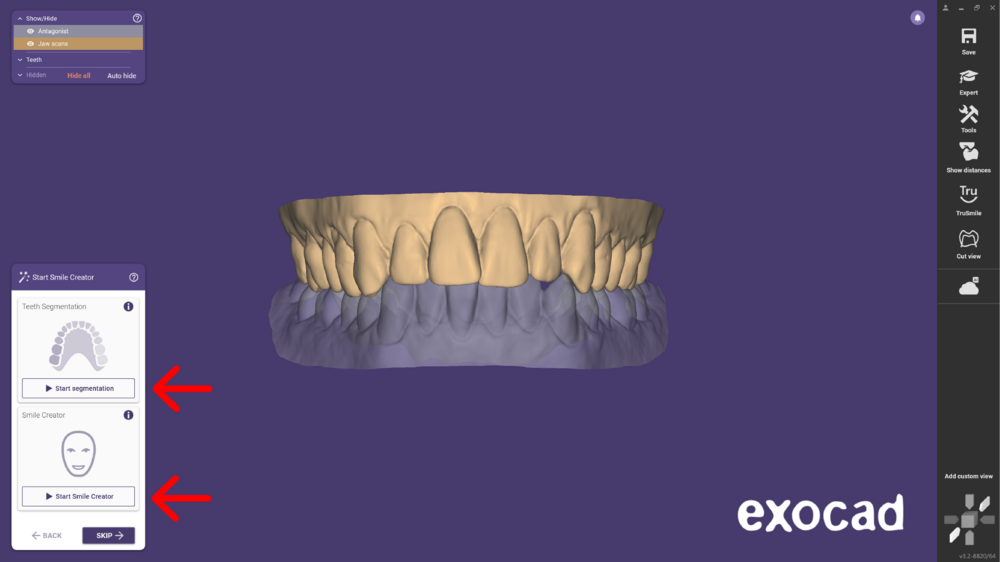
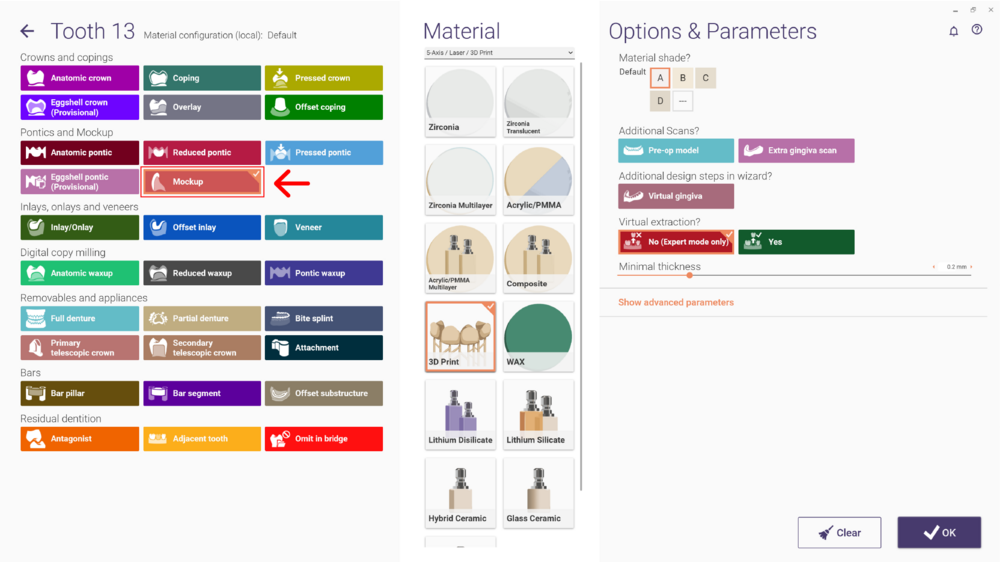 Choose one of the options to proceed. Check out the Smile Creator page for more details about designing a smile with the Smile Creator Wizard.
Mockup 'clip on'
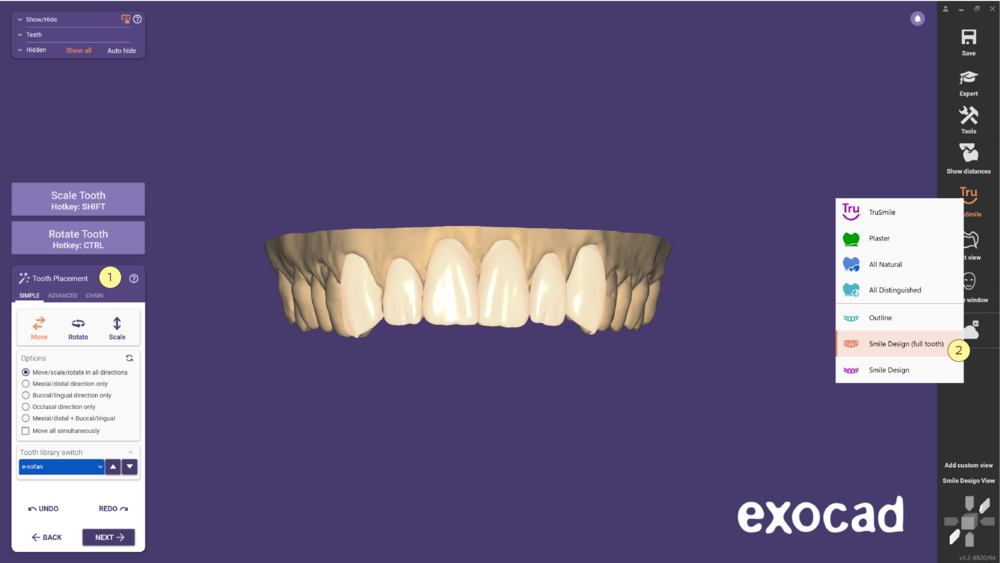
- With the TruSmile [1] you can see the design as a Outline, Smile Design (full tooth) [2] or Smile Design.
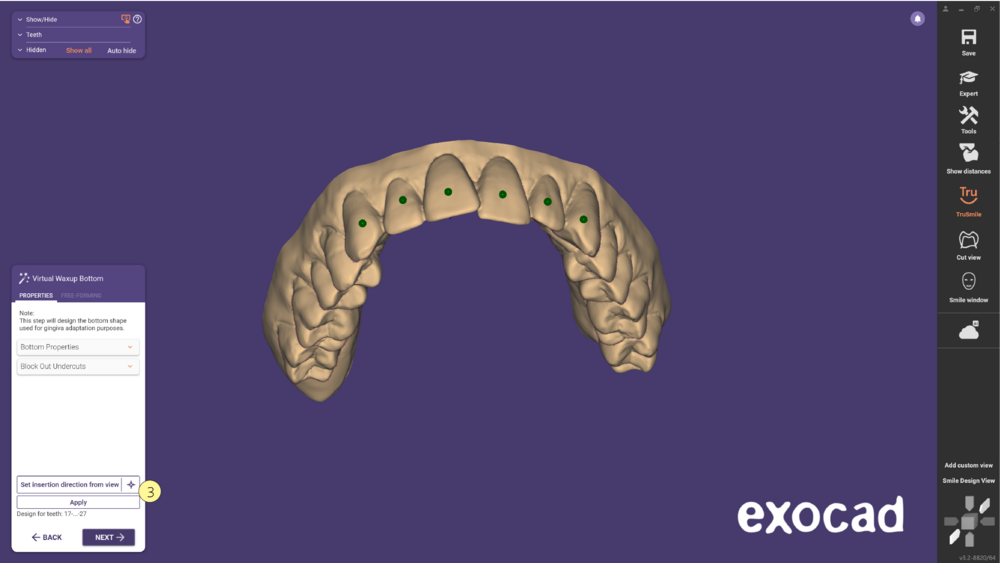
- In the next step, Virtual Waxup bottom, place the model according to the insertion direction you wish to have for the device and click Set insertion direction from view [3]. In order to create the Block out model, click Apply.
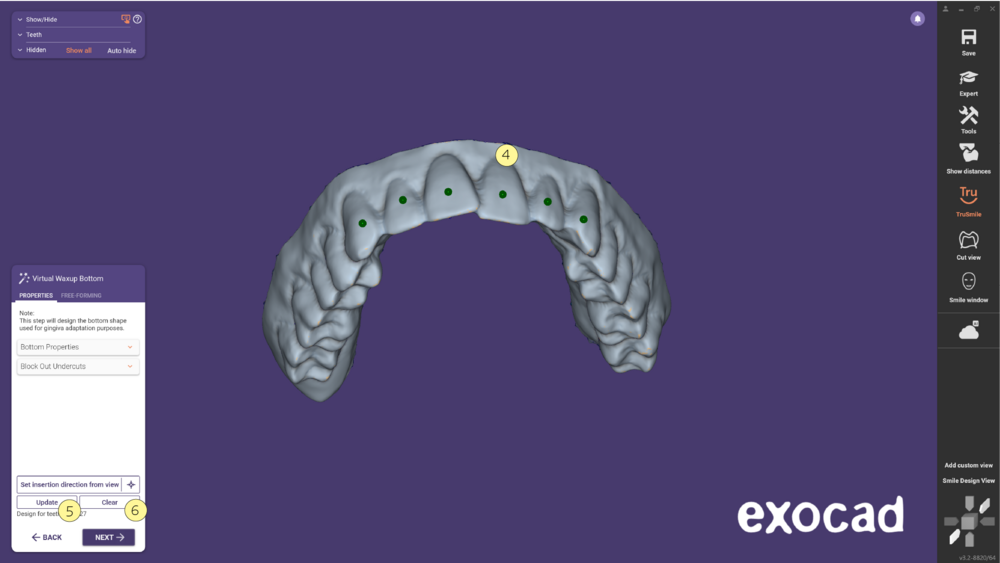
- As you can see, the Virtual wax up bottom [4] was generated and you can Update [5] or Clear [6] the result. Click 'Next' when done.
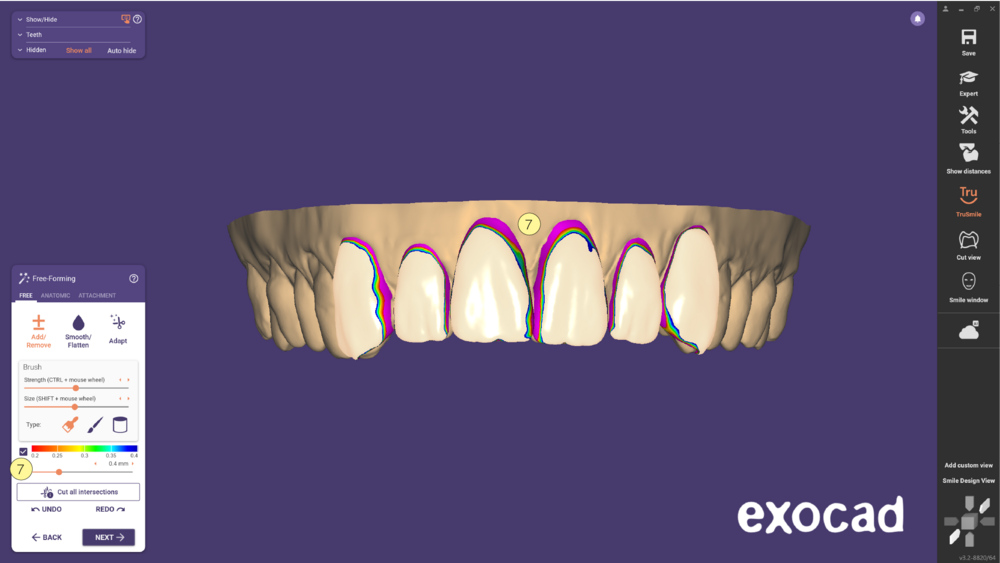
- In the free forming process, set a value in the colour scaling [7] to ensure that you do not fall below a minimum thickness that is required for proper manufacturing.
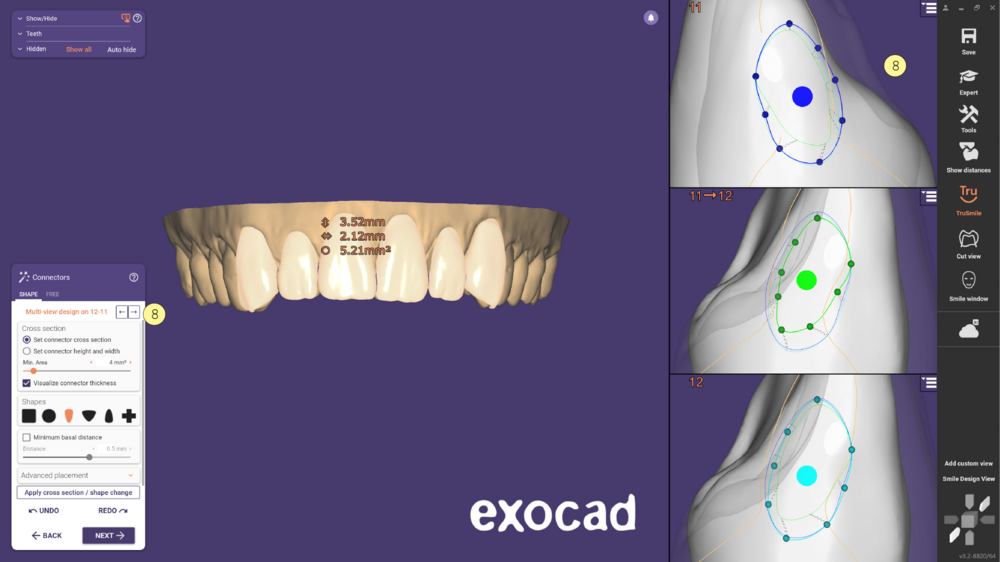
- Define the connectors depending on the type of device you wish to create and use the Multi-view design [8] to facilitate the process and afterwards click 'Next'.
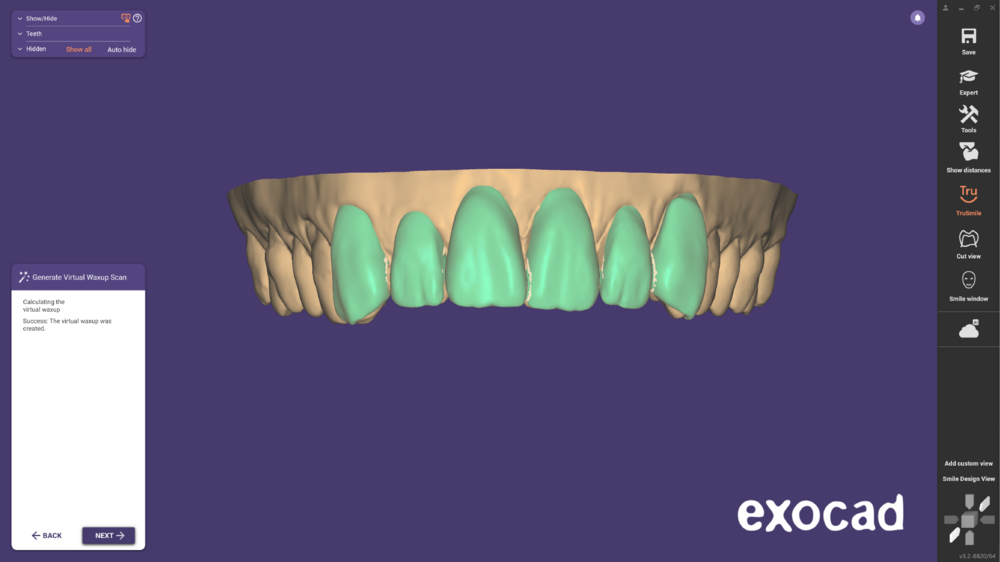
- In this step, the software calculates the virtual waxup . Click 'Next' when the calculation is ready.
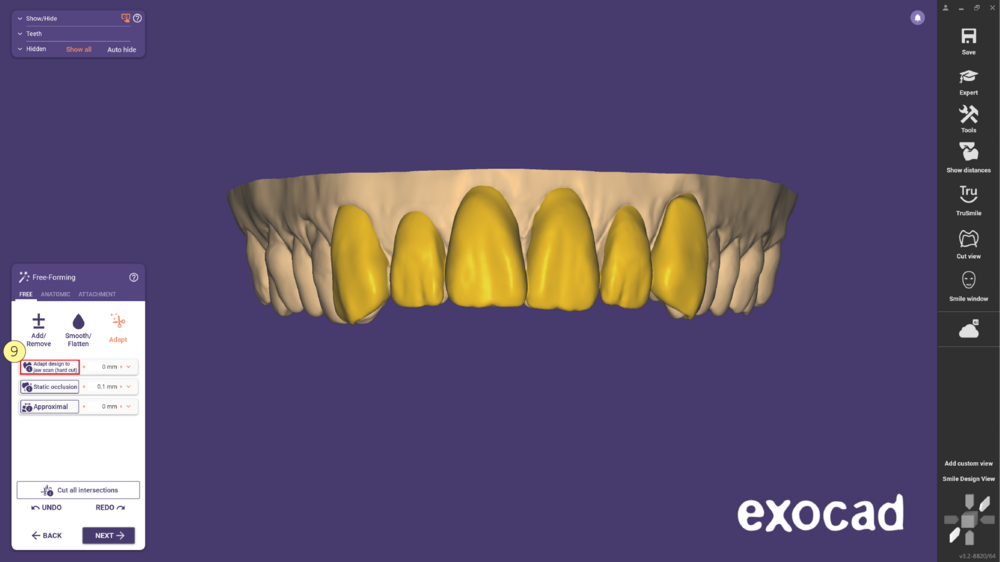
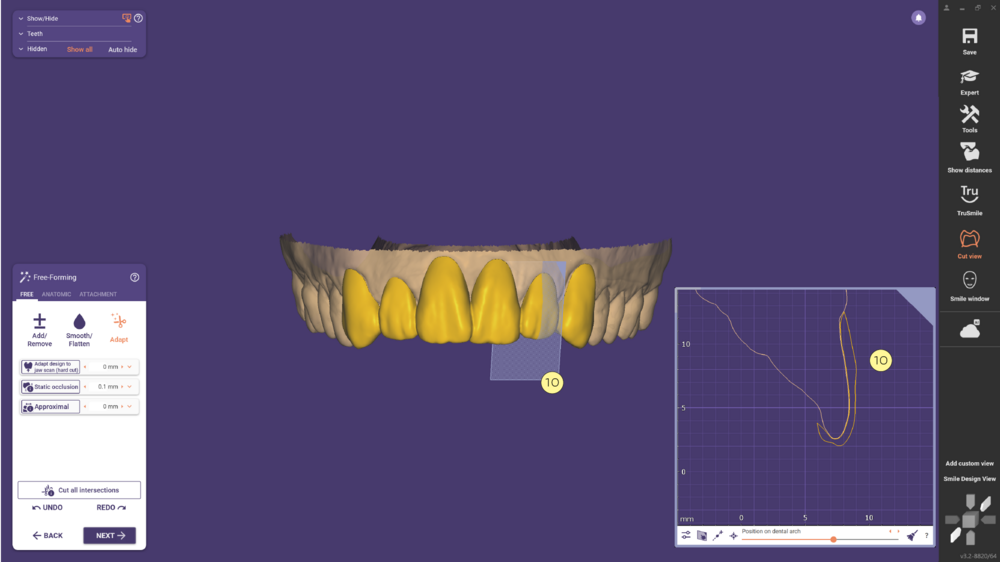
In the next step, Free-Forming, click Adapt to perform the hard cut, clicking Adapt design to jaw scan [9].
- In the screenshot below, you can see a cut view [10] of the clip-on mock up adapted to the model. Click 'Next' to continue.
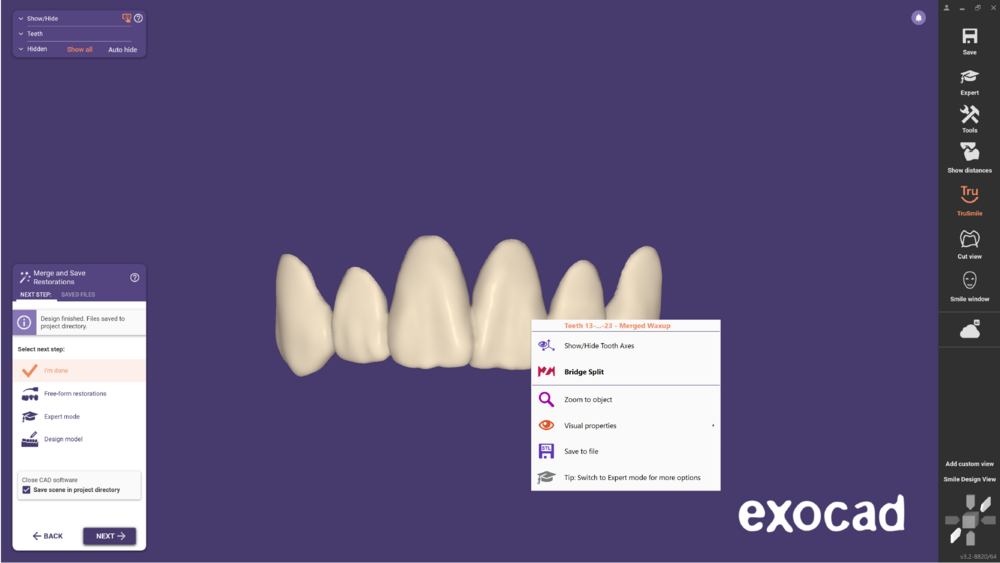
- During the Merge and Save Restorations step, the files are saved to the project directory. You can also right-click on the restoration and click Save to file [11] choosing a different location.
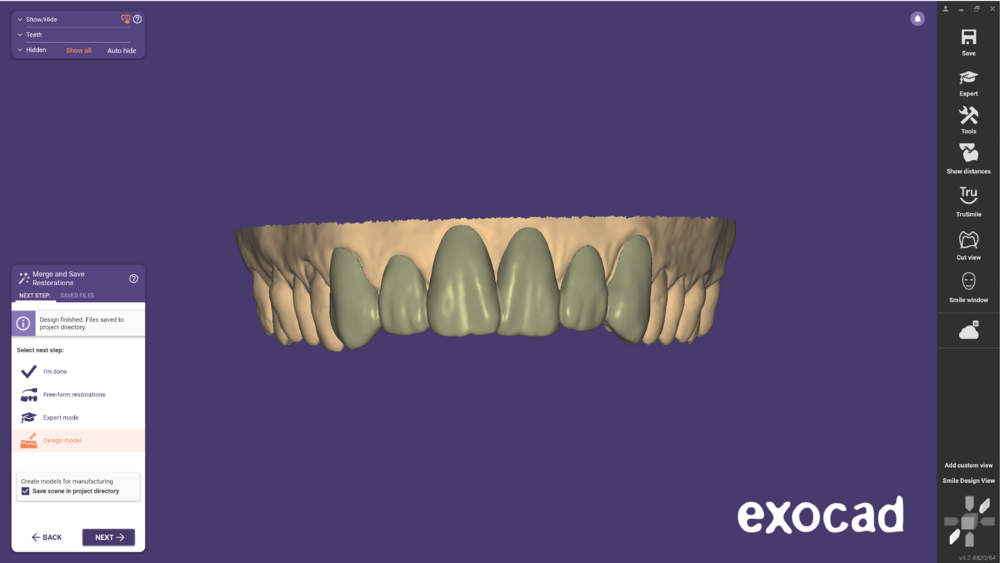
- The following “watertight mesh” is ready for manufacturing.
Using the same design you can also create a digital waxup model in combination with the Model Creator Module by clicking Design model [12].
For further information about the Mockup model click below.


