Mockup model refers to a model which includes a virtual wax up or a virtual set up of teeth. To create a mockup model you can use different worktypes in DentalDB. Below you will find some possibilities. Keep in mind that you need the Module Model Creator in order to do it.
Contents
Digital Wax up model with Mockup design previously completed
After you complete the Mockup design you have multiple options and one of them is to create a mockup model. In order to do that, please follow the steps below:
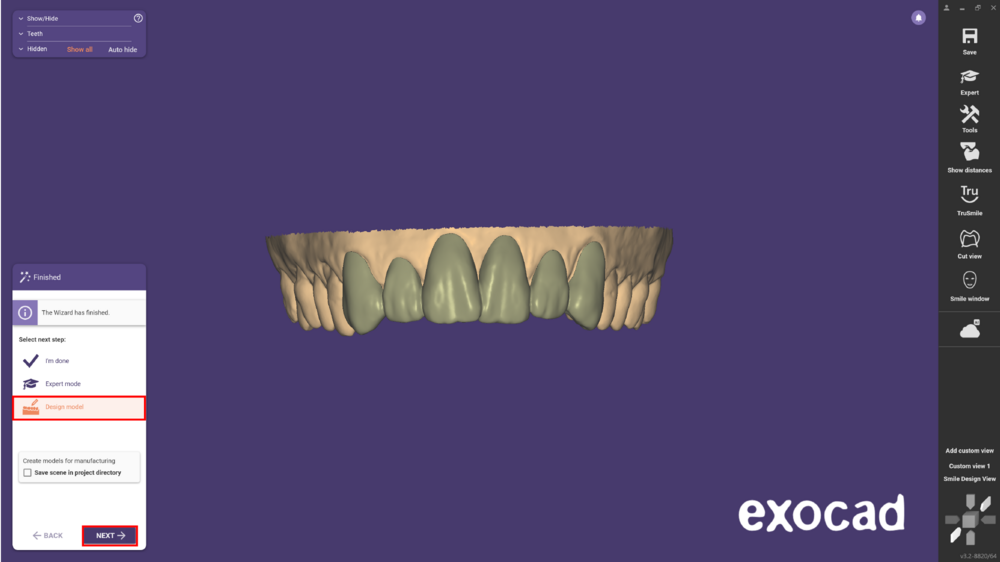
- Click Design model and Next in the Merge and Save Restorations step to automatically start the step-by-step wizard workflow.
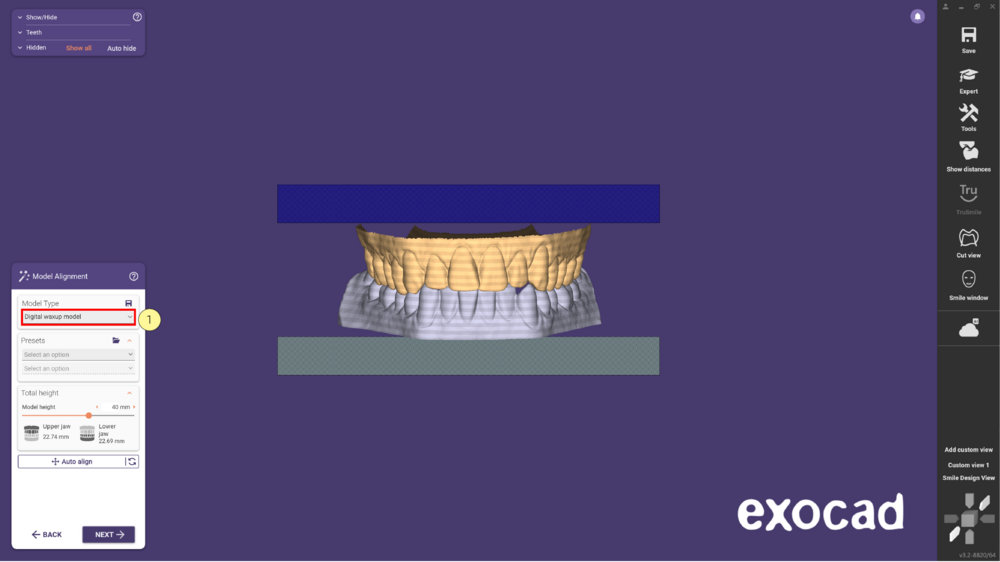
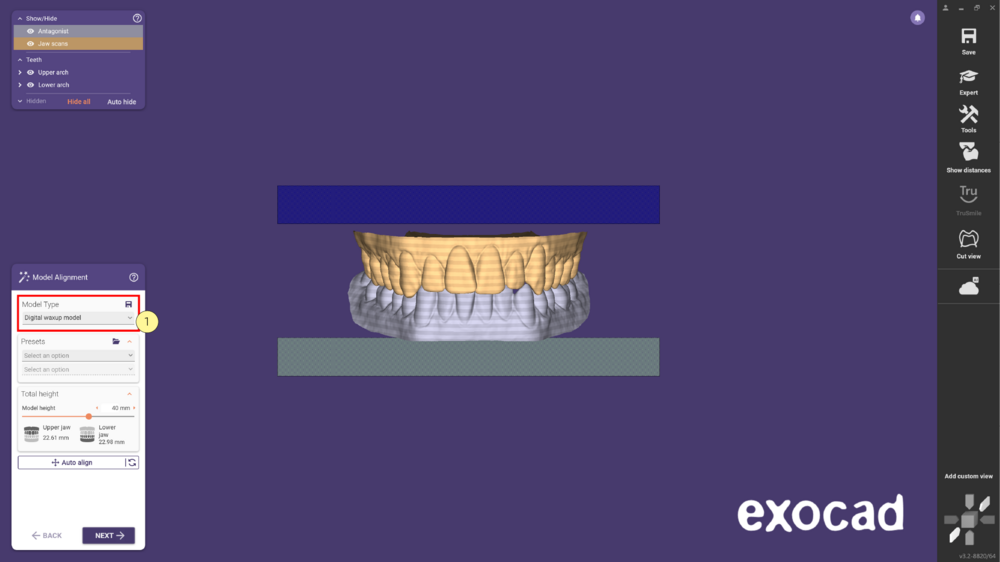
- In the dropdown menu Model Type select Digital waxup model [1]. Make the necessary adjustments and move forward by clicking Next.
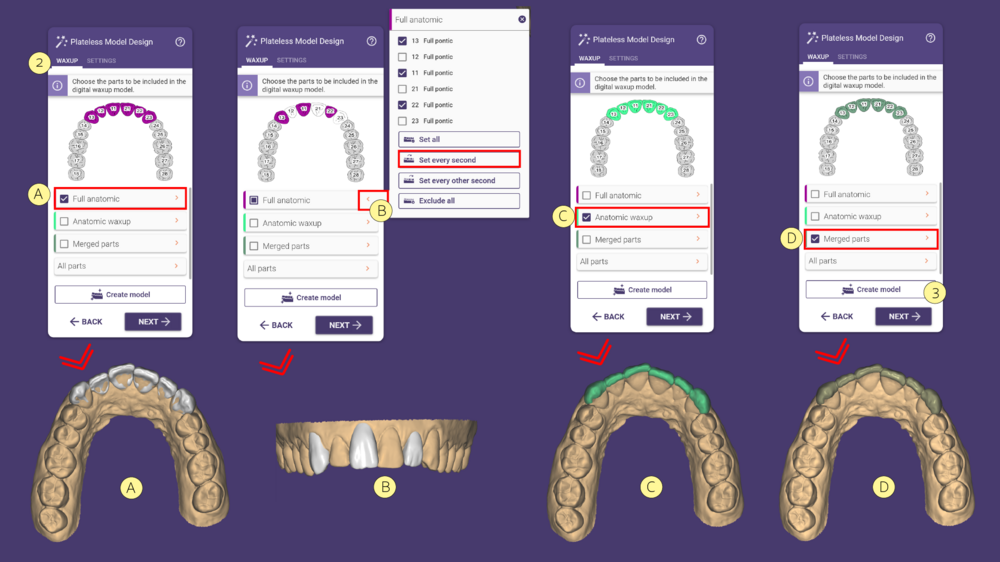
- Choose which parts to include in the waxup tab [2]. Use the Full anatomic [A] if you want to use the pontics designed. You can also expand [B] to choose which teeth to include. Select Anatomic waxup [C] to use the generated waxup or the Merged parts [D].
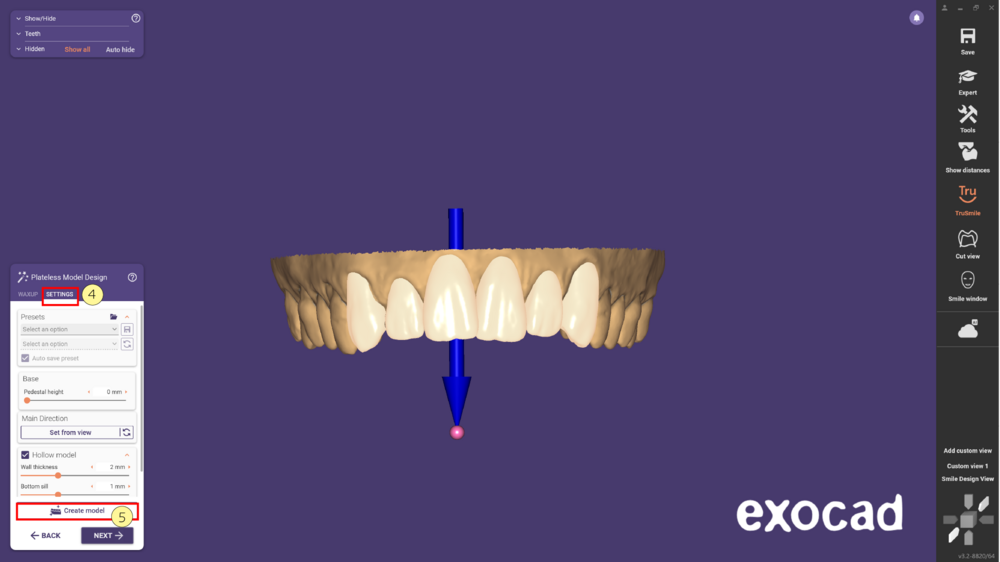
- The tab Settings [4] allows you to set the model parameters, click here for further information. Afterwards, click Create model [5] and Next to move forward.
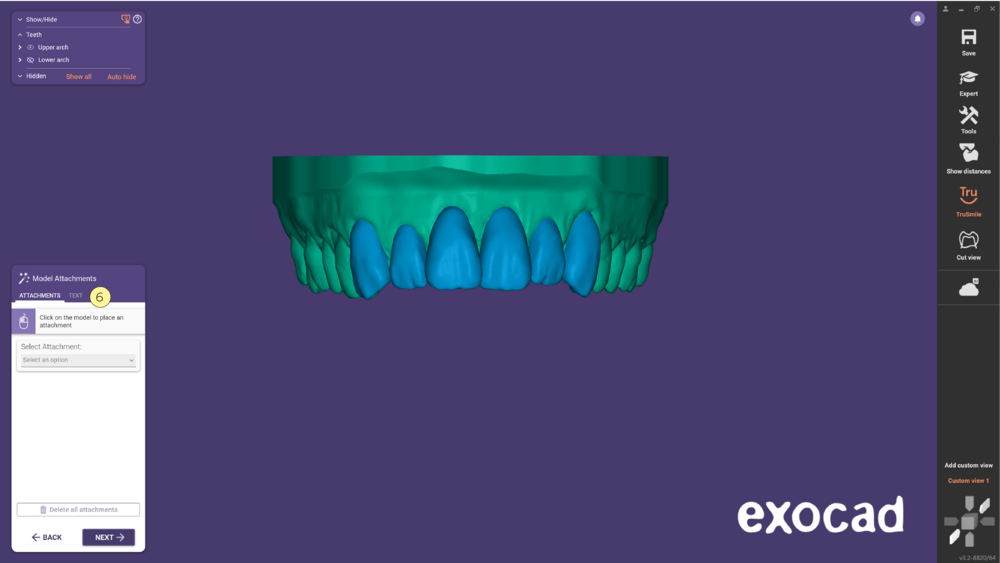
- In the next step Model Attachments [6] you can add Attachments or Text. Click Next to continue.
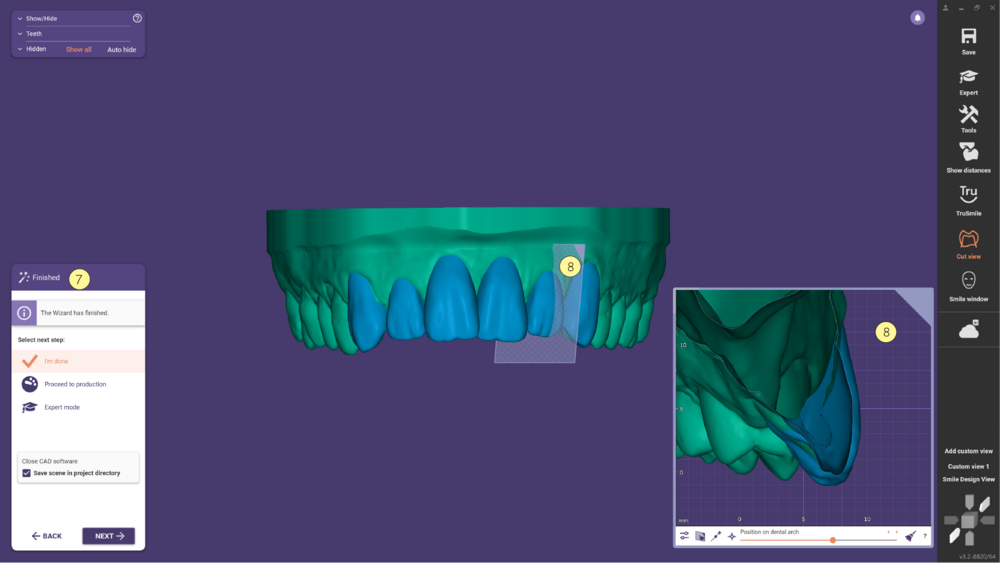
- In the last step, Finished [7], the final model is watertight [8] and free of overlap or intersections. Clicking Next the scene and the model are saved in the project directory.
Digital Wax up model with Mockup worktype
If you are starting the Mockup model through the DentalDB please follow the steps below.
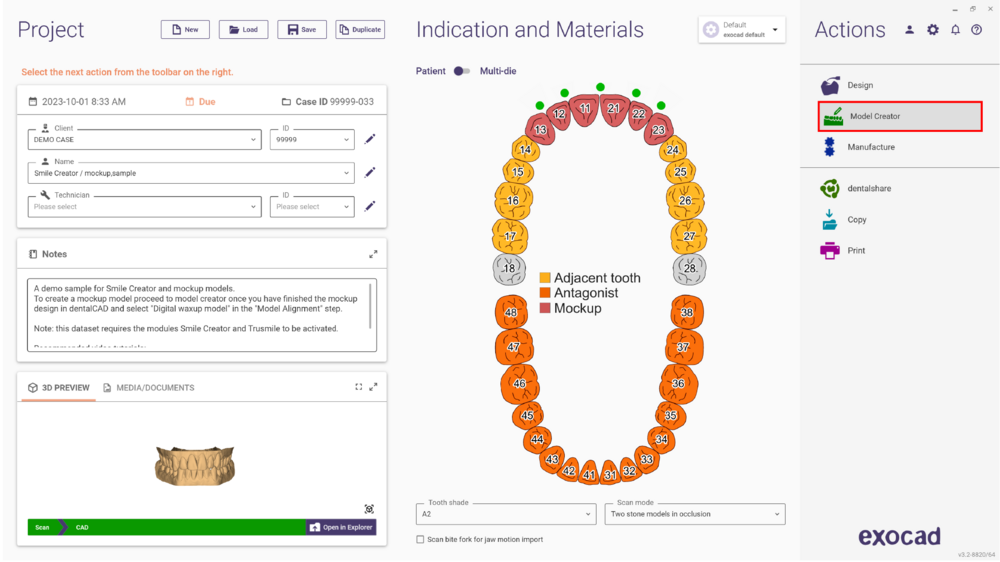
- Click the Model Creator button under Actions.
- Start with the Model alignment, and choose in the drop-down menu as model type Digital wax up model [1]. You can find further information about the Model Creator here. Click Next to proceed.
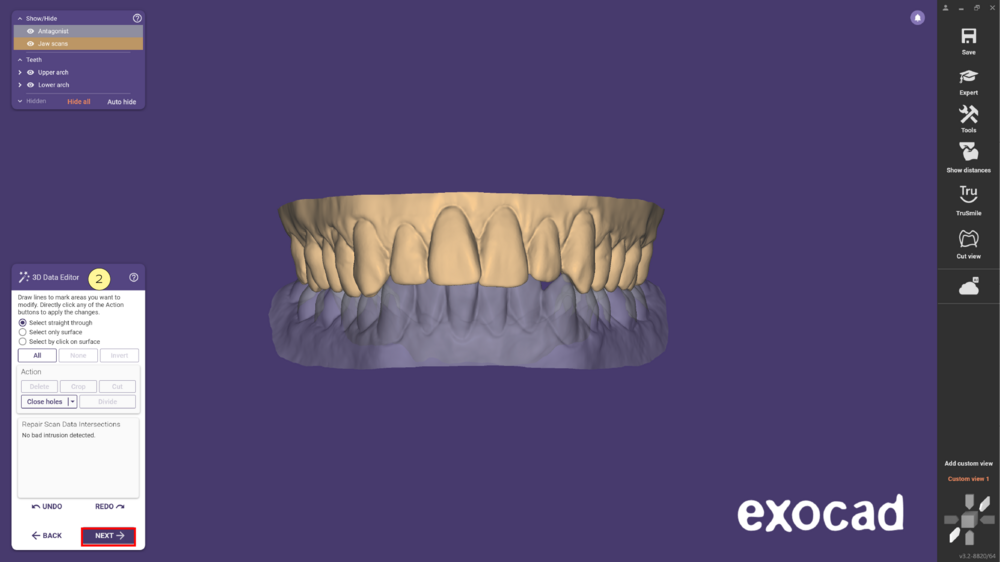
- Then, use the 3D data Editor [2] to adjust the data, if needed, otherwise continue with Next.
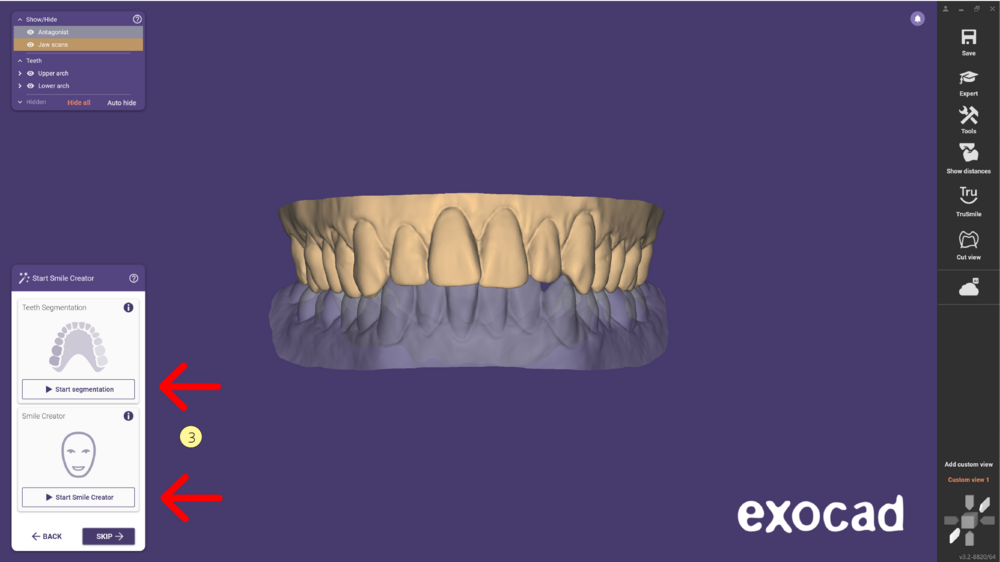
- If active you can use the Teeth Segmentation or the Smile Creator [3] , but it's not mandatory. Check the Smile Creator page for more information about this topic. Proceed with Next.
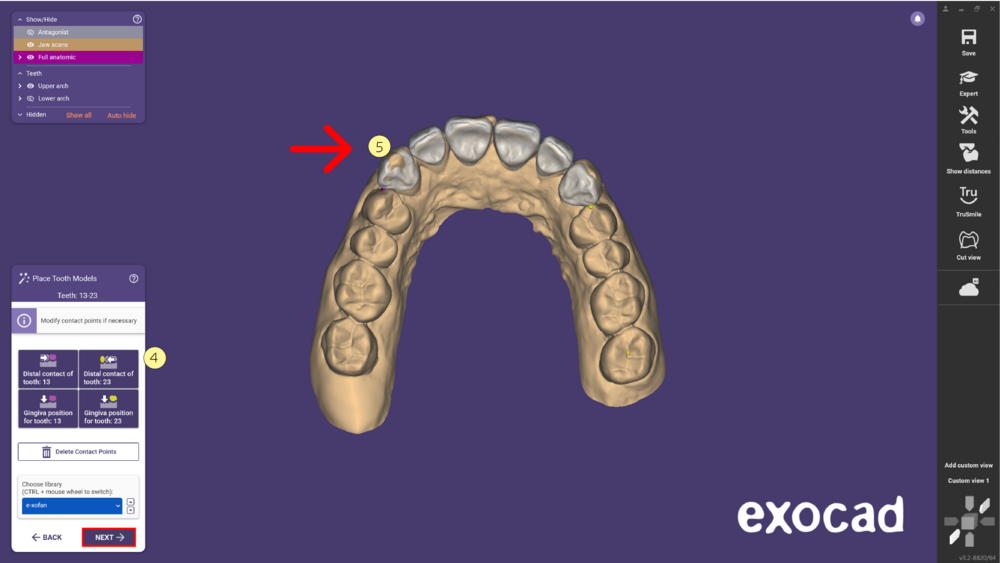
- At this point, set up teeth by clicking on the Distal contact of Tooth 13 and 23 [4]. For details about this Wizard step click Place Tooth Models. As seen below, you can quickly have a good starting point placing multiple teeth simultaneously [5]. Proceed with Next.
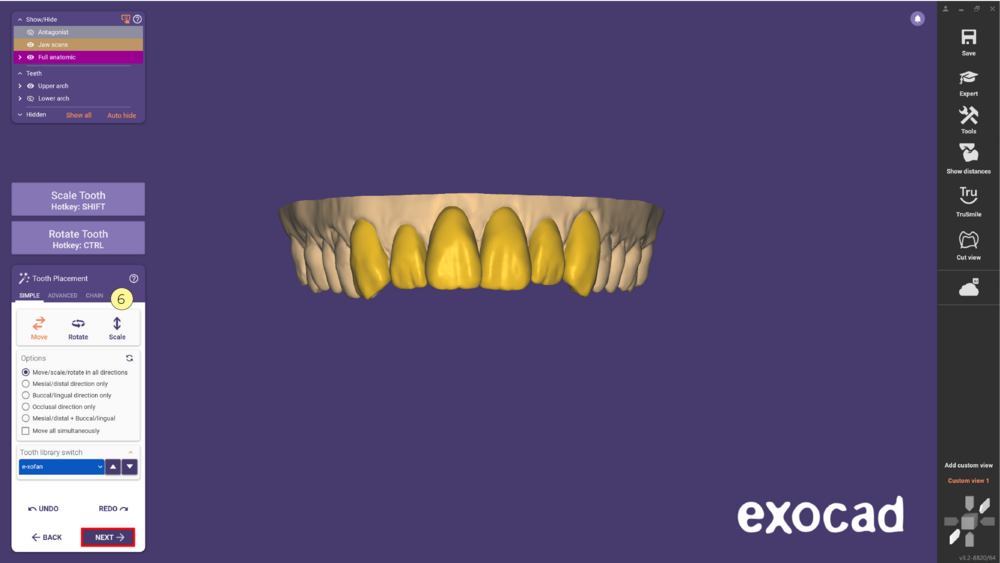
- Afterwards you can improve the tooth placement using the Simple, Advanced or Chain Tab [6]. For further information about this step click Tooth Placement. Click Next.
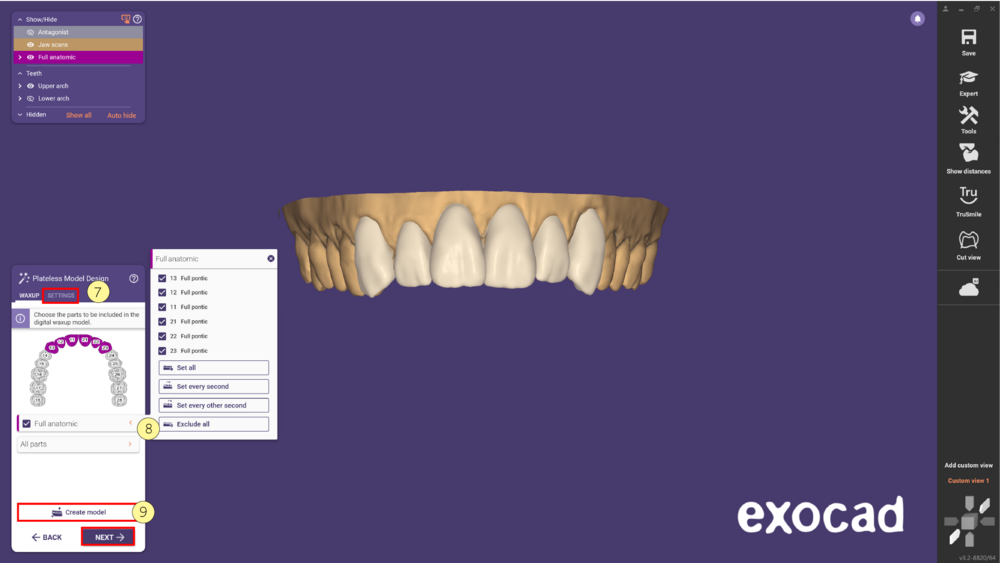
- In the Plateless Model design step you can modify the Settings [7] of the model, here is a recap of how to do it. Expand [8] to choose which teeth to include. Afterward, click Create model [9] to generate the waxup model (green) as seen below. Proceed by clicking Next.
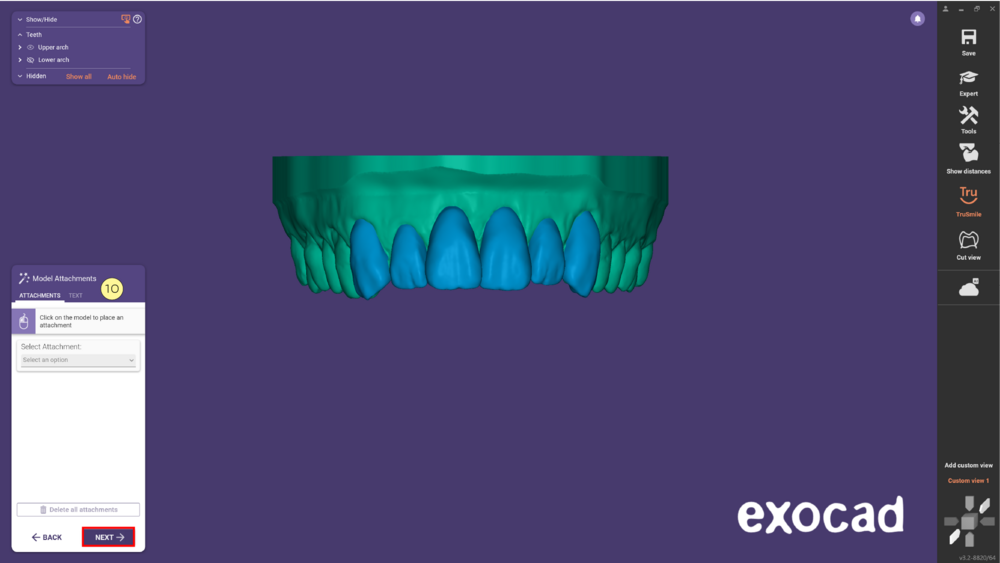
- The Model Attachments [10] allows you to add Attachments or Text. Click Next to continue.
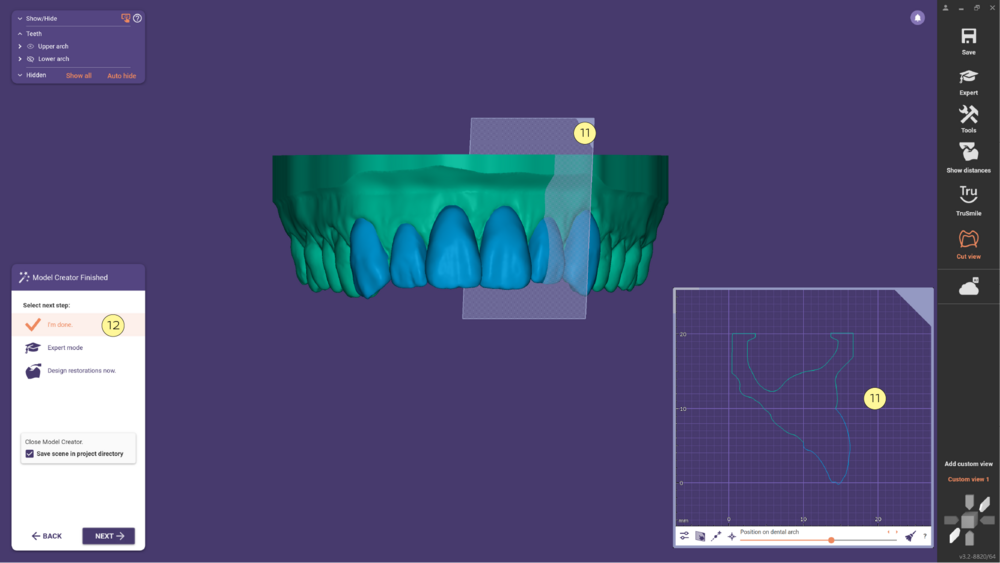
- In the last step, Model Creator Finished, using the cut view tool you can see that the final model is watertight [11] and free of overlap or intersections. The scene and the model are saved in the project directory by clicking I'm done [12].


