DentalDB Application


| Throughout exocad, the question mark in the upper right corner of any window will bring you to the online help page for that window |
Contents
Getting started
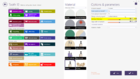
Upon launching the DentalDB application, the following job definition window is presented to you. This one is already filled out:

Defining job details
To define your job, proceed as follows:
- Select the Client (dentist) [1]. You can either select the Client number or the Client name; the other field will update accordingly.
- To add a new client to the database, click the edit icon [2] – a dialog will open that allows you to select from your list of clients (dentists) or enter a new one.
| In the Client window at the Client ID pulldown [1], you can start typing the first characters of a client's first or last name, and the selection will auto fill ("type ahead find") |
- Select the Name of the patient or case [3].
| You can also type in a new patient name in the field – the new name will automatically be added to the database as soon as you save your job. |
- Select Technician [4] (the same way as you select the Client).
- Notes [5] can be added / entered here that relate to the specifics of the case. ( i.e. what type of implant, which tooth library anatomy, or other details of the Rx ).
- Select the restorations and materials by clicking on the tooth arches [6] – see link Defining jobs for individual teeth for details. Colors are used to mark / indicate the different types of restorations in the tooth bow; an index is available [7].
- Define connectors using the toggle buttons [8].
- Green: A connector will be created between the teeth.
- Grey: A connector will not be created between the teeth (click to toggle).
- Red: A connector may not be created, because the material of the adjacent teeth differs.
- No toggle button present: One of the selected types does not permit connectors
By default, connectors will be defined automatically whenever you define a pontic. So in practice, you will use this feature mostly to add connectors between adjacent crowns or copings.
- To use an antagonist scan, select "Antagonist" for at least one tooth in the arch opposing your restoration(s), and define the type of Scan mode using [9]. Available Scan Modes are:
- One stone model, antagonist provided using bite registration putty
- Two stone models, scanned in occlusion, but not mounted in an articulator
- Two stone models, scanned using articulator A (Artex-style)
- Two stone models, scanned with an articulator P (Artex-programmable style)
- Two stone models, scanned with an articulator S (SAM style)
- Digital Impression scan, or a scan from an intra-oral scanner
- You may also select Tooth shade [10] for the entire job. Individual tooth shades can be specified in the individual tooth definition window.
Multidie Mode
Another job option is to scan multiple offset copings, inlay/onlays, or waxups using the scanner-specific multi-die plate. To enable this feature, click Multidie mode [11]. Simply type in a Name for each die position to be used, and click on the corresponding tooth position to specify the restoration type for that particular die in the plate.
Project Menu

- New [A] If an existing job is present, the DB prompts you to either save or discard the current job. Then, it clears all of the the current job details, and allows a new job to be created.
- Load [B] enables re-loading of previously saved jobs, importing jobs from other labs, or importing jobs from intraoral scanners. See the "Loading Jobs" section for details.
- Save [C] adds the current job details to the database, and creates a project file folder that will hold all the data (project file, preview, scan file(s), and construction files) related to this job.
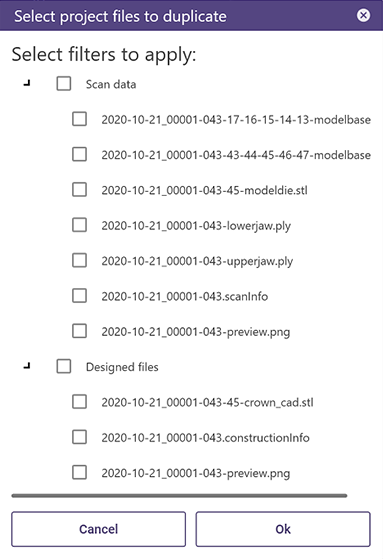
- Duplicate [D] copies the current job into a new job, creating a new project folder. The project and preview images are automatically created. There are options to include or exclude copying of scan and/or construction files. Duplication of scene files .dentalCAD is not possible to avoid inconsistency issues during design if you change the job description or parameters.
| If you want to keep the scene file for different variants of one project, just copy the existing .dentalCAD scene file from the original project to the new project directory. |
3D Preview | Images/Documents
Integrated within the DentalDB, [12] allows you to visualize the scan data in the 3D Preview. Just click and drag over the models to adjust the position. There is also the possibility to open the 3D preview in Fullscreen [A], or Expand [B] the existing window, as you can see below. Both options allow you to show/hide objects and adjust transparency.

Selecting Images/Documents [13] there is an image preview pane, displaying small thumbnails of each file in the current project folder. You can use Drag & Drop functionality to add additional images of your choice (e.g. you can drag and drop patient photos from a digital camera or from your email client directly here). Double-click an image thumbnail to open it in your favorite image viewer, and right-click it to access its context menu.

Below the image pane is the project status indicator [14], showing green if the process (scan, design, upload, or NC/CAM) are completed. Green indicates complete, while white indicates still to be done. Clicking CAD will display the 3D Preview of the finalized design.

"Open in explorer" [15] allows you to open the current project directory in Windows Explorer.
Actions Menu
Once a job is saved or loaded from the DB Menu, the following options become available in the Actions Menu [16]:

- "Scan"- launches the exoscan or 3rd party scan software, using the current job definition.
- "Design" - launches the exocad Dental CAD app using the current job definition.
- "ModelCreator" - starts the model design for the current case. Removable dies can be created for each tooth, prep, or ridge area; articulators are supported.
- "Manufacture" - launches exocam or a 3rd party CAM, for local fabrication of the current job.
- "dentalshare" - safely send cases to a collaboration partner over Exocad's data transfer network.
- "Upload" - sends the design to a remote site, such as a production center, the local copy in the project folder is preserved.
- "Copy" - copies the design to a manufacturing directory, which can be on the local machine or over a local area network (LAN).
Note: Your Actions Menu may not have all these options depending on the specific features offered by your system vendor.
Clicking on Material configuration (local) [A] opens a configuration dialogue that allows you to change the Material configuration. Chosing the right material configuration for the materials you use will ensure that all paramters are correctly set for the specific material you use. You can chose one of the many material configurations maintained by exocad in collaboration with leading material manufacturers. These libraries are provided an updated regularly via dentalshare (see here on how to get access). Additionally, you can also select one of the locally stored material configurations, provided e.g. by your reseller.
- [17] Log in to my.exocad- Mandatory registration and login to the exocad web portal and regular internet access are mandatory to verify the access and the license. After 7 days of using the software without internet, a re-login with online access will be required. It is highly recommended to have internet access available at any time.
- [18] Settings - Click to access the settings menu to open a configuration dialog that allows you to change the language, the user interface theme, the work type selection style and switch between FDI tooth numbering (11-48), Universal Numbering System (1-32, US) or the Palmer Notation system. Check for updates and the About, shows the version of the DentalDB application and the dongle serial number.
- [19] Notification history-Access and retrieve notifications/warnings easily from the notification history.
- [20] ?- Click to open the correspondent Help wiki page.