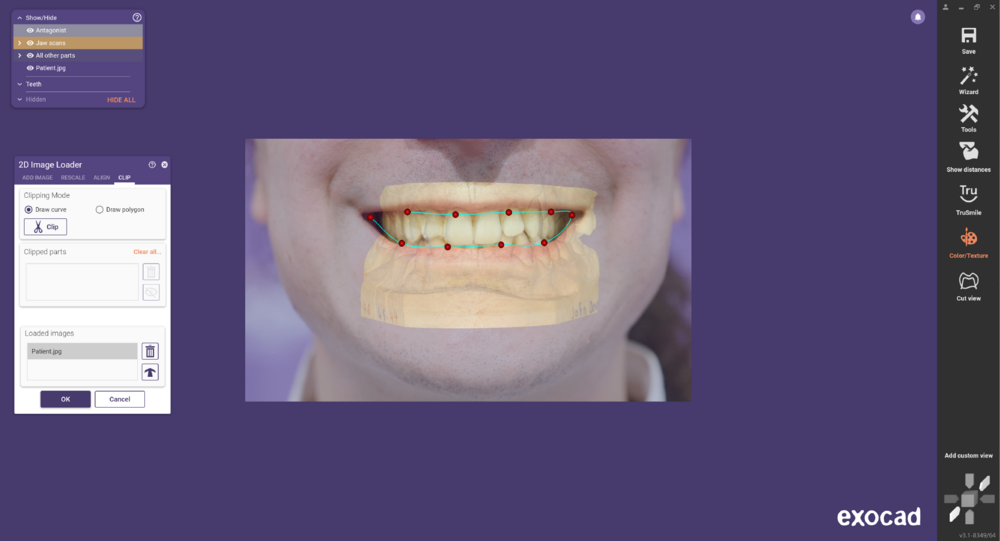
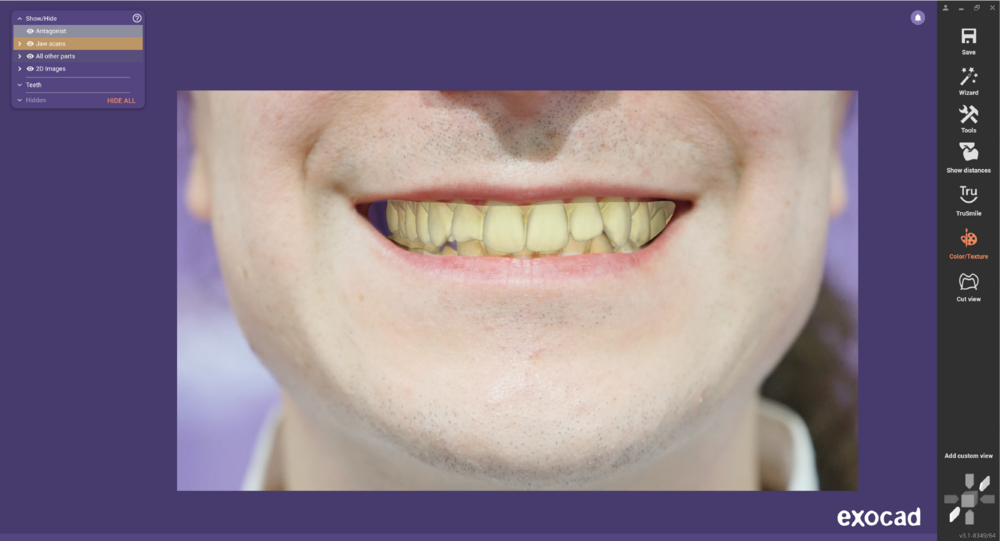
This page shows you how to load 2D images (e.g. patient photos) during CAD design, and how to align (register) them to the 3D data.
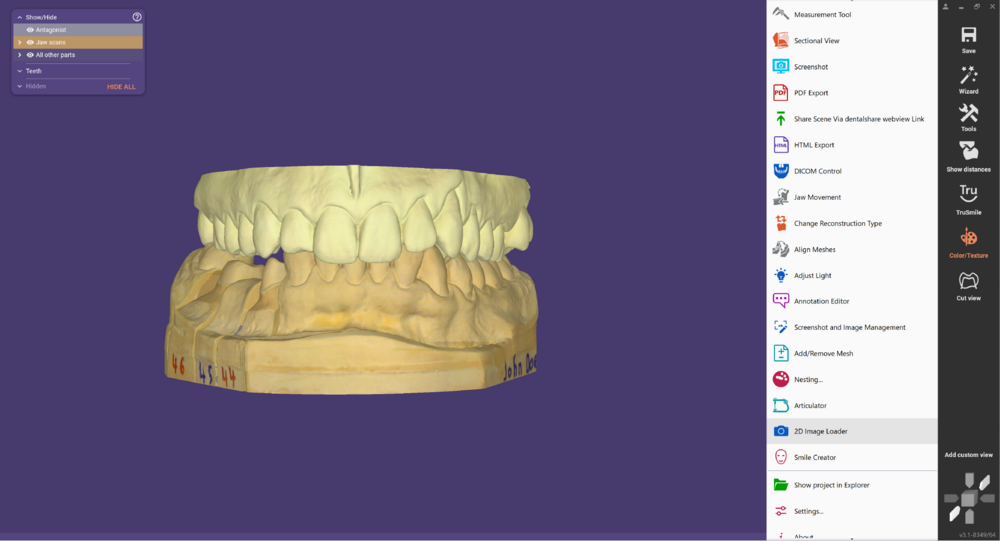
Step 1: Switch to Expert mode. Then, open the "Tools" menu, and choose "2D image Loader"
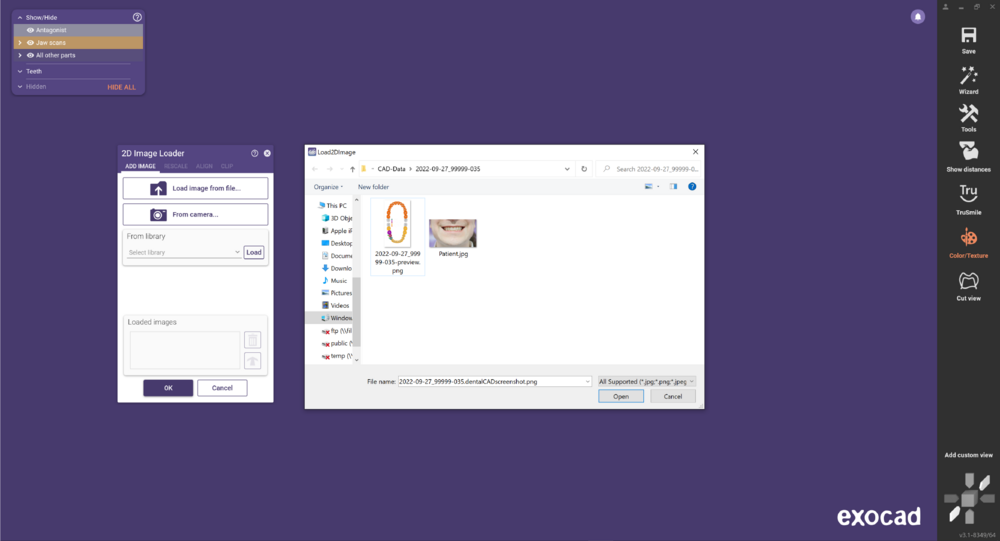
Step 2: Click the "Load image from file..." button to open the file selection dialog. If you have a webcam, and the patient is present, you can also directly take a picture using the "From camera..." button instead. Once the image is loaded, you can adjust its size and position manually using the control points around the image. However, it's probably more convenient to directly to use the 2D/3D registration, as described in the next step.
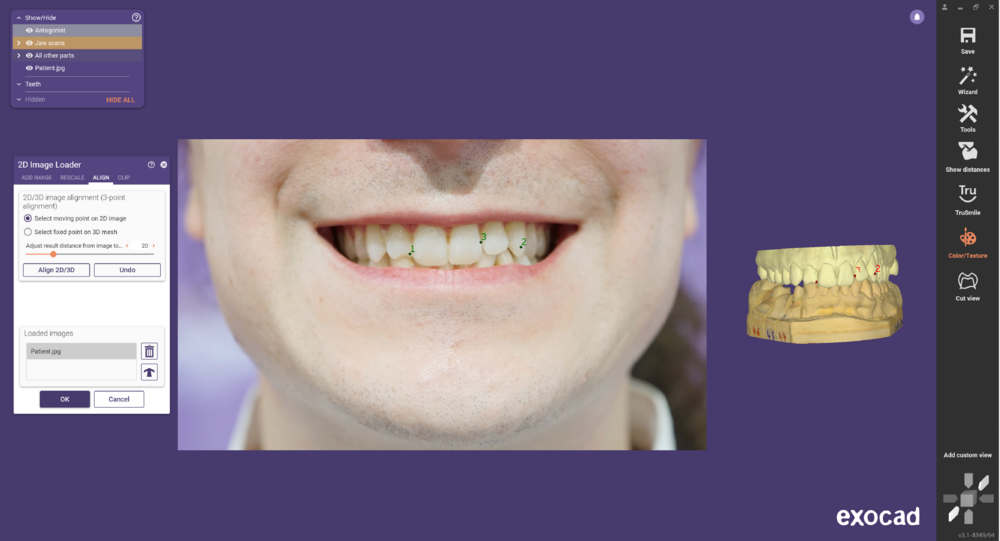
Step 3: To align 2D and 3D by common points, click the "Align" tab. Now, set common points: First, click on the 2D image, then, click on the 3D scan, to set the first point. Proceed the same way with the next points (a minimum of 3 points is recommended).
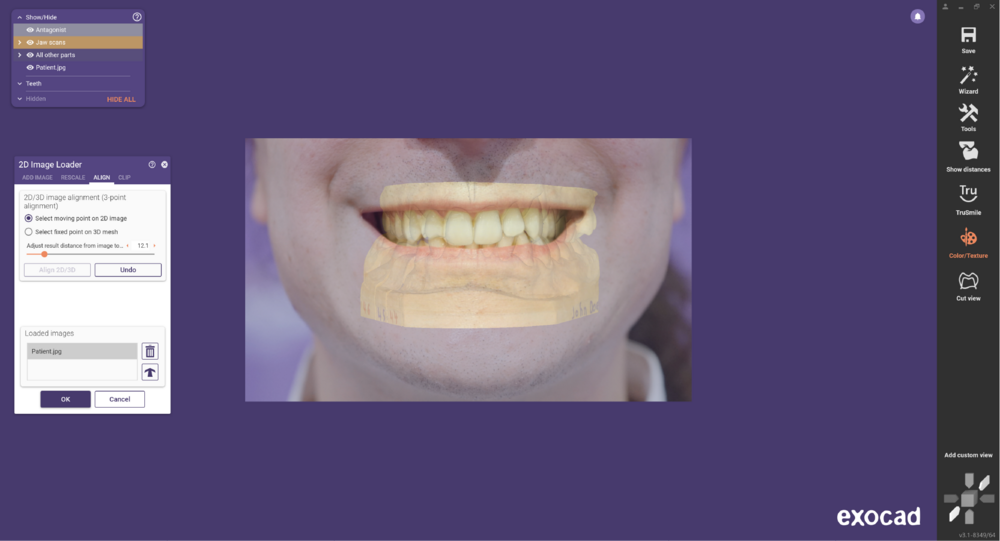
Step 4: Once you've correctly defined all points, click "Align 2D/3D" to proceed.
| For fine tuning, you can switch back to the "ADD IMAGE" tab, which will show the control points around the image, so that you can do final position adjustments manually. |
Step 5: If you wish to clip a certain portion from the image, switch to the "CLIP" tab, and start drawing a line. Double-click to finish the drawing and apply the cutting.
You can now close the window by clicking "OK". Note that the SHOW/HIDE window now has a new group "2D Images", where you can set transparency separately for the main image and for the clipping.
| Obviously, the 2D/3D alignment will only be correct when looking straight onto the image. This can be achieved easily: At any time, you can simply double-click on the image, to re-align the view to the 2D image. |
You can now proceed normally with your design (e.g. restart the wizard by clicking on the "Wizard" button)


