Denture tooth placement


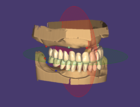

Overview
We are constantly updating and extending our approved denture tooth libraries for DentalCAD denture design. Click here to get an overview of denture tooth libraries and possible production options.
In the “Prosthetic tooth placement” step the sets of denture teeth available in the software are automatically compared with the values from the preceding model analysis.
Check how to set up the Denture teeth Library manager to download denture teeth libraries.
Custom

The difference produced from the model analysis and the width of the sets of the denture teeth is given in mm and highlighted with coloured marking:
Green: suitable sets of denture teeth
Red: less suitable sets of denture teeth
This enables a quick, reliable selection of the sets of denture teeth. The software also provides a digital tooth mould chart to facilitate tooth selection. In addition to the description of the set of denture teeth, the dropdown menu [1] of the tooth selection also contains a preview of the respective mould Chart [2] which can be used to view the shape and size of the set of denture teeth. The respective mould Chart [3] is then faded in with further details by moving the mouse over the chart. The software automatically selects suitable sets of denture teeth using the Auto select button.

|
Denture teeth Library manager

- Click on the dropdown menu and the option Download more libraries... [1] will be available.

- Afterwards it will open the exocad library manager [2]

- Multiple partners are available, choose from the list and click on View and download libraries [3].

- Select from the list which libraries to download and click on Add to download list [4]

- After selecting the desired libraries, click Go to download list [5]

- Fill out the information required [6].

- Click Install libraries [7] to start the download process.

- Wait until the Download and installation status is 100%.
- In order to use the recently installed libraries, re-start the software.
| Only download the needed libraries to keep this process as simple as possible. |
Preset
The Preset tab allows you to select a generic or custom-made tooth set up. You can save and reuse a personalized tooth set up by choosing different libraries, correcting the tooth placement and free forming.
Step 1: When you are ready to save the tooth set-up, click Expert [1] in the Main Toolbar, to exit the Wizard mode.

Step 2: First, right-click in the background [2] to open the expert options and select Export current tooth setup as preset [3].

Step 3: Afterwards define the Display name [4] and click OK [5] to move forward.

Step 4: You can define a different name for the file by changing the Filename [6] as shown below. Click Save [7] to finish.

Step 5:After saving the preset, a Success message [8] will show up confirming that the preset was saved.

Step 6: Click Wizard [9] in the main Toolbar to return to the workflow.

Step 7: To use a previously saved preset, select the Preset tab [10].

Step 8:In the Preset tab, please select the Library Filter [11]according to your needs.
| If you are using tooth stocks we recommend selecting Non-scalable. If you are manufacturing teeth we recommend selecting Only scalable If you want to see all the options select All |

Step 9:To select a preset, click in the Dropdown menu [12] and choose one option by clicking [13].

Step 10: In the end, click Next [14] to continue.

Free
Use the tab Free [1] to move or rotate the denture teeth using the arrows [2] or by dragging them
