Adjusting Denture tooth placement
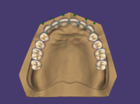
In the Tooth placement step the tooth positions can be adapted to the individual patient's situation. To guarantee a functional posterior relationship, the posterior teeth of the opposing quadrant are fixed together and can only be moved in one block. This means that when the position of the first posterior tooth quadrant is changed the antagonist fourth posterior tooth quadrant is automatically moved and vice versa. The same applies to the second and third quadrants.
Simple Mode
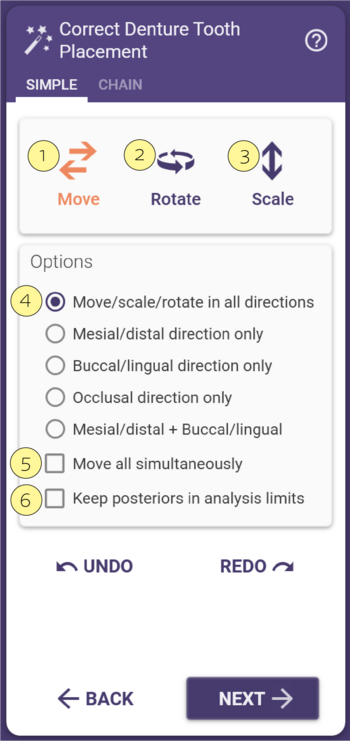
Under the tab Simple or Individual there are several possibilities for Controlling the position of the teeth. Initially, the freedom of movement of the posterior teeth is limited to the adjustment area of the model analysis. In contrast, the anterior teeth are not subjected to any analysis-related limitation.
|
The teeth can be moved freely [1].
The teeth can be rotated freely [2].
The teeth can be scaled [3] or only allowed individual directions of movement [4] . The different directions of movement can be selected in the field.
If the checkbox [5] is activated, all teeth can be moved simultaneously.
The posterior teeth can also be kept within the analysis limits by activating the checkbox [6] .
|
Chain Mode
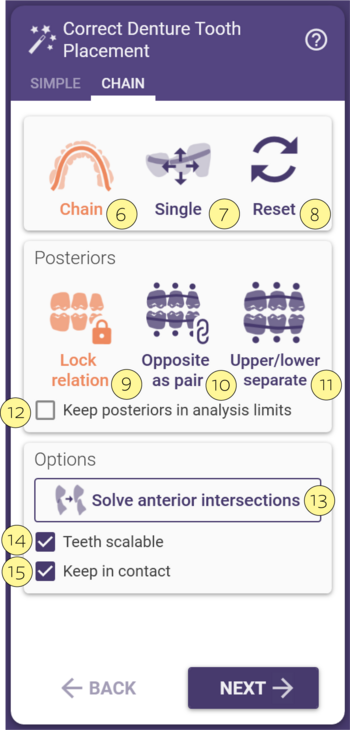
When the Chain Mode tab is selected, a linking of the teeth is activated. In this Chain Mode, you can transform all teeth in the chain, or a single tooth in the chain. This linking enables the teeth to be moved collectively without loosing the proximal contact points or producing intersections.
|
The teeth can be moved or rotate freely in the chain [6]. The chain mode is represented by a light-blue chain, Green chain control points, and dark blue UFOs marking the ends of the tooth bow.
You can transform a single tooth in the chain [7]. In the Single mode, moving or rotating a tooth does not directly influence the placement of the adjacent teeth.
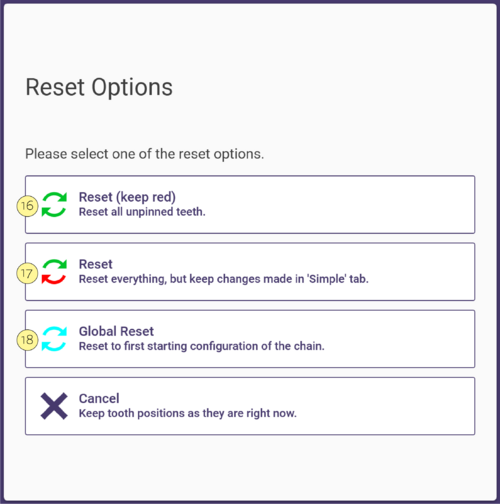
You can Reset the chain [8]. See more details below.
For the Posteriors, keep the teeth in contact selecting the option Lock relation [9]. To move together upper and lower as a single chain, use the Opposite as pair [10] option. If you would like to move each arch individually select Upper/Lower separate [11].
Check the box [12] in order to keep the posteriors within the analysis limits of the model. Only available for the Lock relation [9] option.
Click on Solve anterior intersections [13] to perform an automatic tooth adjustment which eliminates potential antagonist intersections.
Check [14] to allow teeth to be scalable.
Select this option [15] in order to keep the contact between the teeth.
|
|
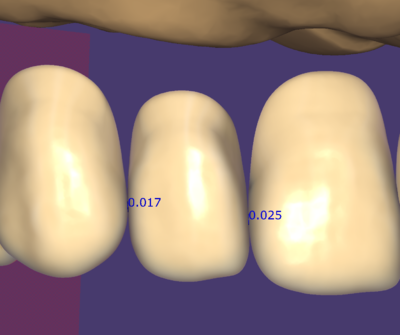
During the positioning of the teeth, the proximal and antagonist contacts are marked with points. The points also have information given in mm and coloured indicators. These indicate the depth of the intersections.
|
|
The button Reset only resets the green highlighted teeth. The following approach has proven successful in setting the anterior teeth in the required position in the easiest possible way.
In the reset window, it can be decided whether all changes between non-fixed teeth should be discarded using green points [16]. Whether everything is to be discarded except the changes under Simple [17]. Or whether everything should be reset to the start configuration [18].
|


