Creating a job using the Virtual Articulator

Define a job in the exocad DentalDB, as usual.
In the Scan mode dropdown [A], select the desired articulator type to open the workflow step Virtual Articulator. Note: this dropdown is only active if an antagonist [B] is present in the tooth bow.
After starting DentalCAD (by clicking Design, [C]) the wizard Virtual Articulator will appear as the first step, assuming an articulator has been selected in DentalDB and the corresponding module has been activated.
Scanning
Follow the workflow of the corresponding scanning software for the available scanner.
 | Depending on the scanner, the position of the models in the articulator can be transferred into the 3D space and do not have to be positioned manually in the CAD. This method uses direct integration, contact your system provider for more information. |
Starting the Virtual Articulator
The Wizard window Virtual Articulator presents two options, Start virtual articulator now and Load jaw movement data from file.
Skip this wizard window by clicking Next. Both options can be accessed later in expert mode, under Tools. This option is also available if no articulator was selected in DentalDB.
To start the Virtual Articulator, click Start virtual articulator now.
| The option “Load jaw movement data from file” is only displayed if the module "Jaw Motion Import" is activated on the dongle. This option allows you to load jaw motion data and transfer it to the 3D models in the CAD window. |
Virtual Articulator
The Virtual Articulator window appears, providing tools for the virtually articulation.
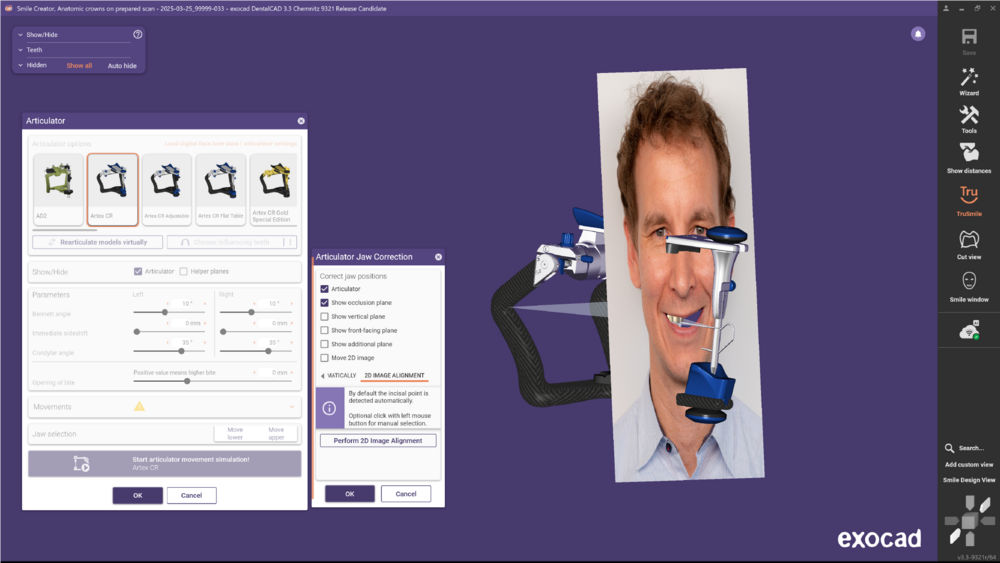
- In the Articulator options section [1], select the Articulator type to use.
- Optionally under the Show/Hide section, check/uncheck the Articulator and Helper planes to make it visible or not.
- The Parameters [2] available depend on the selected articulator type. Set the preset values according to the functional requirements.
- In the Movements section [3], select the articulation movements by checking the checkboxes Protrusion, Retrusion, Laterotrusion left and Laterotrusion right. Use the sliders to set the movement length.
- The Jaw selection section [4] allows you to choose which jaw should move while performing the movement simulation, select wither Move lower or Move upper.
- To perform the simulation of the articulator movements, click Start articulator movement simulation [5].
|
Correcting Jaw Position
If the scanner is capable of transferring the position of the models from the articulator, the models are shown in the correct position. Otherwise (or if the models were not articulated in a physical articulator), the positioning must be performed virtually.
Rearticulate models virtually
Click Rearticulate models virtually. The Articulator Jaw Correction window appears, providing tools for Manually, Automatically and 2D image alignment orientating the jaws. For visual assistance, different planes can be displayed during positioning. The occlusion plane is shown by default.
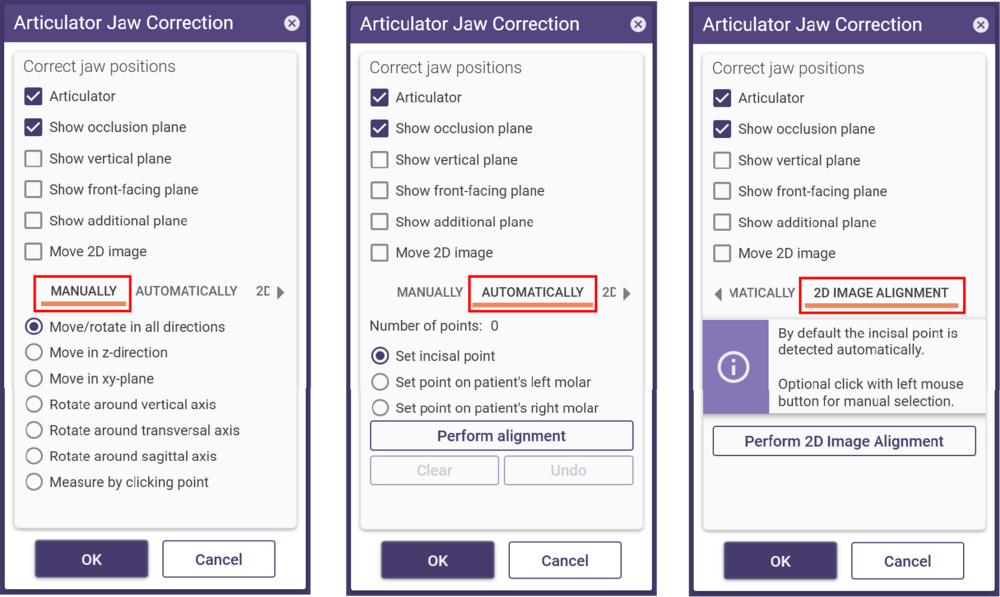
Position the models manually or switch to the other tab to position the models automatically.
In the tab Manually, correct the position of the jaws by clicking a corresponding radio button for the required movement direction.
Alternatively, in the tab Automatically, set three points: the incisal point, a point on the left molar, and a point on the right molar. After setting three points, click Perform alignment to perform automatic alignment, then OK to proceed.
To use the 2D image alignment tool, begin by loading and positioning a 2D patient photo via the Smile Creator. For optimal results, it's recommended to use the automatic TruSmile Photo integration. By clicking the "Perform 2D Image Alignment" button, the system will automatically align the scan dataset to the patient's photo inside the virtual articulator, then manually refine the alignment if needed using left click.
Specifying which teeth influence articulator movement
Click Choose which teeth influence articulator movement to open a new window where you can define teeth which should be considered/ignored during articulator movements. Use this function (for example) if the articulator settings have been adjusted and a specific tooth, teeth or tooth area should be ignored, for example, a tooth that is to be extracted. Marked areas do not affect the articulator movements.
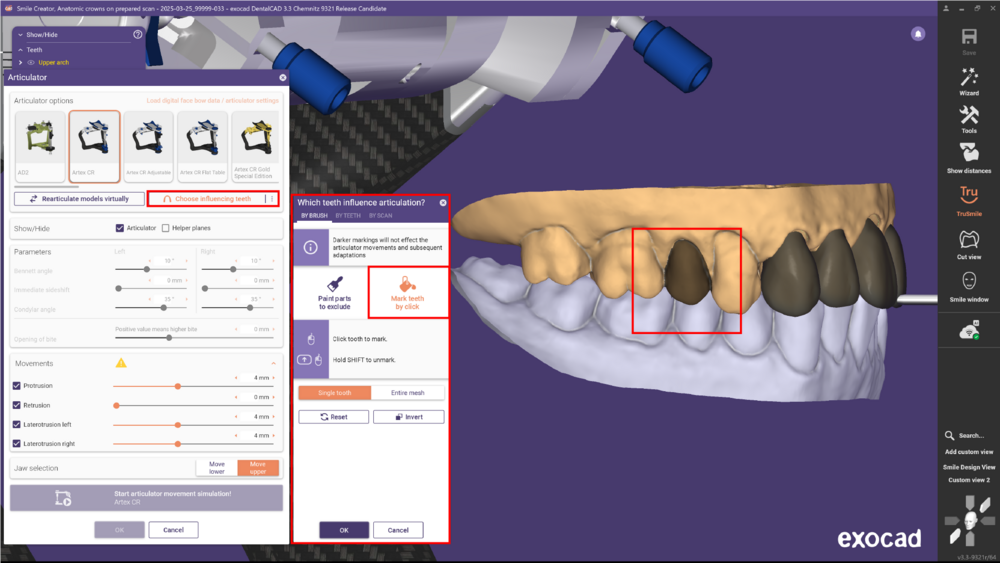
Designs are unmarked by default.
If a design is available and the Virtual Articulator is started in expert mode, the design is automatically marked, and all areas that affect motion simulation would be cut off.
Click areas or entire tooth designs while holding the Shift key to unmark them. These unmarked areas are then included in the motion simulation and thus cause a tooth guidance through the design.
In this case, first adapt to the antagonist statically to avoid early contact, then unmark the areas for the desired guidance and finally adapt dynamically.In the tab By Brush, use the functions Paint parts to exclude and Mark teeth by click to mark/unmark areas.
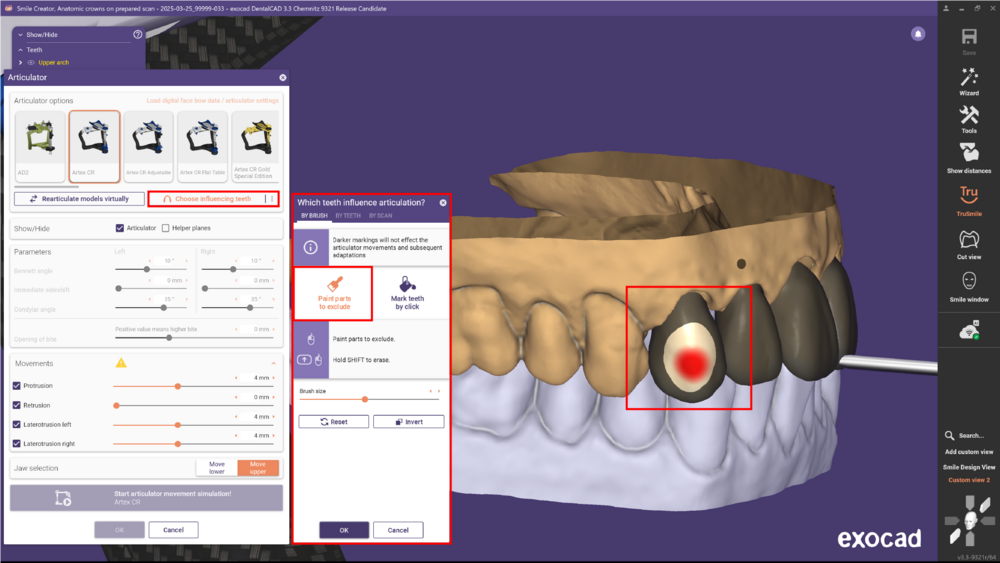
If Paint parts to exclude is activated, you can directly mark tooth parts to ignore/ unmark design parts to include in the movement simulation. Use the slider to define the brush size.
[[File: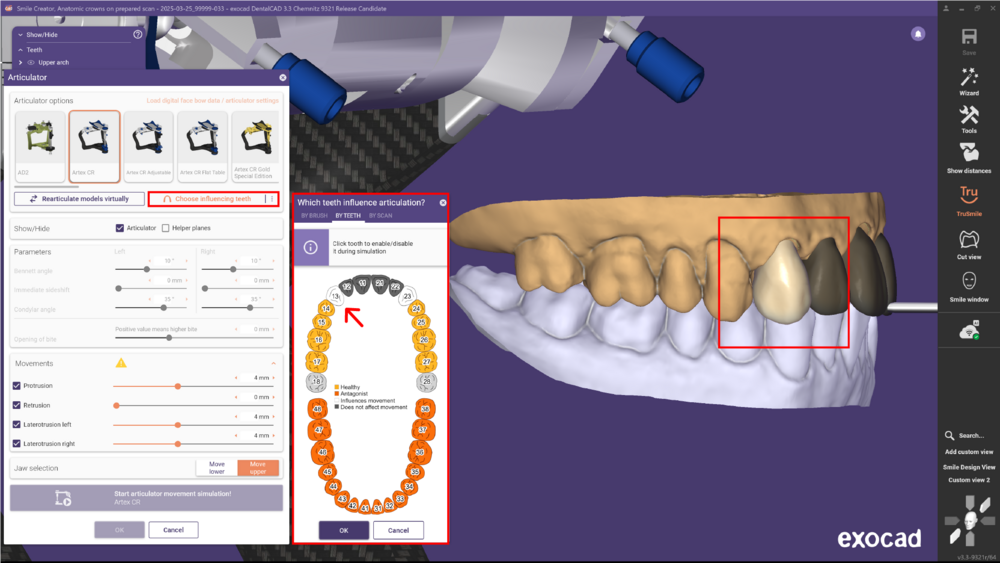
Activate Mark teeth by click to select teeth to ignore/include during movement simulation.
If a design already exists when this function is applied, an additional tab By Teeth is available, where you can mark/deselect teeth of the design and jaw scan data on the dental arch.
[[File: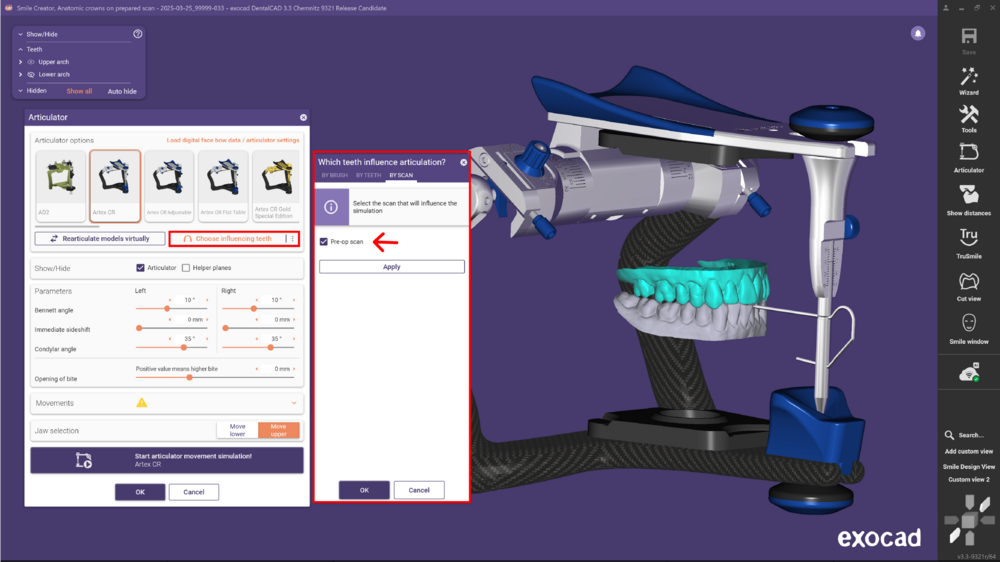
If a pre-op scan or a waxup scan is available when this function is used, an additional tab By Scan is available.
Select either Pre-op or Waxup Scan to perform the movement simulation with the selected object instead of the jaw scan.
Load digital facebow
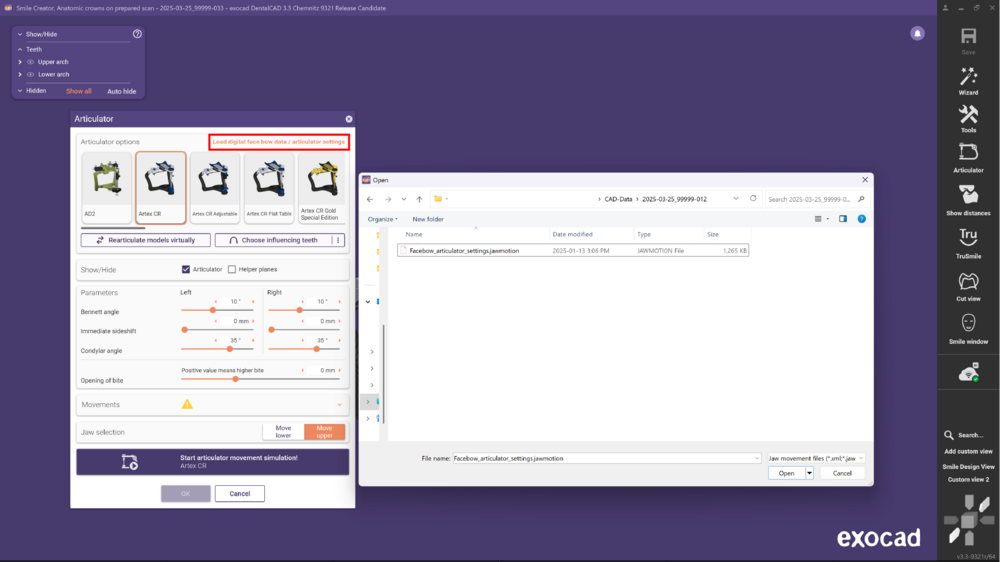
Click on Load digital face bow data/articulator settings to import position and parameters automatically to the articulator
Simulating movement
Once the articulation is completed, click Start articulator movement simulation to simulate all movement paths and calculate a collision control.
When the simulation is completed, close the articulator application and continue the design process by clicking OK.
Using calculated movement paths for the design
After virtual articulation has been performed, a separate window Repeat articulator movement is available in the design steps. For visual inspection, use the slider to select and perform individual movements on the models.
Click Articulator on the toolbar to open/close this window.
*Click
[1] to unfold/fold the
Recalculate Articulator Simulation options.
- Selecting the checkbox Show movement [2] you can visualize the simulation recalculation. If this box remains unchecked, the recalculation occurs in the background.
- [3] opens the window Which teeth influence articulation? without opening the Articulator. See image below.
- Click [4] to restart the articulator movement simulation without starting the Articulator again.
[3] Specifying which teeth influence articulator movement 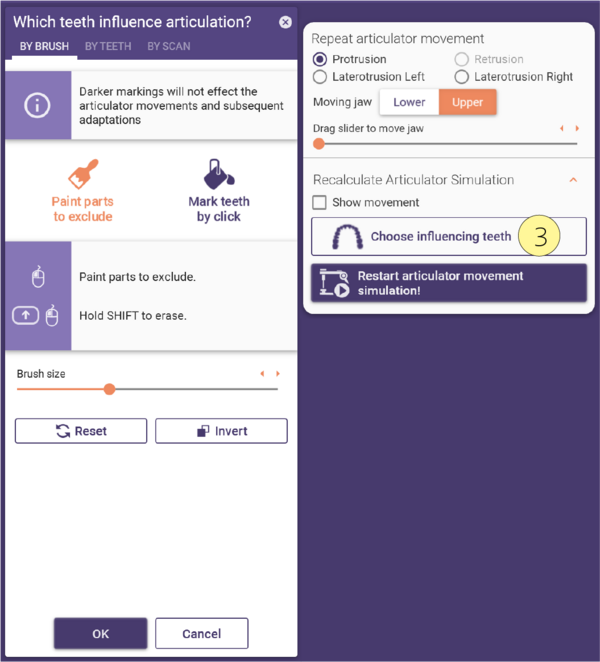 After virtual articulation has been performed, the design can be adapted dynamically as well as statically in the workflow step Free Forming.


 After virtual articulation has been performed, the design can be adapted dynamically as well as statically in the workflow step Free Forming.
