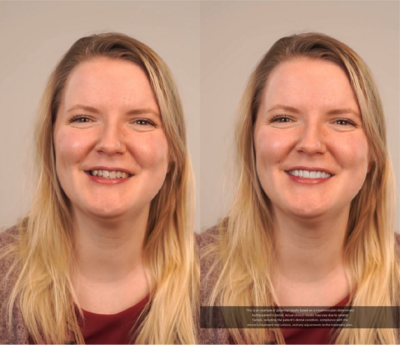
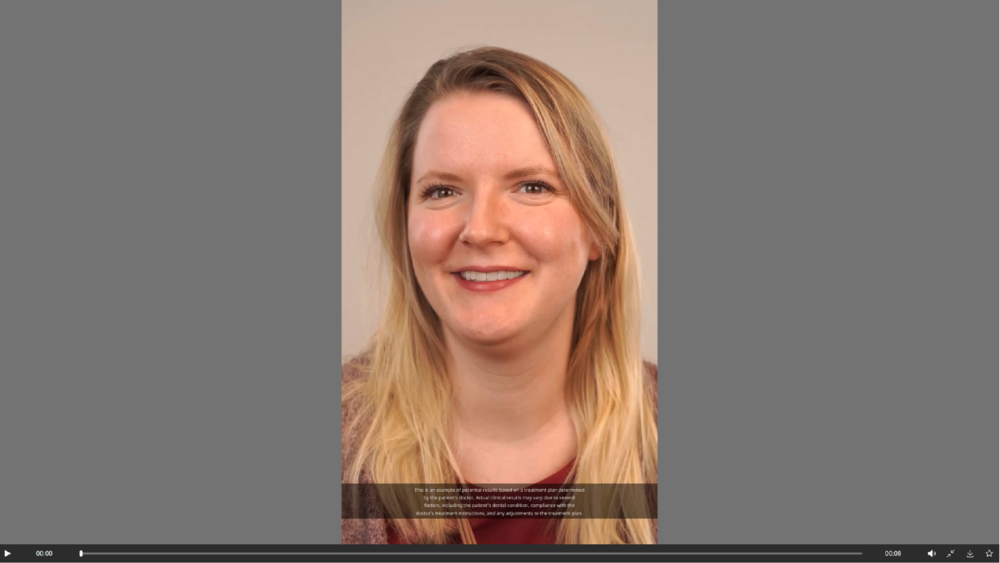
Overview
With the smile video tool, have a dynamic realistic visualization of the treatment. The video showcases the before and after and allows you to communicate treatment plans more effectively, making it easier for patients to visualize their future selves with natural mouth movements.
Requirements
- Video recording of the patient following the guidelines
- Intra-oral scans of the patient within one week of the recording to ensure that the tooth situation and the video match
- Only scans of teeth that have not been prepped should be used
- Access to Cloud services
- TruSmile video settings (Please get in touch with your reseller to enable it)
- A Smile Creator design must have been done.
- It is highly recommended to use the cloud-based TruSmile Photo Integration before generating a video.
| Please send videos as files or attachments, rather than directly through messaging applications such as WhatsApp or Telegram, as these platforms often degrade video quality and resolution. |
Step by step
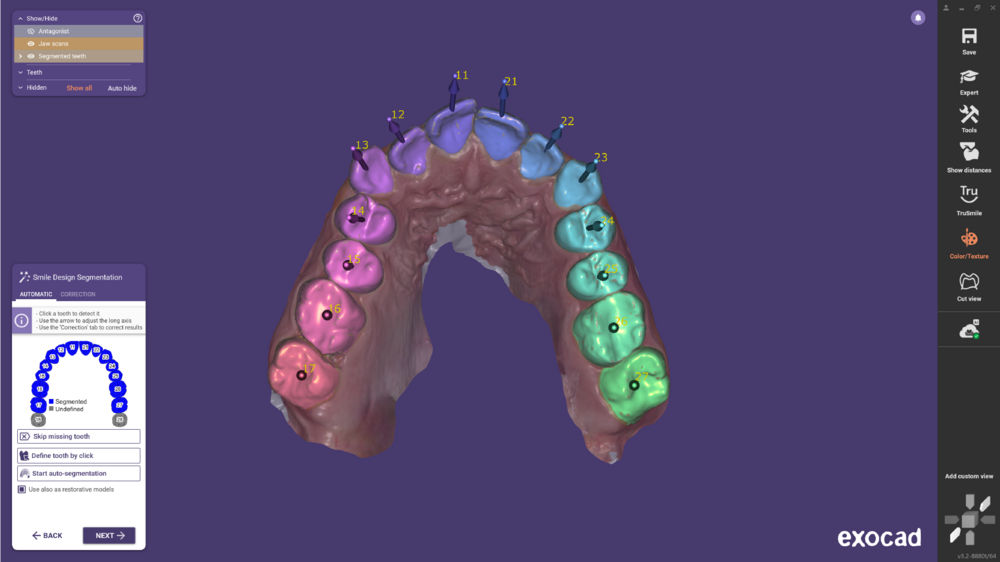 Step 1: Start by performing the Smile design segmentation.
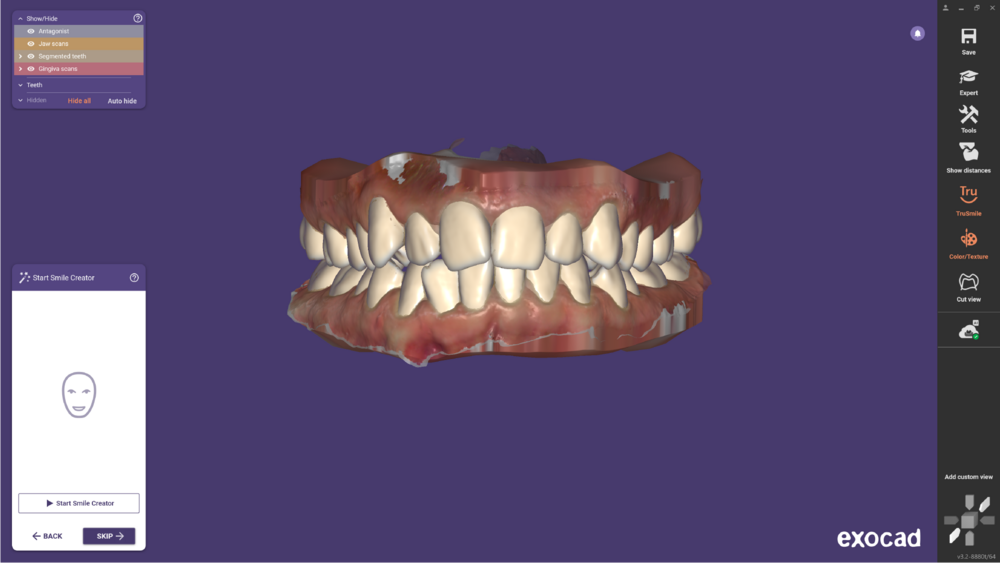 Step 2: Then, continue with the Smile Creator and follow the usual steps.
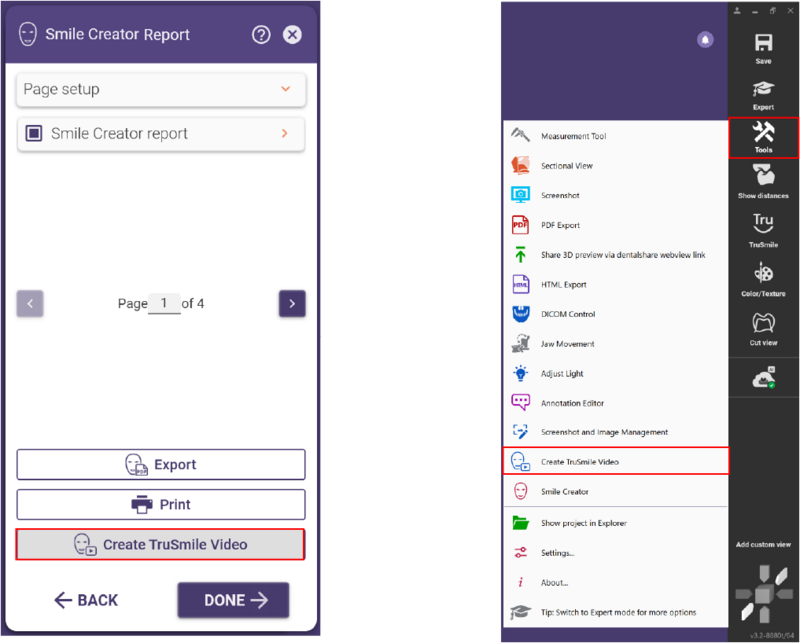 Step 3: Entering the Smile Creator Report Wizard step, you have the option to Create a TruSmile Video.
You can also open the Create TruSmile Video option, under Tools.
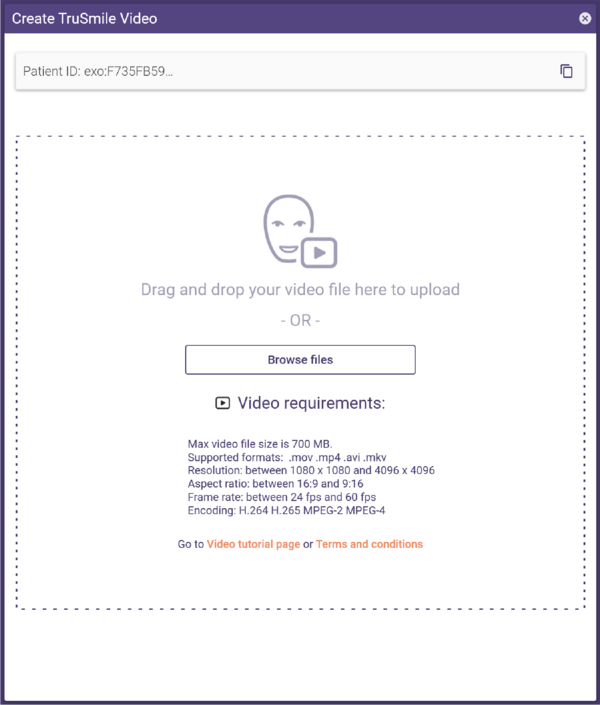 Step 4: In the Create TruSmile Video window, Drag and drop your video or click Browse files and find the video you would like to upload. Don’t forget to follow the Video requirements listed.
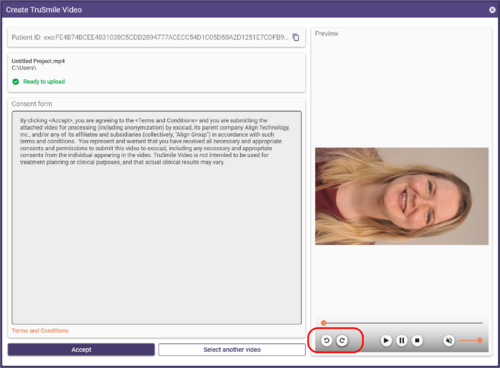
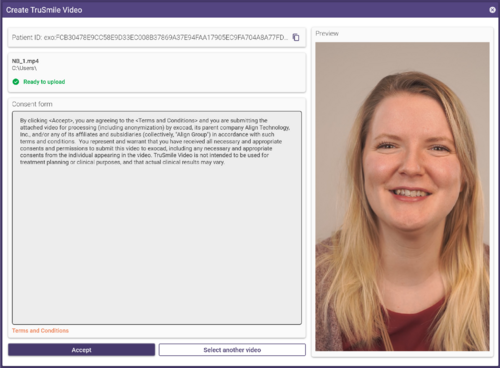
Step 5: After selecting the video, you have a preview on the right side of the window. Hover the pointer over the preview to visualize additional functions as play or rotate. Read the Consent Form and Accept it to proceed.
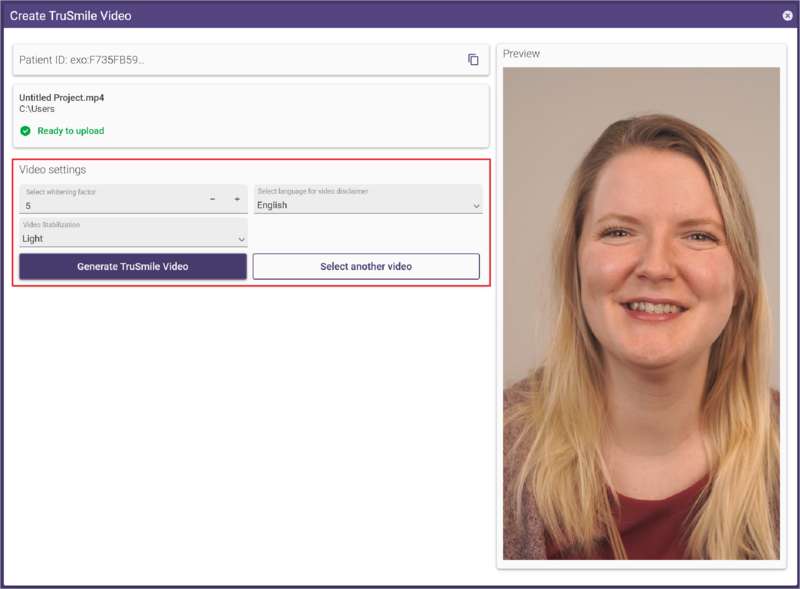 Step 6: Before generating the TruSmile Video, adjust the video settings. Select the language for the video disclaimer and choose the type of video stabilization depending on how you recorded the video.
Off if a tripod was used
Light in case you recorded using slow and smooth movements
Strong if you were holding the camera manually or with fast movements
Proceed by clicking Generate TruSmile Video.
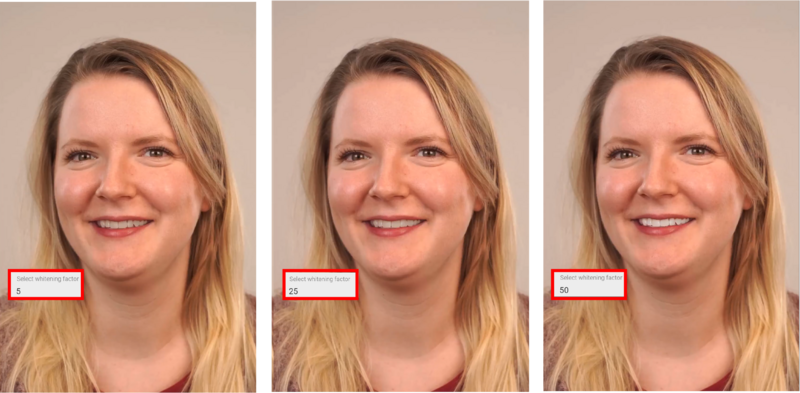 You can decide the whitening factor from 1 to 50 using the + - buttons or typing the whitening factor value. The higher the value the whiter it will be.
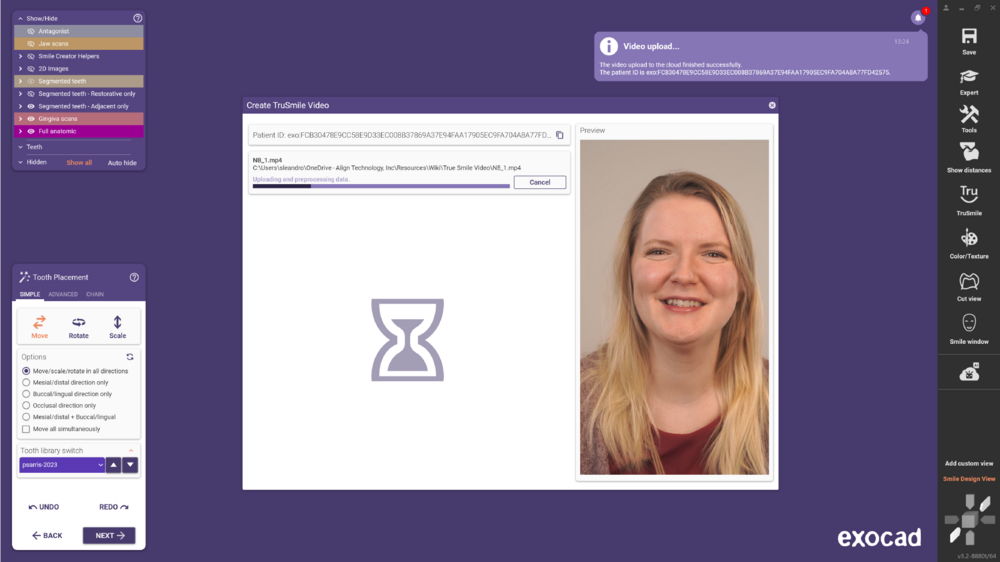 Step 7: After that, the video will be uploaded. Wait a couple of minutes and you will receive an email informing you that the TruSmile Video is ready. You can also access the TruSmile Videos from the my.exocad.com portal.
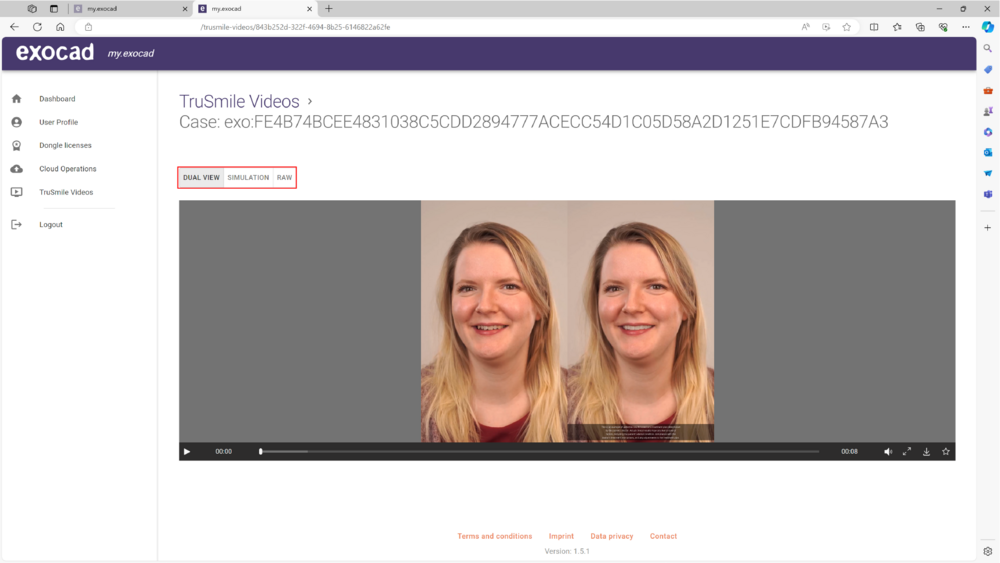 Step 8: You can visualize the result using the dual view, only the Simulation or the Raw (originally uploaded).
| To try this feature with a sample case, you must have DentalCAD version 3.2 Elefsina Feature Release, Engine Build 9036 (2024-09-27) or later. Click here to download the sample data. |
Troubleshooting
The video shows teeth on the tongue. What can I do?
During the recording of the video, patients need to be instructed not to show their tongue in front of their teeth. These parts of the video may appear incorrectly in the end due to visual overlap.
Why do I see a line/cut between the lip and gingiva?
In some cases, the line between the lip and the gingiva is very predominant which can lead to visual artifacts. Try to use another section of the video, or to adjust the camera and lighting settings. We would also be happy to get your feedback rating on the video player, so our R&D team can look at it.
The patient’s teeth look too white. Is there a way to make them look more natural?
If the generated tooth color is too white or overly bleached, adjust the whitening factor, under video settings when uploading /generating the video. You can also adjust the lighting settings during the recording of the video.
The patient’s teeth look too dark and greyish. Is there a way to improve their appearance?
That result may be related to the speed of the mouth movements. Ask the patient to talk more slowly and do fewer movements. This may improve the result. You can also adjust the lighting settings during the recording of the video.
Can I use the TruSmile video tool if the patient has an underbite, open bite, or mandibular advancement?
No. To get a good result, the patient can’t have an underbite, open bite, or mandibular advancement. That can lead to inaccuracies in the simulation.
It looks like the teeth are jumping position during the video. Why would that happen?
If the upper teeth are hardly visible in the recorded video it’s very hard to get see the original teeth position and get a good result. Try to record the patient again and make sure the teeth are fully visible.
Why is the video flickering?
That may be due to insufficient light, try to record again with a different light, preferably LED.
Why there is no difference between the simulation and the original video?
If you didn’t perform changes in the tooth placement step or the Smile Creator before creating the TruSmile Video, the only difference you may notice is the whitening factor.
I see the teeth in the wrong position. What can I do?
If that is the case, you may need to use another section of the video with the patient making slower movements with their mouth.


