The TruSmile Video feature provides a dynamic "before-and-after" visualization to help you effectively communicate treatment plans, allowing patients to see their potential smiles in motion with realistic mouth movements.
Contents
Key Benefits
- Dynamic, realistic visualization of dental treatments.
- Improved patient comprehension of treatment outcomes.
- Simulated natural mouth movements.
Prerequisites/Eligibility
You can start testing TruSmile Video if you:
- Use exocad DentalCAD Engine Build 9036 or later, with my.exocad integration
- Are located in either the EU or the US, and this is correctly reflected in the my.exocad account that you are using
- Have Cloud Integration/TruSmileVideo enabled in your exocad software configuration (see below for details)
| To use the TruSmile Video feature, you must record a video following specific guidelines. For more information, refer to the detailed instructions here. |
Pricing and Terms
TruSmile Video is being offered as a pay-per-use model, with micropayments using pre-paid “credits”. During the Early Access phase, users will get two free TruSmile Video generations at no charge, plus two free TruSmile Photo generations. To generate additional videos or photos, you can purchase "exocad credits” using the option Top up.
You can see the number of credits available to you under “My Credits”, after logging in to the my.exocad portal.
Ensure that you use the same email address for your webshop signup as you do for your my.exocad account.
Note: If you do not see the “My Credits” menu item on my.exocad, it means that your my.exocad account is not eligible for exocad credits yet. In addition, you can see the list of available cloud features in your market under “Services”.
Please check that your account is indeed associated to a lab or clinic in the EU or US. Contact [email protected] for help.
When you use TruSmileVideo/Cloud Operations, you agree to additional Terms & Conditions and to the respective Privacy Policy.
Configuration Options
To activate TruSmile Video, ensure the required settings are enabled in DentalCAD, located under:
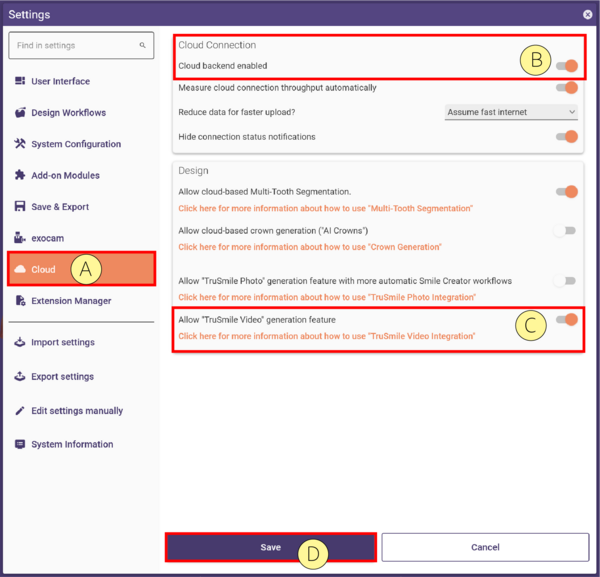
Tools → Settings → Cloud [A]→ Enable Cloud backend enabled [B] and Allow "TruSmile Video [C]" generation feature → Save [D]

Step-by-Step Instructions
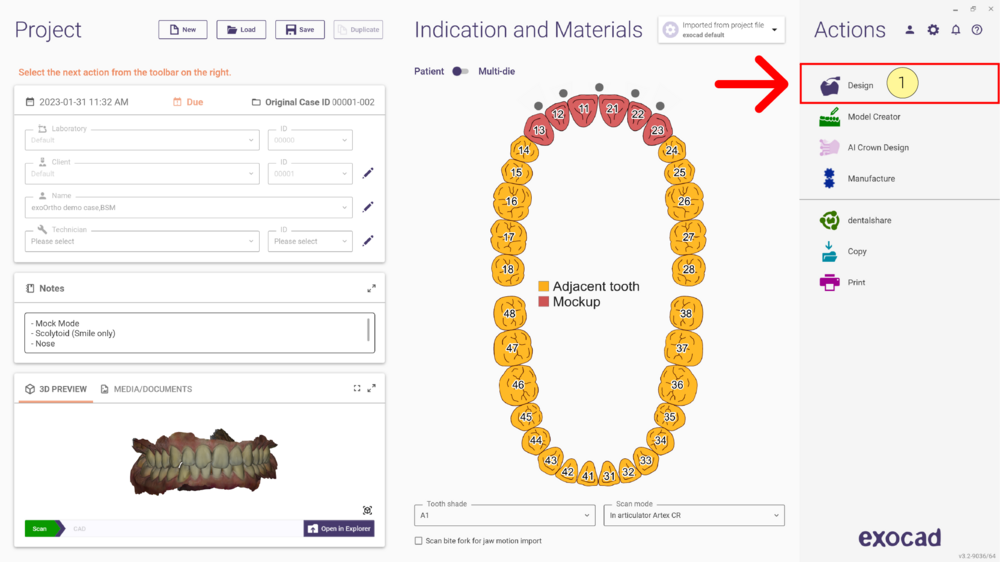
- Step 1: Open DentalDB, define the indication and materials as usual, and launch DentalCAD by clicking the Design [1] button.
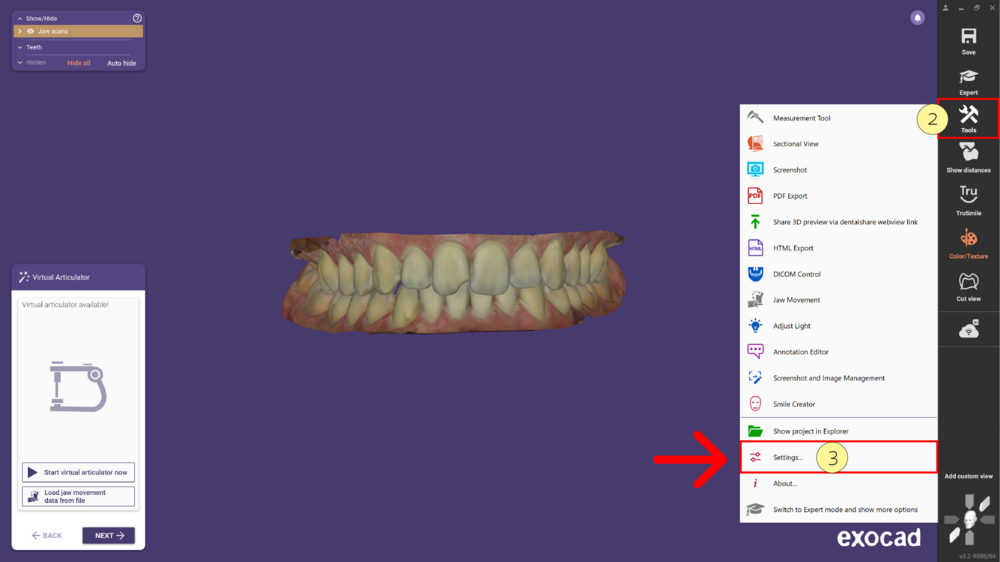
- Step 2: In DentalCAD, click Tools [2] in the toolbar and select Settings [3] from the dropdown menu.
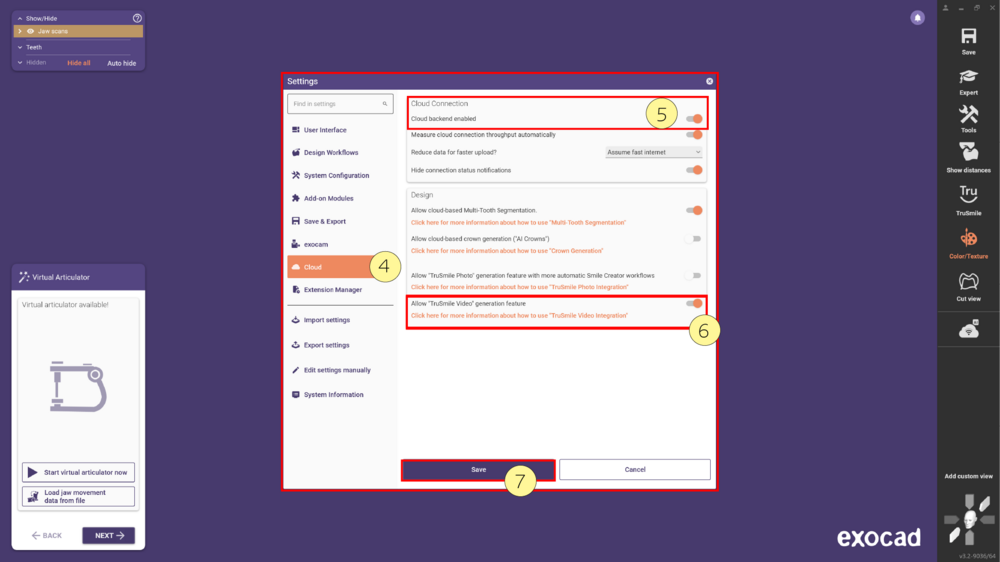
- Step 3: In the Settings menu, navigate to Cloud [4]. Here enable the Cloud backend enabled [5] and the Allow TruSmile Video Generation [6] options. Then click Save [7], and restart the application for the changes to take effect.


