Contents
Quick start for video recording on a mobile phone
For a swift video recording, follow these 7 steps. For more detailed information, please refer to the additional guidelines provided.
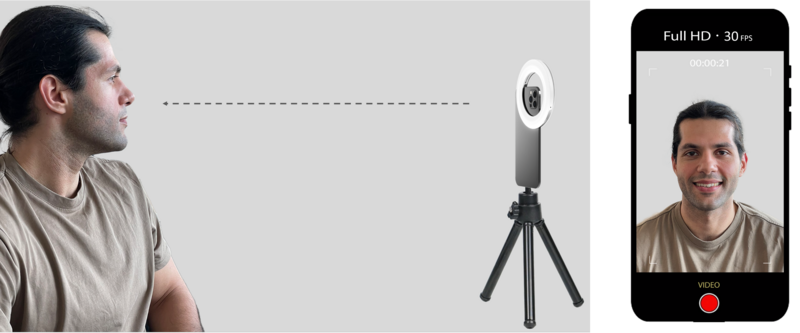
1. Camera settings: Set your mobile phone to Full HD (=1080p HD) resolution and 30 FPS (see the video recording specifications for details).
2. Lighting: Ensure good lighting condition and use a ring light if available to enhance visibility.
3. Setup and Stabilization: Use a tripod (table or a similar suitable stand) to keep your mobile phone steady. Ensure the wall behind the person is plain to provide a clean and distraction-free background for the video.
4. Framing: Record the person in portrait mode and position the teeth approximately in the center of the frame.
5. Camera angle: Point the camera directly at the patient's face, focusing on their smile.
6. Video length: Ensure the video does not exceed 30 seconds (or trim it using a video editing tool).
7. Performance: The last but inevitable for success; ensure that the person talks, shows their teeth, and smiles frequently during the video recording. It's crucial that the teeth are clearly visible, as we will be showcasing a new dental situation in the final video, and a clear depiction of the teeth is essential for the success of the video.
| Please send videos as files or attachments, rather than directly through messaging applications such as WhatsApp or Telegram, as these platforms often degrade video quality and resolution. |
Physical guidelines for the recording
- Preparation: Instruct the person to sit comfortably and steadily with their hands resting on their lap.
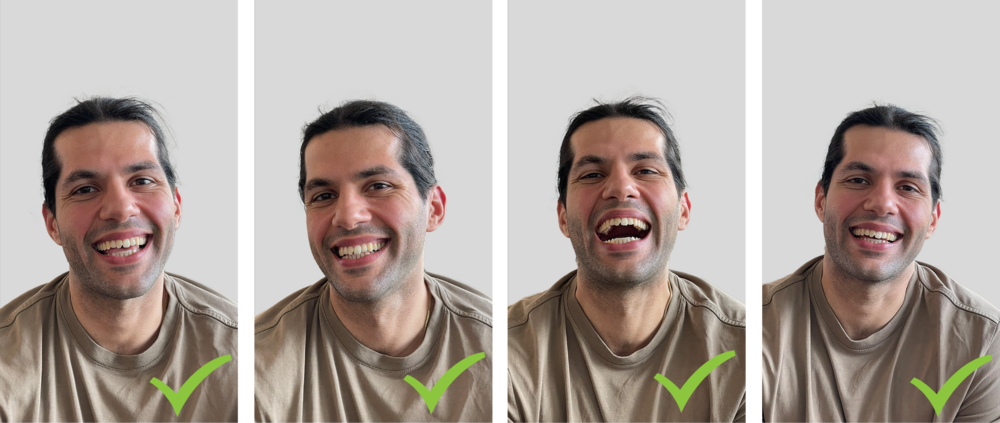
- Encourage the person to perform the following actions during the recording:
- Face directly towards the camera
- Executes facial movements at a moderate pace
- Speak throughout the video
- Smiles and laugh naturally
- Display their teeth clearly
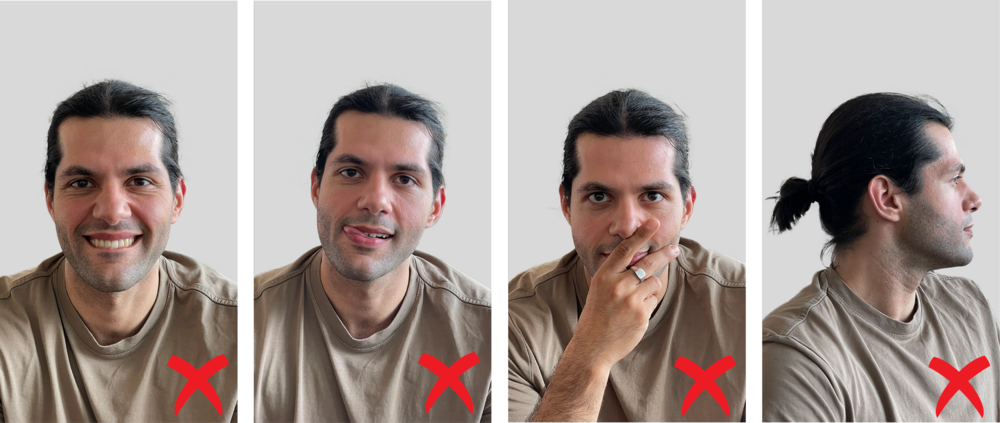
- Avoid the following physical interactions during recording:
- Rapid head movements
- Moving out of the frame
- Biting the lips
- Protruding the tongue
- Covering the mouth with hands
- Turning the head so far that both corners of the mouth are no longer visible
| Finally, perform intra-oral scans of the person within one week of the recording to ensure that the tooth situation and the video match.Only scans of teeth that have not been prepped should be used. |
| This tool is exclusively for person aged 18 and above, excluding those with underbites and/or supernumerary teeth. |
Environmental guidelines for the recording
- Preparation: Choose a plain background that is free of patterns and varying colors to ensure a clean and distraction-free video.
- Tripod: Stabilize your device with a tripod to maintain a steady and consistent shot throughout the recording.
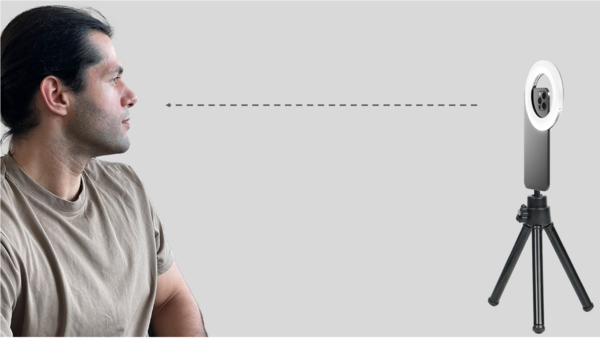
- Lighting: Ensure optimal lighting conditions for clear visibility by using ring lights or other suitable lighting options. The light source should be positioned in front of the person, ideally from the direction of the camera, rather than behind or above them. Focus on providing ample illumination for the anterior teeth to enhance their visibility.
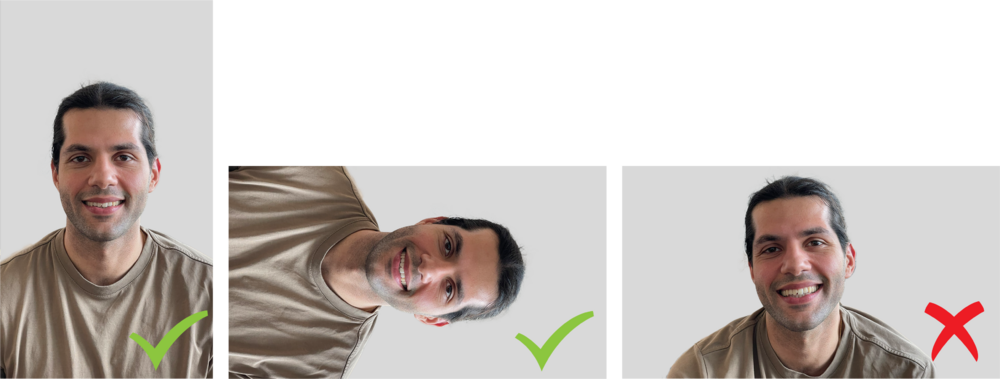
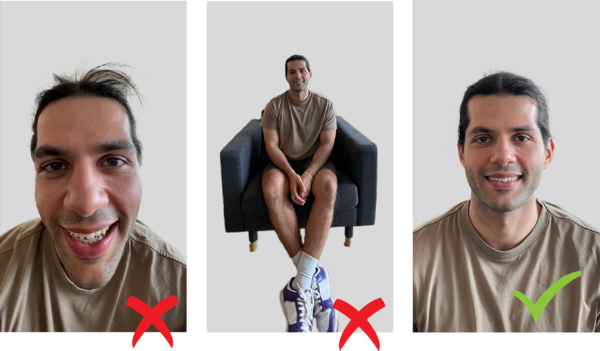
- Video image format: Record the video in portrait mode. While landscape mode is allowed for uploading, it is not suitable for the final product, especially for dual-view presentations. If the video has been recorded in portrait mode but is displayed tilted (center image below), it can and must be rotated when uploading, see the following page.
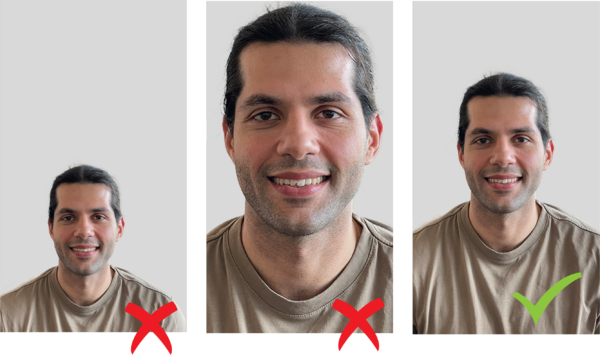
- Face position: Ensure the patient's head is in the upper part of the frame, with their teeth approximately in the middle, so that the head doesn't fill the entire frame, allowing for some movement, but also not too small (the disclaimer will cover the teeth if it is too small).
- Avoid camera zoom: Don't use any camera zoom function (digital or optical) during the recording to avoid unstable shots, change in perspective, and quality loss. Instead of zooming, move the camera closer or carefully choose the framing before recording.
- Camera positioning relative to the patient’s face: Position the camera aimed directly at the patient’s nose. Ensure the patient is recorded from a frontal view, capturing the full face in an upright posture. The camera should be aligned at the same level as the patient’s smile, avoiding any high or low angles.
Example of a video recording
Video recording specifications
- Maximum video length: 30 seconds
- Videos exceeding this length won’t be uploaded. It is recommended to record longer videos and cut out the best parts using a video editing tool.
- Resolution: 1080p to 4096p
- Width and height must be between 1080p and 4096p. Full HD or 4K can be selected. It is recommended to use Full HD (=1080p HD) to reduce the duration of the upload. The final video will be reduced to Full HD anyway, but a video created with a higher resolution can still be used.
- Frame rate: 24 to 60 FPS
- The frame rate can be set between 24 and 60 FPS. However, it is recommended to use 30 FPS, as higher rates do not provide significant benefits.
- Supported formats: .mov .mp4 .avi .mkv
- Other formats can be converted to these using appropriate tools.
- Maximum file size: 700 MB
- This size is typically not exceeded due to the 30-second length limitation.
- Encoding standards: AVC (H.264), HEVC (H.265), MPEG-2 or MPEG-4
- Smartphones will support these on default settings. For other digital cameras select one of these.
iPhone users
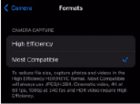
- Most Compatible (Preferred method):
- Go to Settings.
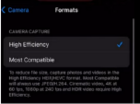
- Navigate to Camera > Formats > Camera Capture.
- Select the Most Compatible option.
Selecting the Most Compatible format ensures that files are saved in a universally supported .mp4 format. This allows for seamless downloads from iCloud without requiring additional file conversion.
- Using the High Efficiency:
- When downloading from iCloud:
- Click on the three dots (...) menu.
- Choose More Download Options.
- Always select the Original Version or Highest Resolution for the best quality.
- Files in the .M4V format can be opened in Clipchamp, where they can be edited and exported as .mp4 in Full HD resolution.


