This page shows you how to create a model with a provisional stump based on the design of an eggshell provisional. This can be useful as a preview/guide for the final preparation, or as a tool to facilitate the manual finishing of the provisional crown.
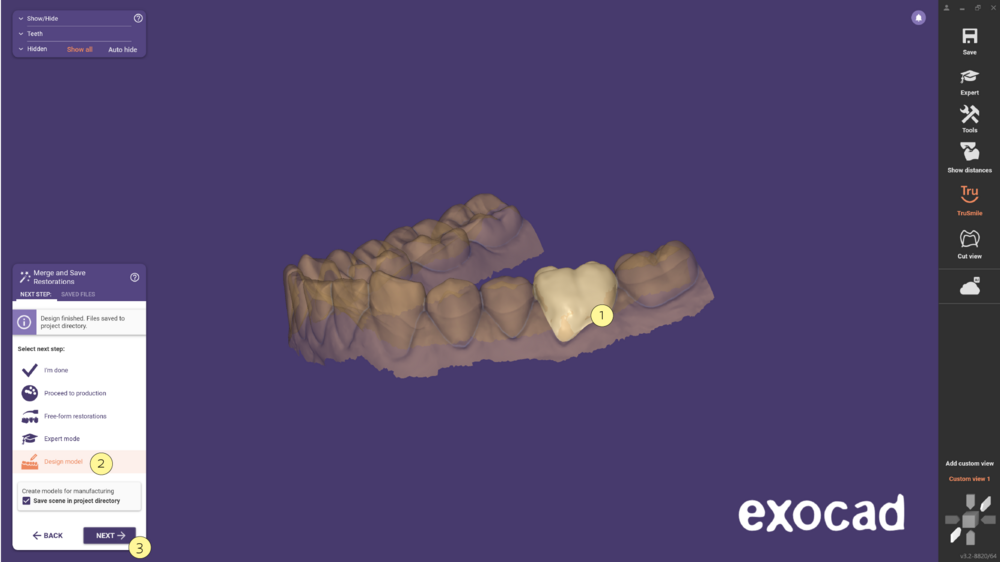
- Step 1: After finishing the provisional restoration design [1], please select the option Design model [2] and click Next [3] in order to open the Model creator.
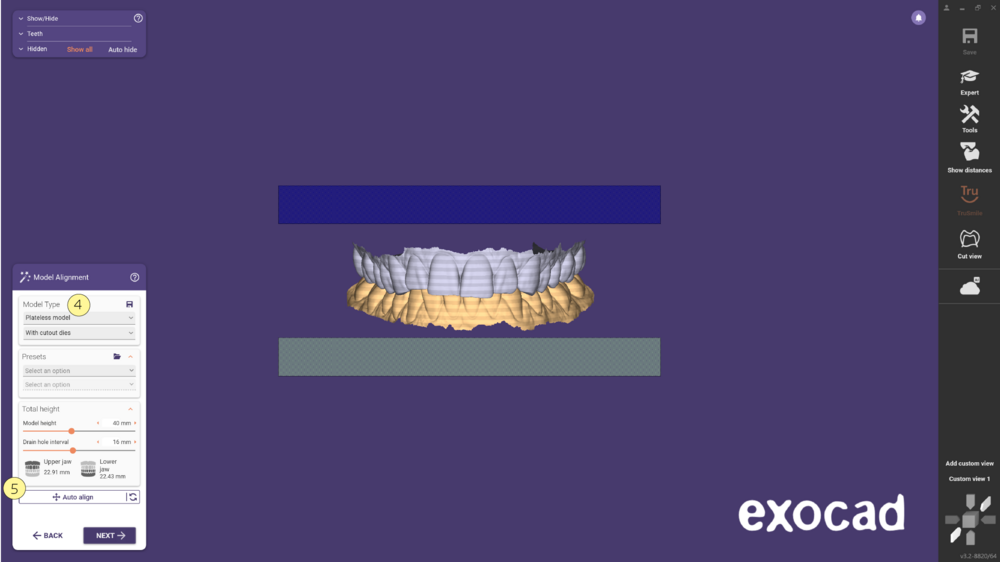
- Step 2: Select the Model Type [4] and proceed with the Alignment [5]. Check this page for further information about model alignment. Click ‘Next’ to proceed.
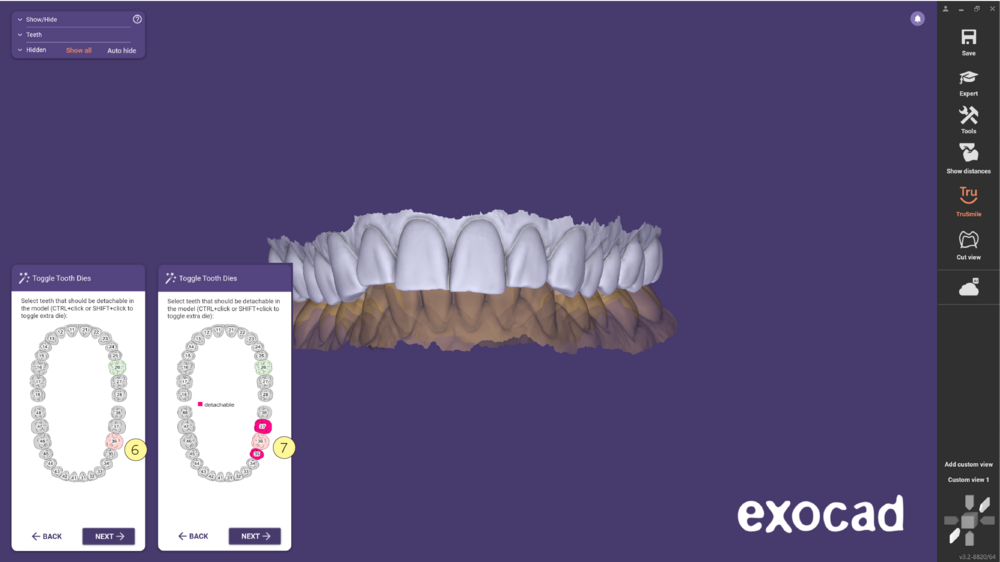
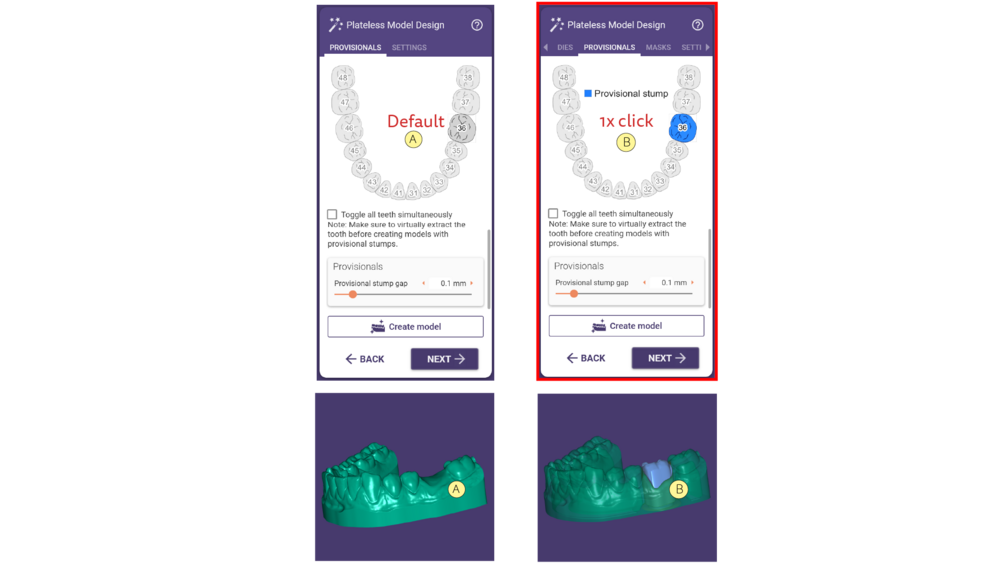
- Step 3: The following step, gives you the option to have more teeth detachable on the model. If you keep the Default selection [6], only the 36 will be detachable. In order to have other detachable teeth [7], please click on the corresponding tooth. Click next when done.
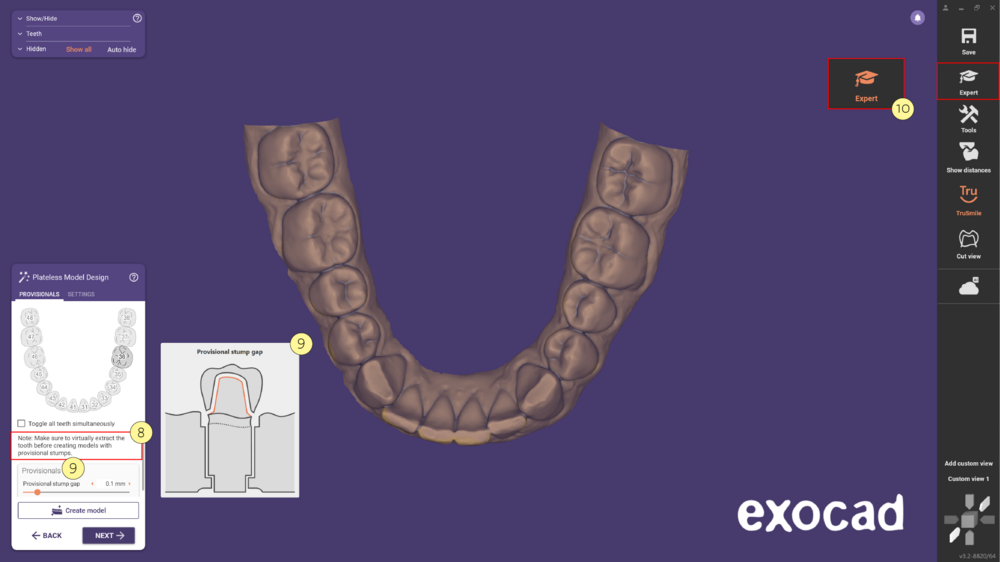
- Step 4: Note that is recommended to virtually extract the tooth before creating models with provisional stumps [8]. In this menu, choose the provisional stump gap [9] and switch to Expert [10] mode to perform the virtual extraction of the tooth.
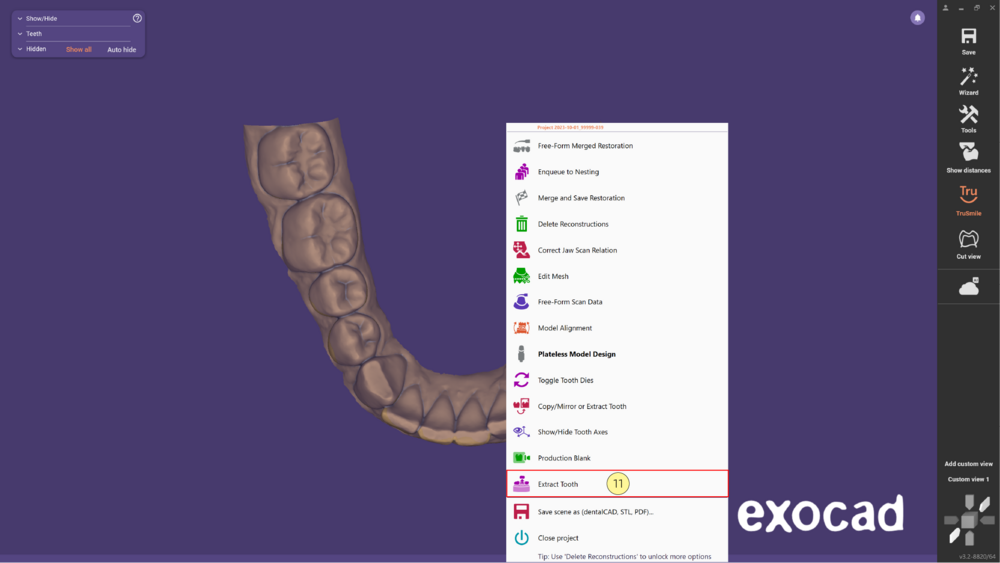
- Step 5: Right Click on the tooth and choose the option Extract Tooth [11].
- Step 6: In the Extract Tooth dialog window, choose the type of copy [12]. Click on the tooth you wish to extract [13], for further information on this topic, check this page. To finalize this step click OK [14].
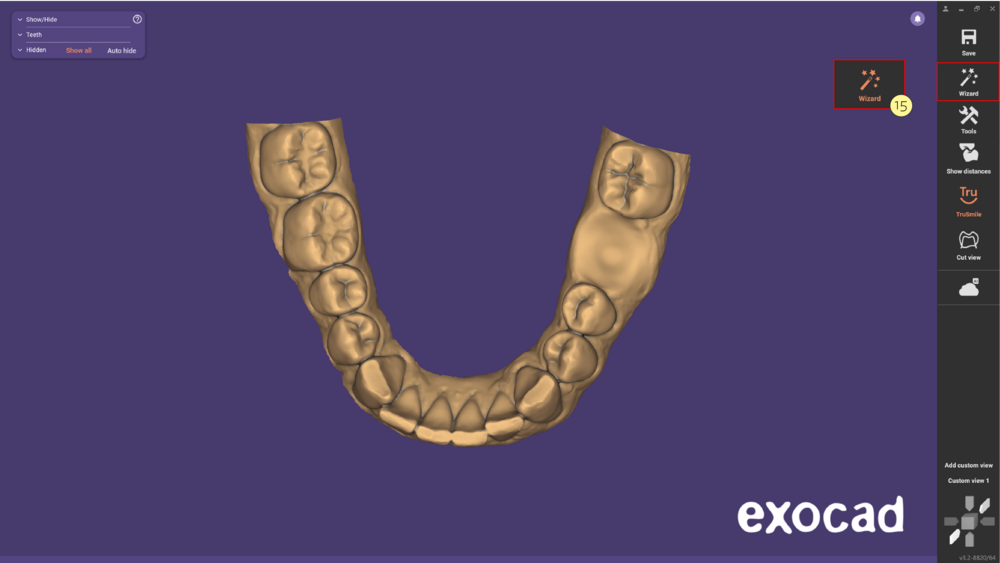
- Step 7: Go back to the Wizard [15] mode and continue the remaining steps.
- Step 8: In the ‘Provisionals tab’, select one of the following options [A] or [B]. Check the image below to identify the differences.
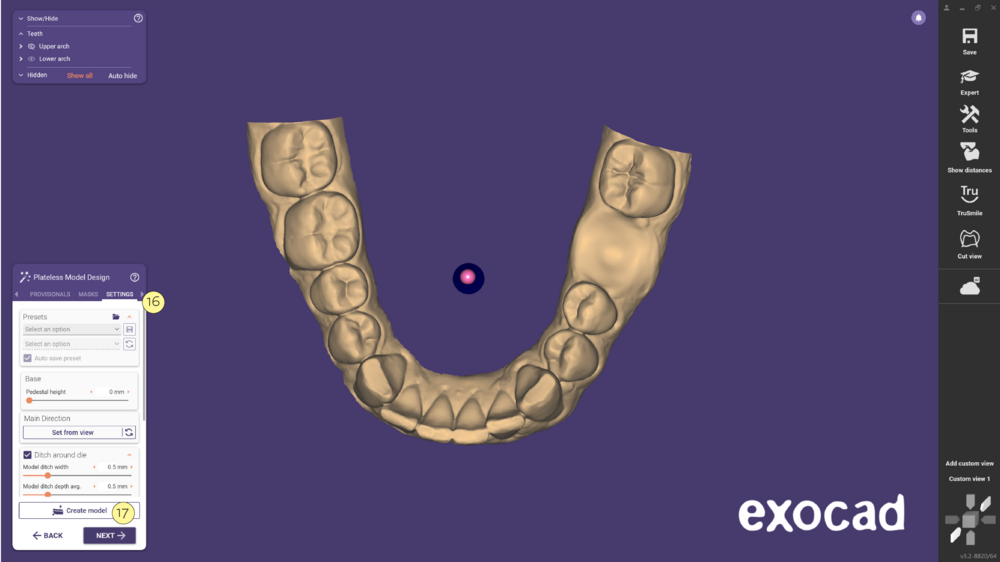
- Step 9: In the Settings tab [16] select the desired parameters and click Run [17] to create the model. Click ‘Next’ to move forward.
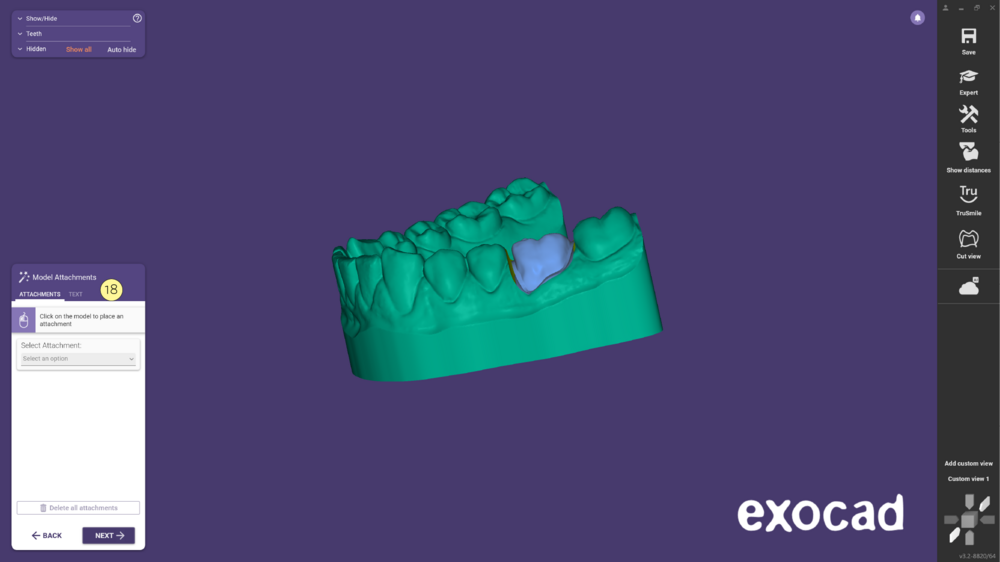
- Step 10: At this point Model Attachments [18] you can add Attachments or Text. Click ‘Next’ to continue.
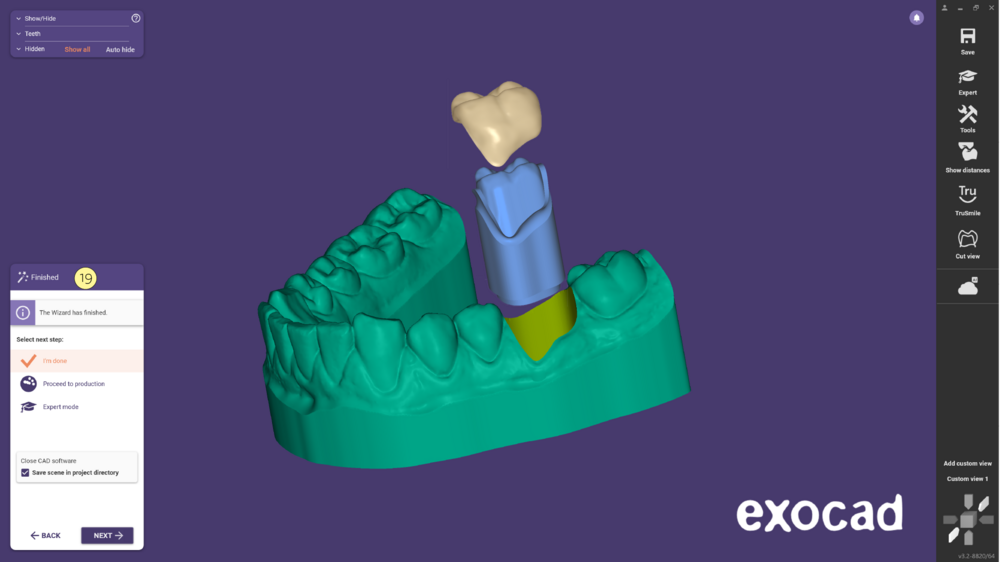
- Step 11: In the last step Finished [19] clicking ‘Next’ with the ‘I’m done’ option, the CAD software will be closed and the files are saved in the project directory.


