DentalCAD users can now test the AI Crown Design feature for crowns. Designs are requested and retrieved directly within DentalCAD, where margins are defined as usual, and all standard tools remain available for customization. This functionality reduces design time while allowing for complete personalization of each crown. To learn how to enable this feature, visit Enabling AI Crown Design.
Step by Step
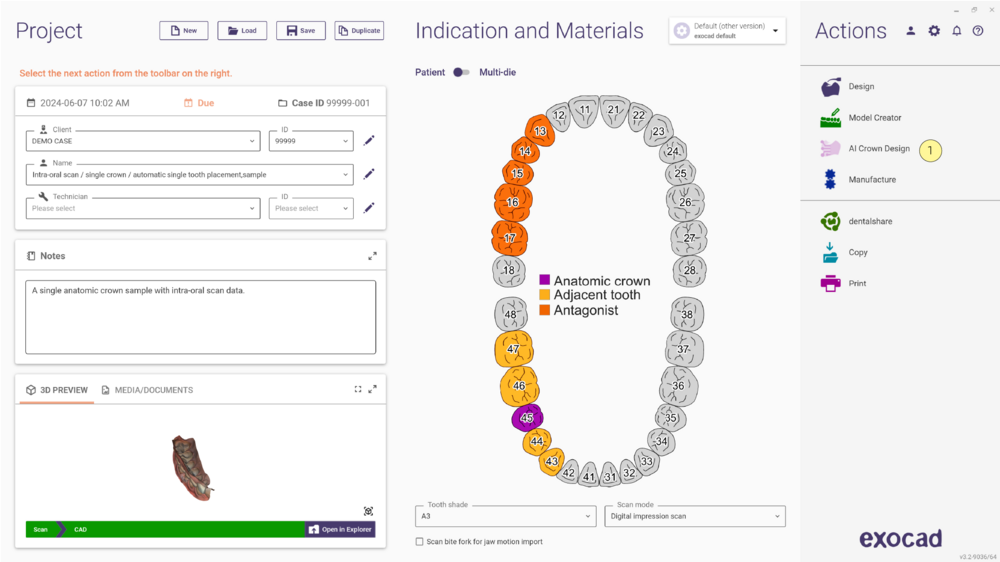 Start by defining a single anatomic crown in the project and then select the Design button as usual or AI Crown Design [1].
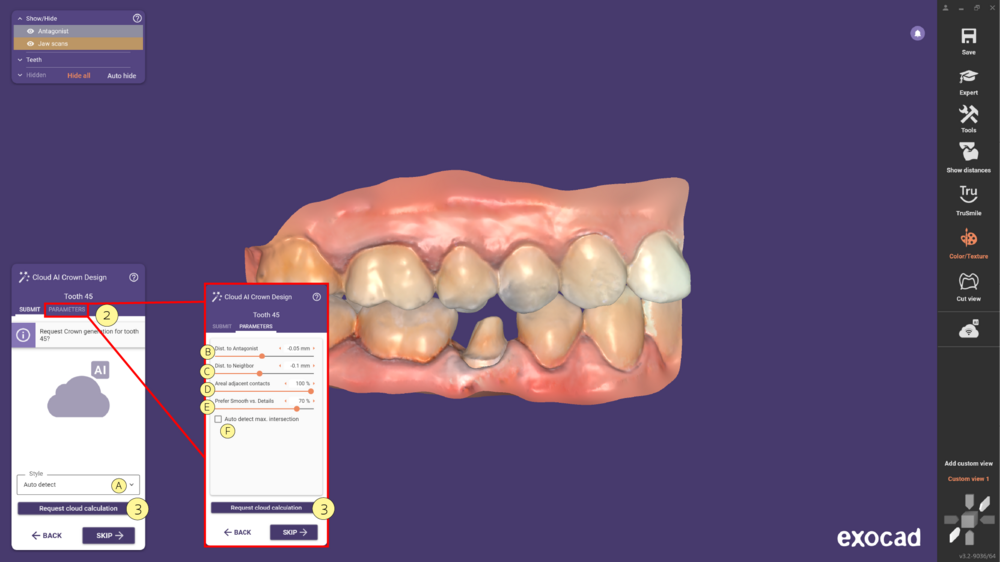 Entering the Cloud AI Crown Design wizard step, you can decide the Style of the crown, expanding the dropdown menu [A], and adjust the Parameters [2].
[A] Style
Auto detect: Let the AI automatically choose a style
Use adjacent or contralateral: Copy the details of the neighboring tooth or the contralateral tooth if not available
exocad library: Use this library for the AI design
[B] Dist. to Antagonist: Target the intersection depth/distance of the generated crown with the antagonist. Note: Negative values are sometimes recommended to have an initial intersection which can then be adjusted in Free-forming e.g. by cutting.
[C] Dist. to Neighbor: Target intersection depth/distance of the generated crown with the adjacent teeth. Note: Negative values are sometimes recommended to have an initial intersection that can then be adjusted in Free-forming e.g. by cutting
[D] Areal adjacent contacts: Manage the size of the contact area, to get broader, more areal adjacent contacts increase the value and decrease it to reduce the contact area.
[E] Prefer Smooth vs Detailed: This allows the user to influence the smoothness or how much detail the crown shall have. The lower the value (more to the left), the smoother the crown shall be. The higher the value (more to the right), the more detailed the crown shall be. The middle value means that there is no user preference.
[F] mark this checkbox to automatically detect the maximum intersection by analyzing the adjacent and antagonist teeth.
If you are unsure what to select, keep the default values. Click Request cloud calculation button [3] to start the generation of the crown.
Please note that these are rough guidance parameters to the AI, which control the contact strength and might not be exactly followed.
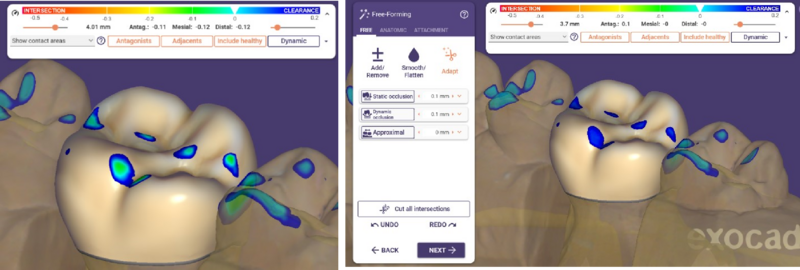 Example: the following crown was generated with distance parameters set to -0.1. Exact distances can then be enforced using the familiar “Cut Intersections” tool in a later step of the wizard. Please note, if you want a larger contact with intersection depth 0, you should set these parameters to negative values for the AI to get contacts and then cut them to 0 at the end in the wizard.
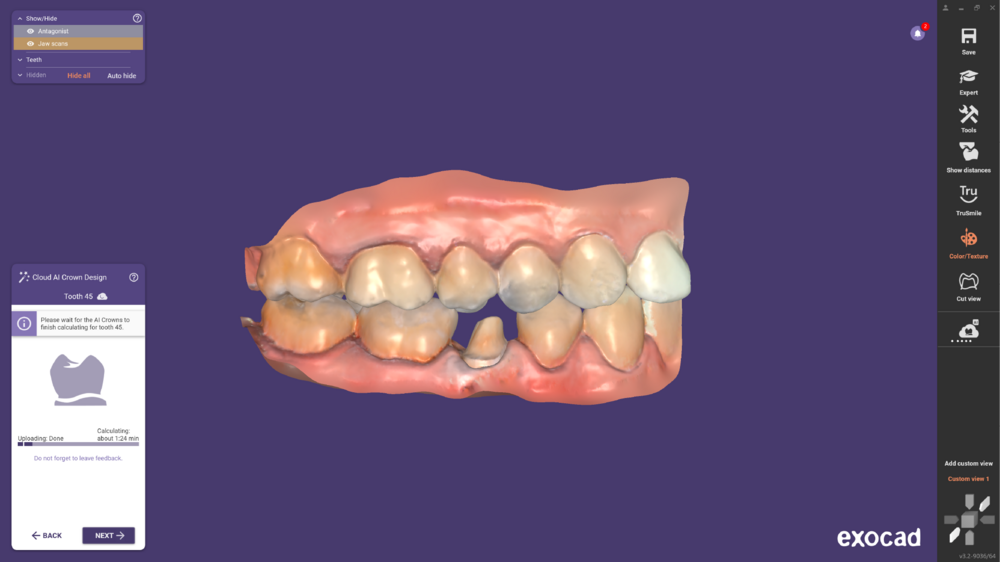 The calculation starts and, in this case, it takes approximately 1:30 minutes. Please wait for the calculation to be finished.
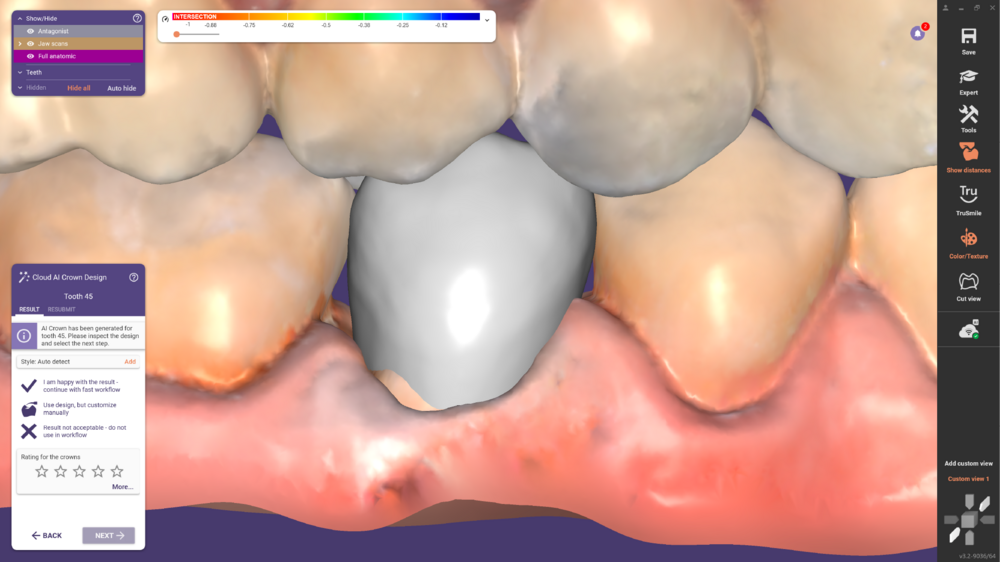 Once the AI crown is calculated and visible, an evaluation form will appear. Please select the evaluation and rate the proposal of the crown. The selection in the evaluation section determines the next steps in the wizard. Please click More… to give detailed feedback.
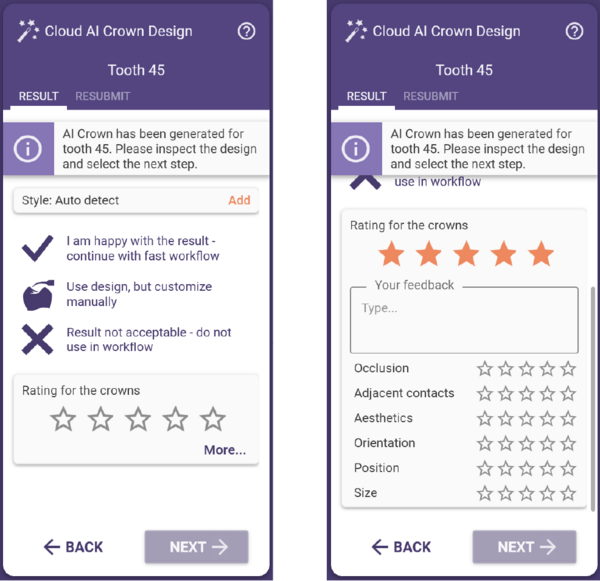 The rating section provides your feedback to the R&D team about the quality of the AI crown shape. This will allow us to improve the crown generation results.
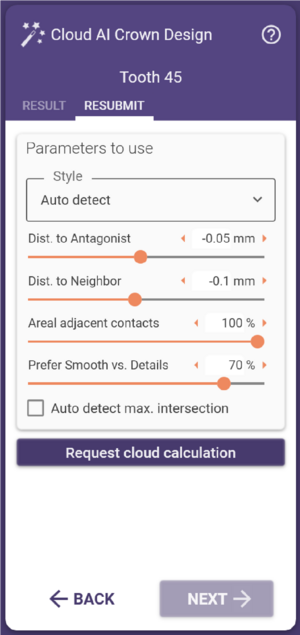 If you would like to perform changes in the Parameters selected previously, select the Resubmit Tab to adjust them and then, click Request cloud calculation.
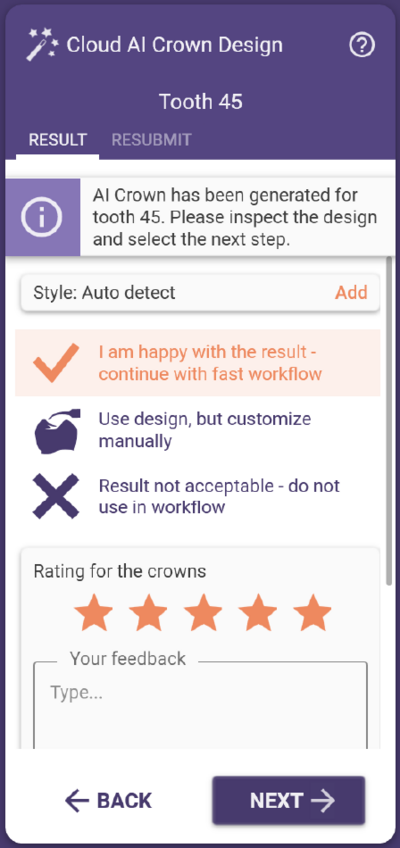 I am happy with the result: Continue with the fast workflow
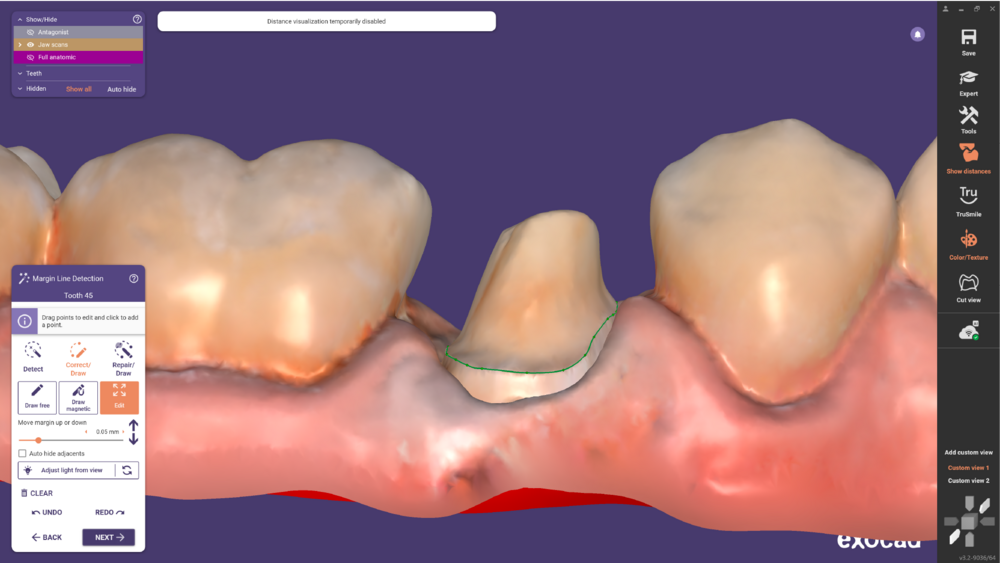 Start by defining the margin line.
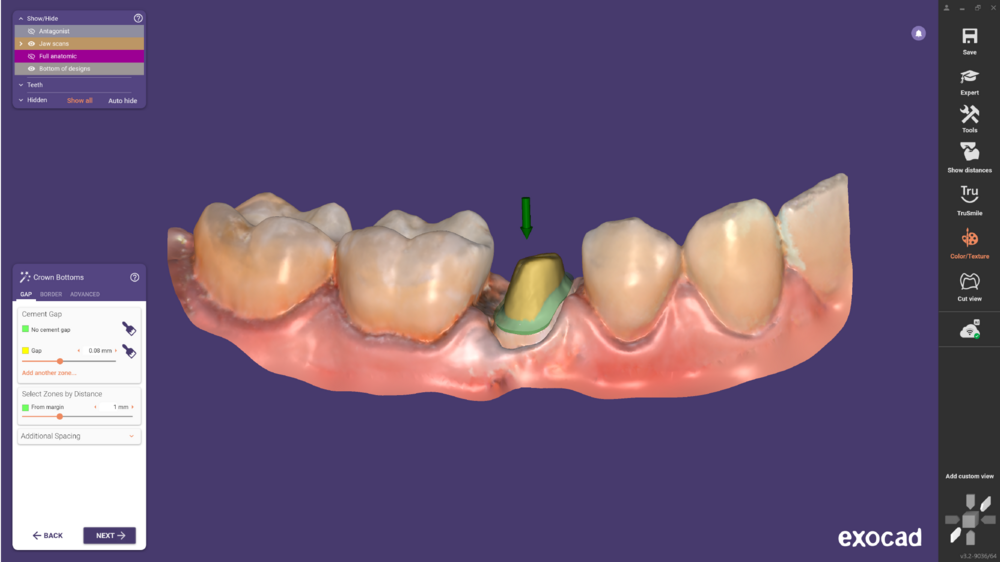 Then, verify the crown bottom and proceed.
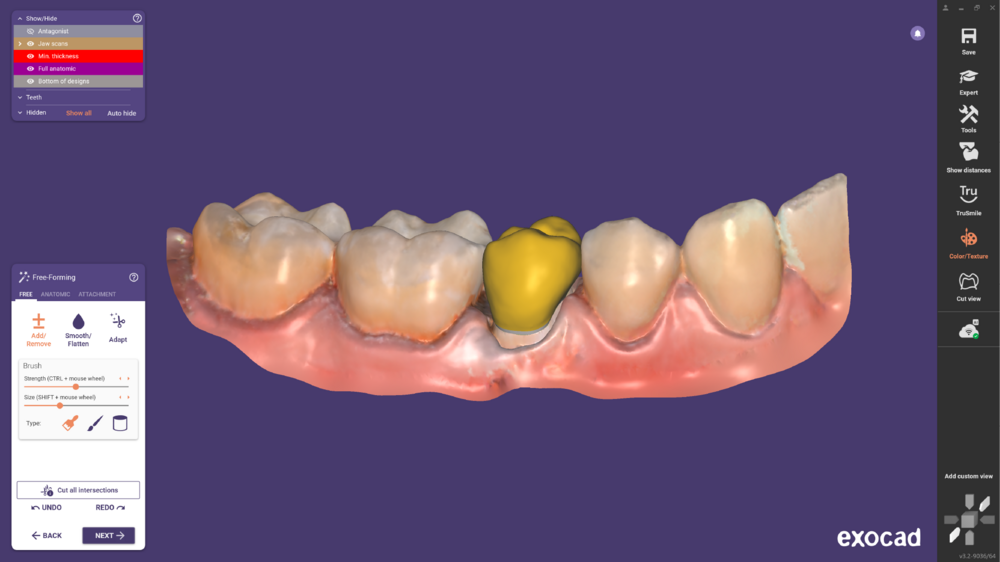 Make any necessary adjustments in the Freeforming. Click Next to continue.
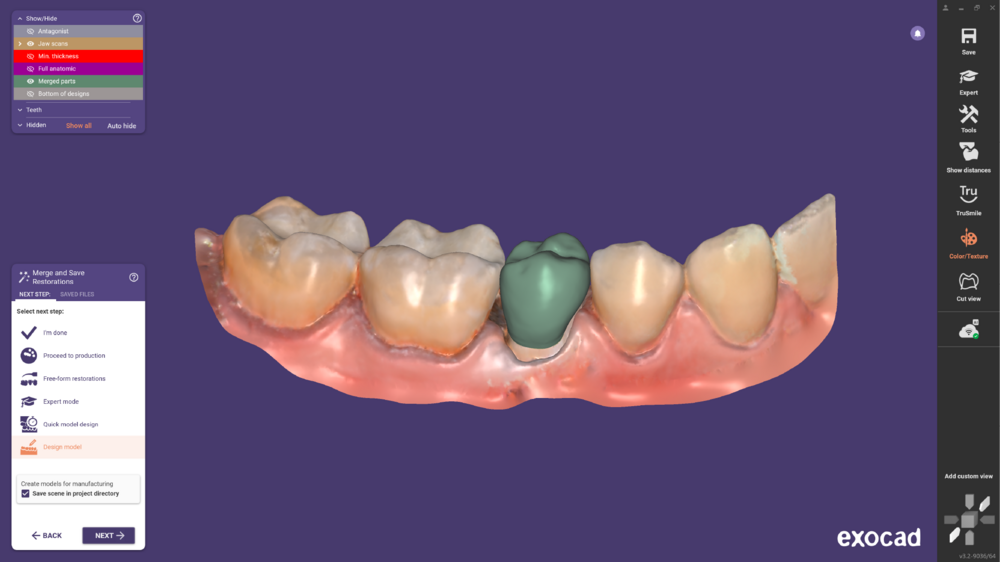 You finally reached the Merge and Save restorations.
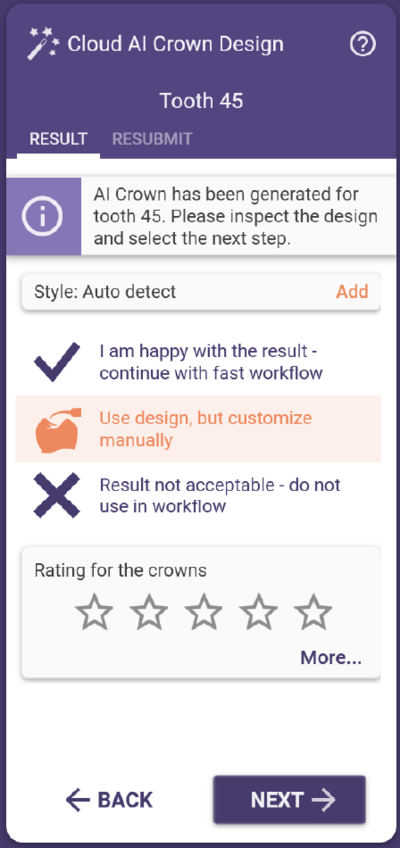 Use design, but customize manually.
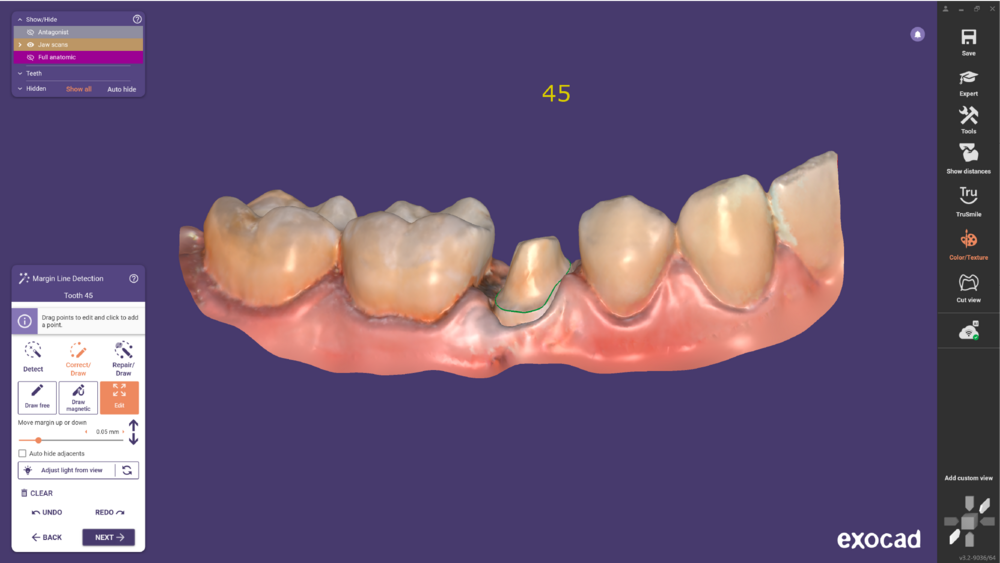 Start by defining the margin line.
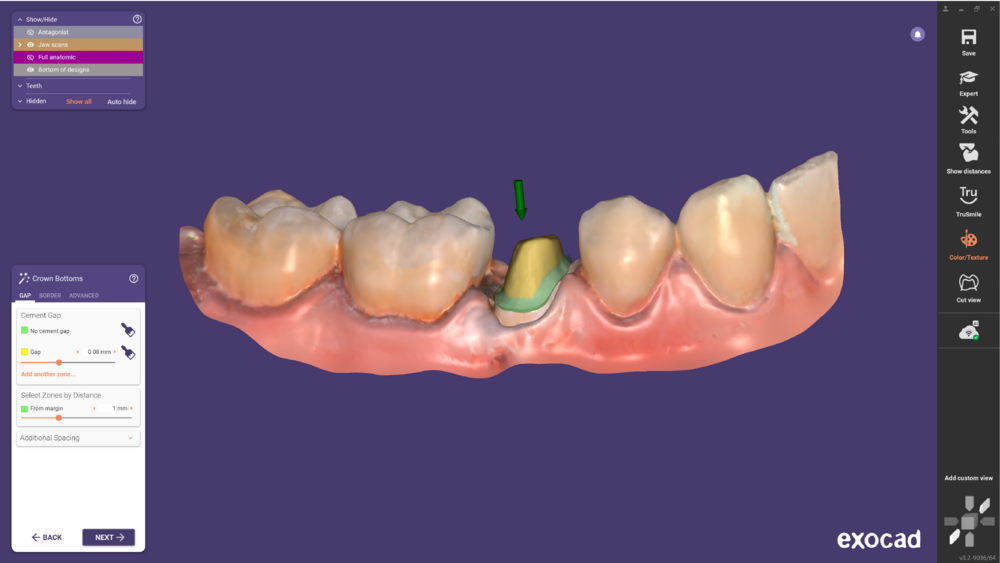 Then, define the crown bottom.
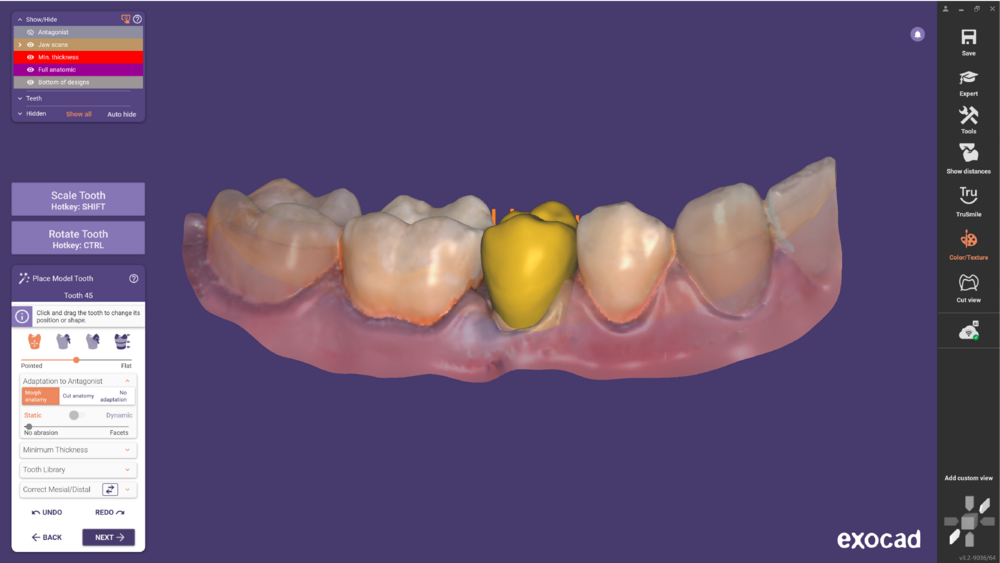 Clicking next you will enter the Place Model Tooth step.
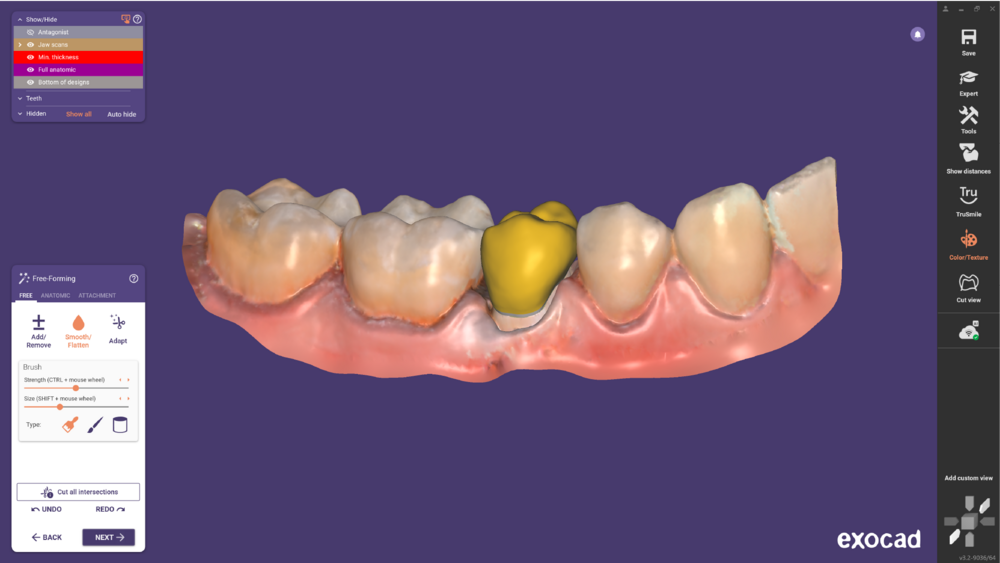 Then, you enter the Freeforming step.
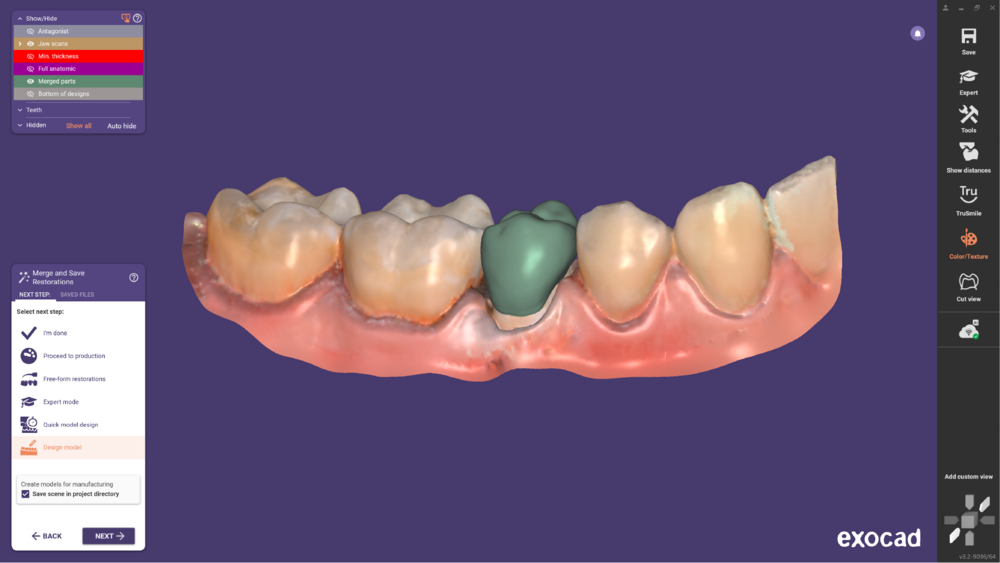 And finally, Merge and Save restorations.
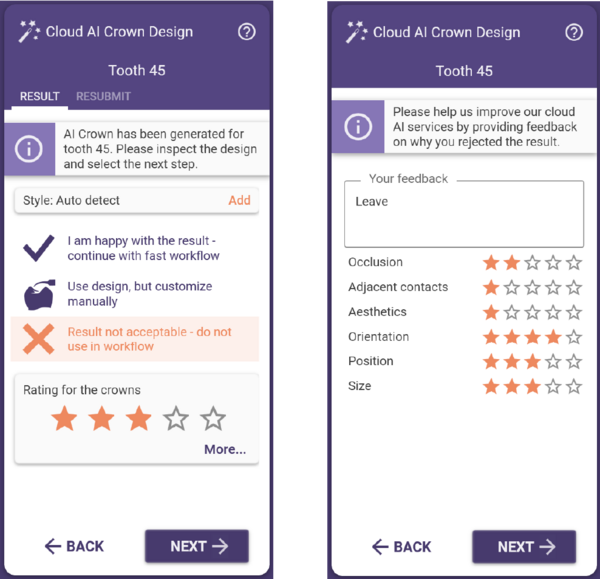 Result not acceptable- do not use it in the workflow
In this case, the library tooth will be loaded as usual, and the AI crown design proposal will be ignored. Don’t forget to rate the crown to help us improve our cloud AI services by providing feedback on why you rejected the result. Afterwards click Next to proceed.
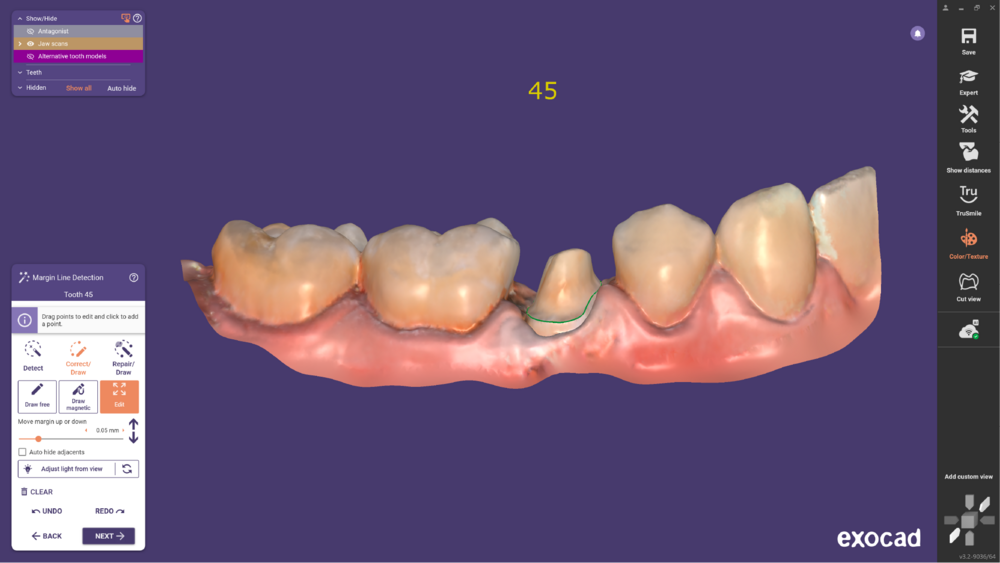 Continue as usual, defining the margin line and click Next to proceed.
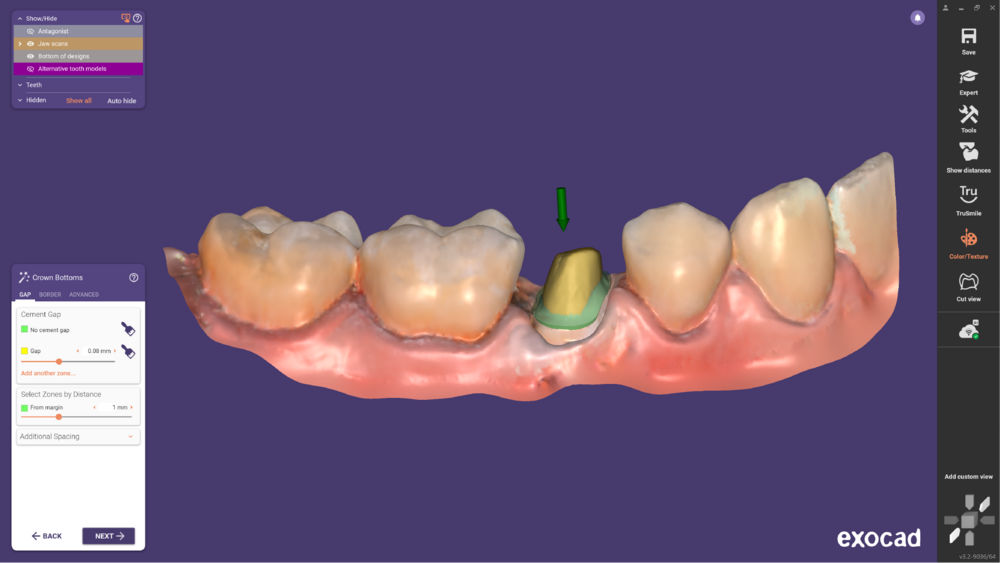 Then, define the crown bottom.
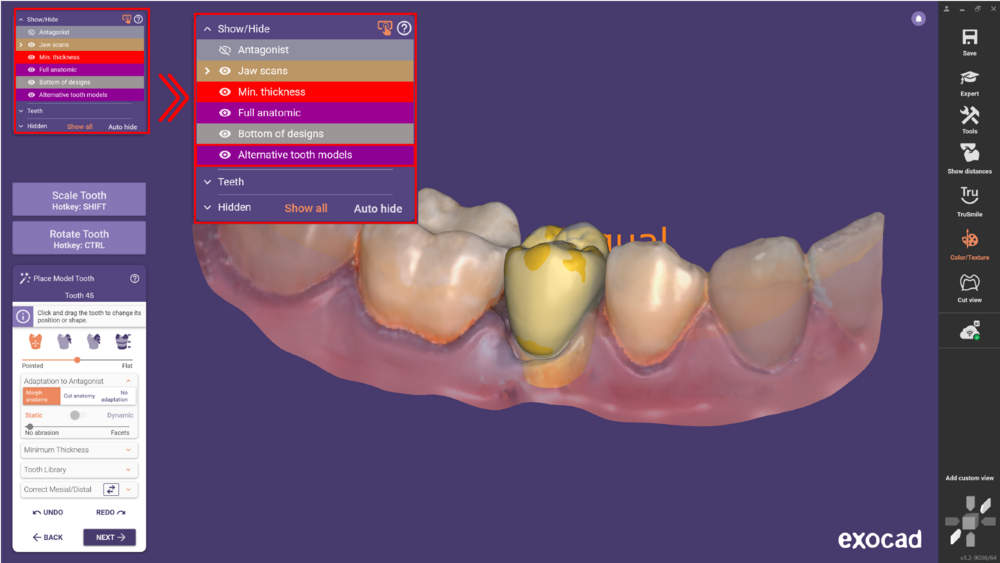 Clicking next you will enter the Place Model Tooth step. As you can see, the software kept the Alternative tooth models calculated previously, as a reference, under the Show/Hide menu.
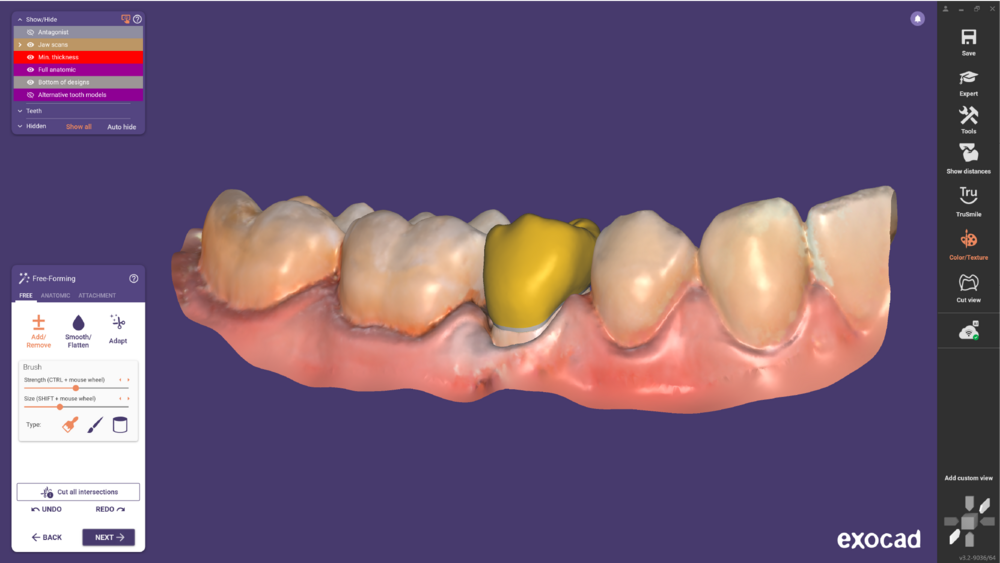 Then, you enter the Freeforming step.
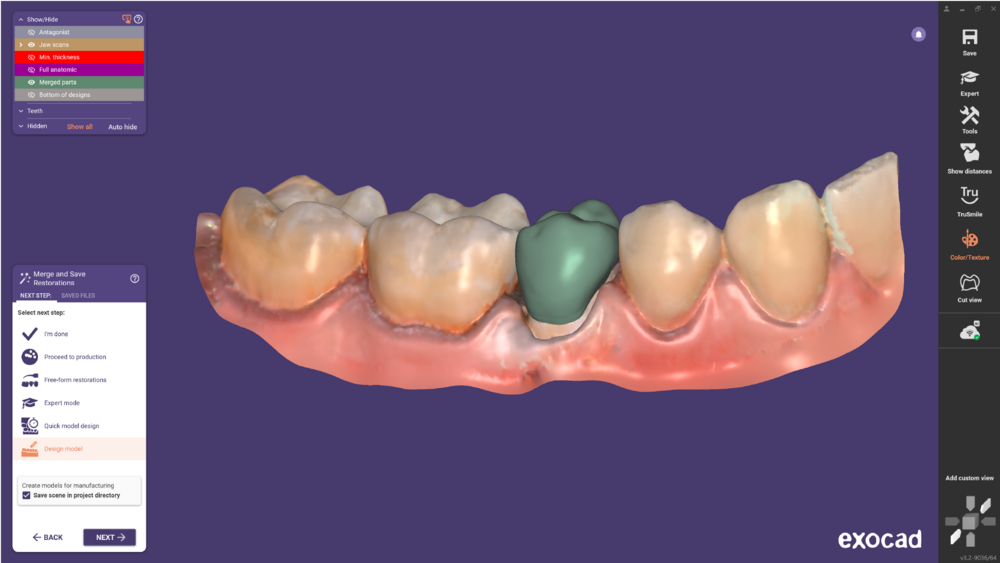 And finally, Merge and Save restorations.
Q&A
What types of cases and requirements are supported for AI crown generation?
AI crown generation is currently available only for the single anatomic crown or coping work type designed on prepared dies or implant-based custom abutments and screw-retained crowns. You must have an antagonist scan and at least one adjacent tooth.
What factors can negatively impact the results of an AI crown design?
The accuracy of AI crown design can be compromised by atypical or uncommon tooth arrangements. Examples include supernumerary teeth (extra teeth), agenesis (developmental absence of teeth), or premolarization (where teeth, such as molars or canines, exhibit characteristics of premolars).
Can I use AI crown design if my scan includes other elements, such as braces for orthodontic treatment?
Scans containing additional elements, such as braces, scan artifacts (e.g., floating fragments), or excessive material like plaster, can interfere with the analysis. These minor objects can negatively influence the outcome. To ensure accuracy, it is essential to avoid including unnecessary elements in the scan and to clean up any artifacts before using the tool.
What are the minimum requirements for a scan to use AI crown generation effectively?
For the AI crown design to deliver optimal results, the scan should cover an area that includes at least four teeth, along with surrounding gingival structures. The scan should also have minimal surface defects, such as holes or gaps. A high-quality, well-prepared scan is critical for achieving reliable outcomes.


