Defining the Margin and Surface Properties
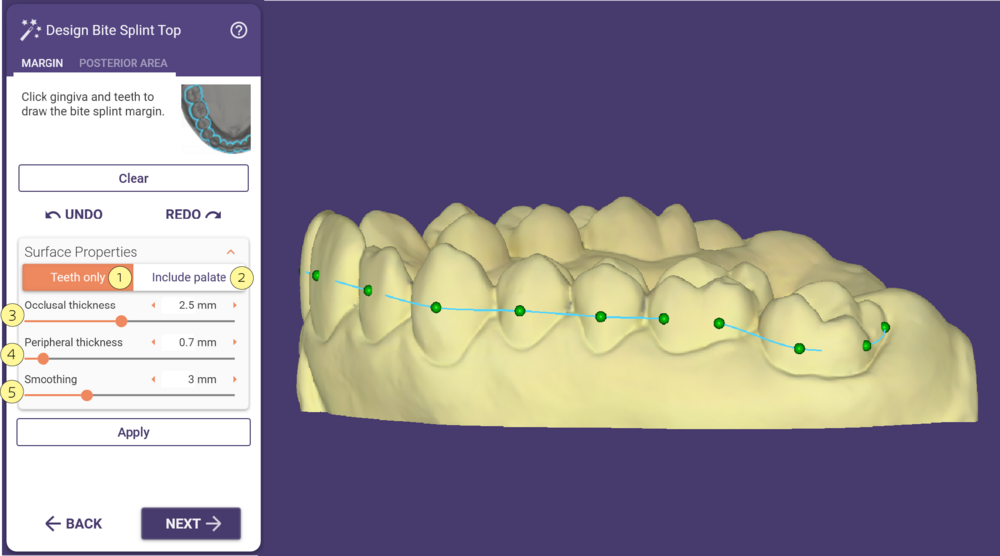
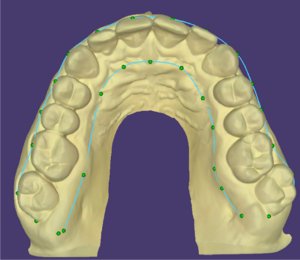
Left-click points around the model (on gingiva and/or teeth) to define the margin line.
| Try not to have sharp points in the margin line curve |
Expand the surface properties section, and select Teeth only [1] or Include palate [2], depending on the type of splint you are designing. In case the margin line covers teeth and palate it is mandatory to include the palate.
The sliders allow you to define the thickness of the different areas and the outer smoothing of the splint.
[3] Occlusal- The thickness of the occlusal surface of the model
[4] Peripheral- The thickness on the axial walls of the model
[5] Smoothing- Controls the smoothness of the top surfaces of the splint. The larger the number, the smoother it will be.
After the parameters are set click Apply.
Defining the Posterior Area
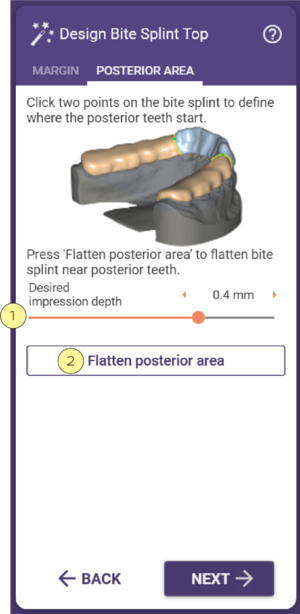
You can flatten the posterior area of the bite splint by clicking two points on the splint where the posterior region starts,
setting the Desired impression depth [1], and clicking Flatten posterior area [2]
The next set will take you to "freeform the bite splint top" which is similar to free-forming, see Freeforming "Free" tab.


