3D Data Editor
Using the 3D Data Editor, you can crop meshes, close holes, and divide one mesh into multiple meshes. You can use it to edit any mesh data (e.g. jaw scan) or to fix problems in the mesh prior to model creation.
Access the 3D Data Editor by clicking a mesh and selecting Scan Data Editor in the Expert toolbar, or by right clicking
a mesh and selecting Edit mesh in the context menu.
You select areas of the scan by left-clicking points to highlight area(s) of the scan you want to edit. Double-click the last point to complete the outline.
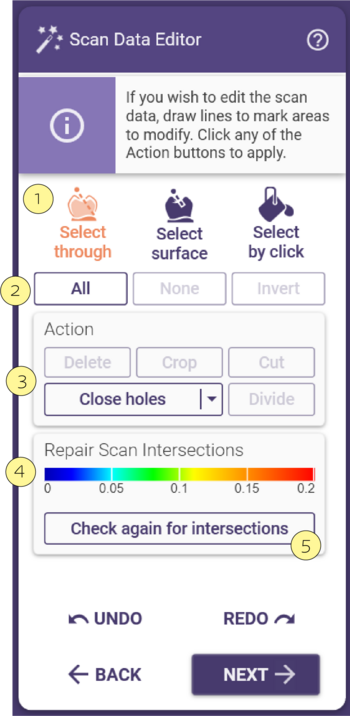
[1] You can select the surface(s) to be affected by the outline you draw, this should be done prior to the editing action:
- Select straight through will highlight all surfaces, even those hidden behind the visible surface
- Select only surface will highlight only the visible surface(s) and ignore any surfaces hidden behind
- Select by click on surface is useful to choose one of many overlapping surfaces
[2] You can define selections globally without drawing an outline:
- All will highlight all surfaces of the scan
- None will clear all existing selections
- Invert reverses the highlighted and non-highlighted regions of the scan
[3] You can choose what action is performed on the highlighted region(s)
- Delete will remove all of the highlighted surfaces.
- Crop will remove all of the non-highlighted surfaces, preserving only the highlighted surface.
- Cut will cut the part of the mesh you have marked. The marked part of the mesh will not be deleted. Instead, a new mesh will be created which is then shown in a list in the 3D Data Editor window.
- Close Holes will look for completely highlighted holes, and close them with artificially generated surfaces, interpolated from surrounding edges.
- Divide separates each area of highlighted scan data into a separate surface.
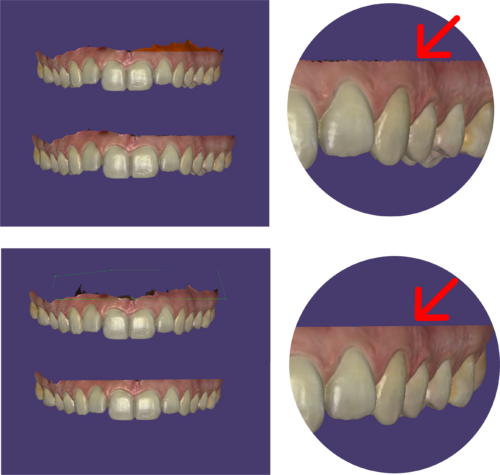
It is common in some scan types to have intersections (overlapping data) between the upper and lower scan, the maximum intrusion is displayed
[4] If this checkbox is active, a color scale corresponds to the depth of the intersection.
[5] Repair will automatically adapt the model scan to create an intimate contact with the intersecting surface.
| To unmark areas, re-select the area while holding SHIFT. |
| In case you have removed/changed too much in a scan, use Undo or Cancel to revert all unwanted changes. |


