Placement of library teeth


The software will load library teeth and positions them automatically. In this step, you can manually optimize the position of the model teeth by moving, rotating, and scaling. Switch between these modes using the buttons Placement Correction [1-3]. Then, simply drag and drop the mouse on the teeth to make your adjustments.
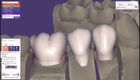
| Model teeth are displayed in yellow – this means that they are responsive to mouse actions. |
For crown preparations, don't be overly concerned about positioning accuracy at this point. You can always do fine-tweaking later in the "Free-forming" step. It doesn't matter if the model tooth doesn't properly fit the preparation; as long as the tooth model is positioned somewhat reasonably in relation to the preparation, the software will adapt the library tooth automatically in the next step.
For inlay preparations, accurate positioning is crucial already at this point. The closer you position the model tooth to the prepared tooth, the better the result will be, so it is worth investing a little more time here.
Contents
The 'Simple' Tab

- To move a model tooth: Activate Move [1]. Then, click the model tooth you want to move and drag it to the desired position. To restrict movement to certain directions, activate a corresponding radio button [4].
| While in 'Move' mode, you can also rotate and scale a tooth by using hotkeys. To rotate a tooth, hold CTRL. To scale a tooth, SHIFT. For direction-based scaling, hold CTRL and SHIFT. |
- To rotate a model tooth: Activate Rotate [2] or use the shortcut in 'Move' mode. Click the model tooth you want to rotate, hold the mouse button and drag. Rotation center is the tooth model’s center. To restrict rotation to certain directions, activate a corresponding radio button [4].
- To scale a model tooth: Activate Scale [3] or use the shortcut in 'Move' mode. Click the model tooth you want to scale, hold the mouse button and drag. A green arrow indicates the scaling direction. To perform direction-based scaling, hold CTRL and SHIFT. To restrict scaling to certain directions, activate a corresponding radio button [4].
| A semi-transparent display of the model teeth might help you see both the prepared tooth and the model tooth, thus facilitating accurate placement. Right-click Anatomic shapes in the 'Show/Hide groups' window to toggle transparency for all library teeth. |
An orange color (for example [6]) marks an area where the tooth model is placed so close to the preparation that it lies within the material's minimum thickness. The software will automatically fill these areas during the adaptation of the tooth models. So, in the area marked by [6], once the tooth is adapted to the preparation, the fissure will not be as deep as in the original model tooth, due to the restriction enforced by the minimum material thickness.
| Instead of using the mouse for switching between modes [1-3], you can also leave button [1] pressed and use hotkeys to quickly toggle modes – this will save you a lot of time : Hold <CTRL> to switch to rotation, <SHIFT> to switch to scaling. Note that whenever hotkeys are available, they will be displayed in a "tool tip" for the respective button. So, in this case, you can simply move the mouse over button [1], and a help bubble will appear which reminds you of the available hotkeys. |
When placing tooth models, it may be helpful to visualize intersection with the antagonists, if you have performed an antagonist scan ("Show distances" in CAD buttons). See the section Visualizing contacts and occlusions for details.
Restricting Movements
In some cases, it may be useful to restrict possible movements to certain directions. Especially novice users who are not yet used to navigation in virtual 3D space will appreciate the options [4] which allow you to limit movements/scaling only to:
- Mesial/distal direction
- Buccal/lingual direction
- Occlusal direction ("up and down"
- Mesial/distal and buccal/lingual direction ("move to all sides, but keep height")
Moving all teeth simultaneously
You can move all teeth simultaneously by checking checkbox [5]. This is useful e.g. when all teeth are positioned too low or too high in the software's initial setup suggestion.
When done with the adjustments, click 'Next' to proceed to the next step. The model teeth will then be adapted to the preparations.
The 'Chain Mode' Tab for quick bridge setup (as of 2016 version)
As of 2016 versions of exocad DentalCAD, you will find the tab 'Chain Mode' in the Tooth Placement dialog. This tab gives you access to the new 'Chain mode', a new method for quick setup of large bridges.

Choosing a Different Tooth Model
To replace a tooth model with a different model (e.g. to put a premolar-shaped tooth on a molar preparation, due to space restrictions), right-click the tooth to replace and choose Load custom tooth model... - you can now select a different tooth model.