Bite Splint Bottom
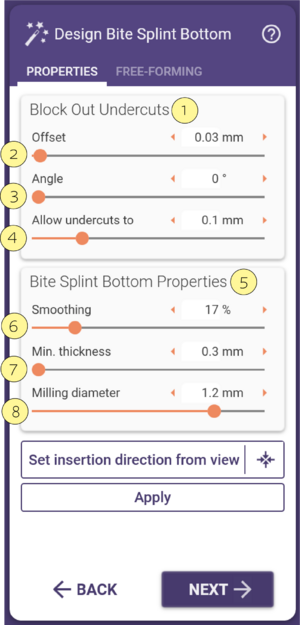
This step controls the retention of the bite splint. In the tab properties there are two sections Block out undercuts [1] and Bite Splint Bottom Properties [5]
Control the parameters by typing a value or by adjusting the slider.
[2] Offset - This controls the digital spacer which is layered on the model.
[3] Angle - This specifies the amount of draft angulation in relation to the insertion axis.
[4] Allow undercuts up to - This is for the maximum amount of retention.
In the section Bite splint bottom properties [5], there are also 3 sliders.
[6] Smoothing - Controls the target smoothness of the bottom surface of the splint. The larger the number, the more smooth it will be.
[7] Min thickness - This is the minimum thickness of the bitesplint.
[8] Milling diameter - you can choose the diameter of the tool to be used for milling. It is beneficial to choose a value slightly higher than the diameter of the actual tool you are using, e.g. choose 1.2mm when milling with a 1mm tool.
Insertion direction
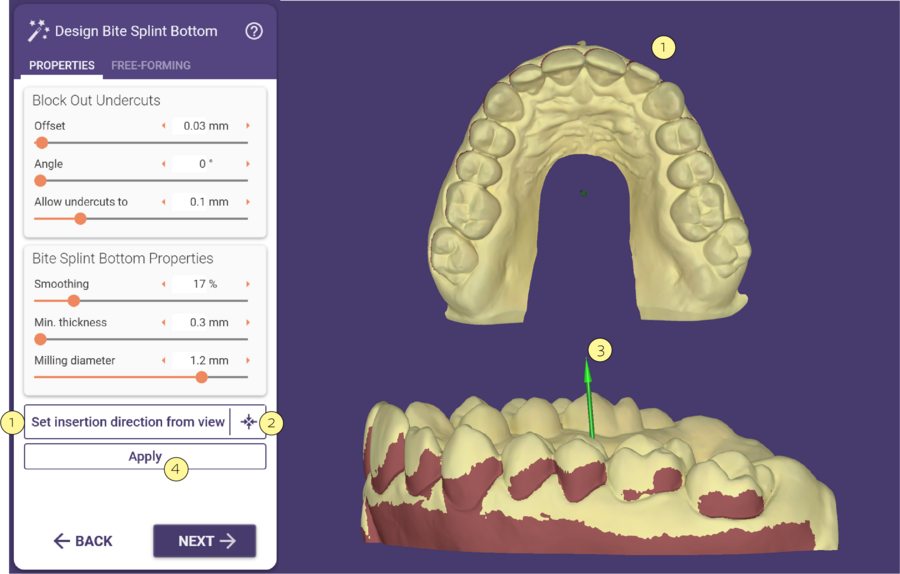
 To set the insertion direction from view, rotate the model to the occlusal view and click Set insertion direction from view [1].
To position the model in the center of the screen click on the symbol [2].
You can also adjust the insertion direction by clicking and dragging the green arrow [3].The dark red undercut area will be updated in real-time.
When finished setting the parameters and the insertion direction click the Apply [4] button.


