The new iTero-exocad connector™ 2.0 improves lab-doctor collaboration. The user has the option to share a 3D design preview directly out of the DentalCAD software in any design step with the doctor. Follow these step-by-step instructions to optimize your lab-doctor interaction:
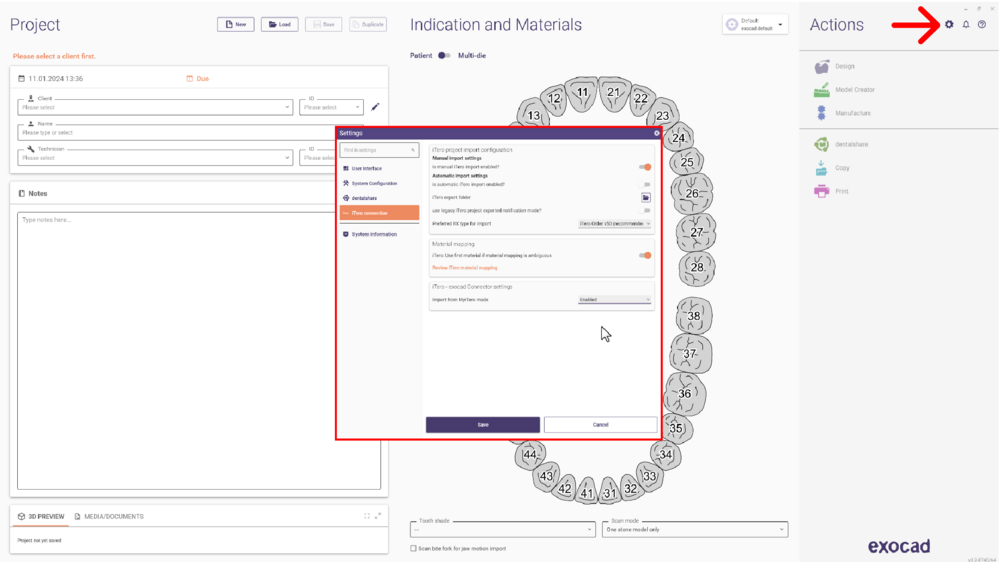
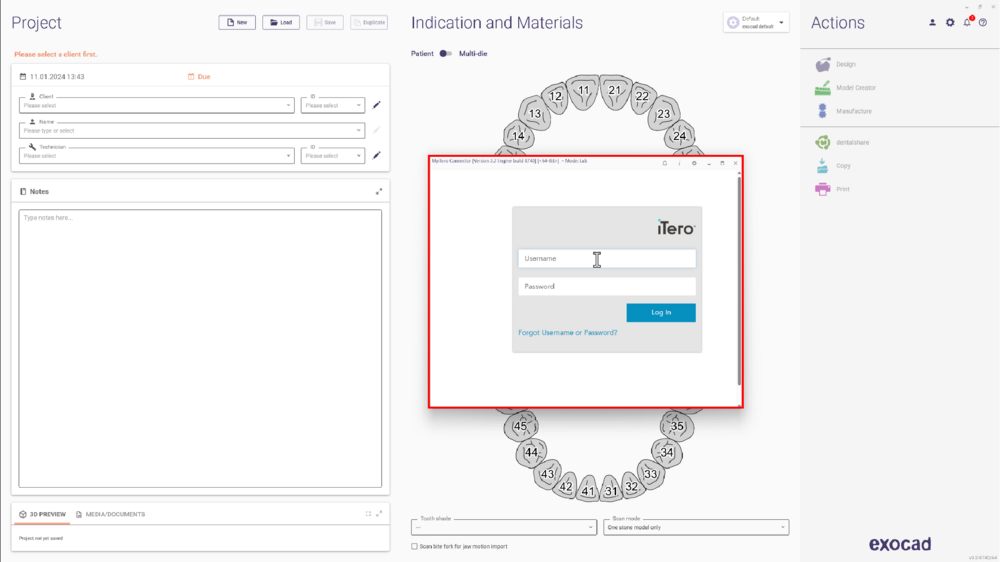
- Start by making sure that the Import from MyiTero mode under iTero-exocad Connector settings is Enabled in DentalDB. You can find these options by opening the Settings menu on the iTero connection section. Don't forget to Save and restart DentalDB.
- Then, Log in into the My iTero connector.
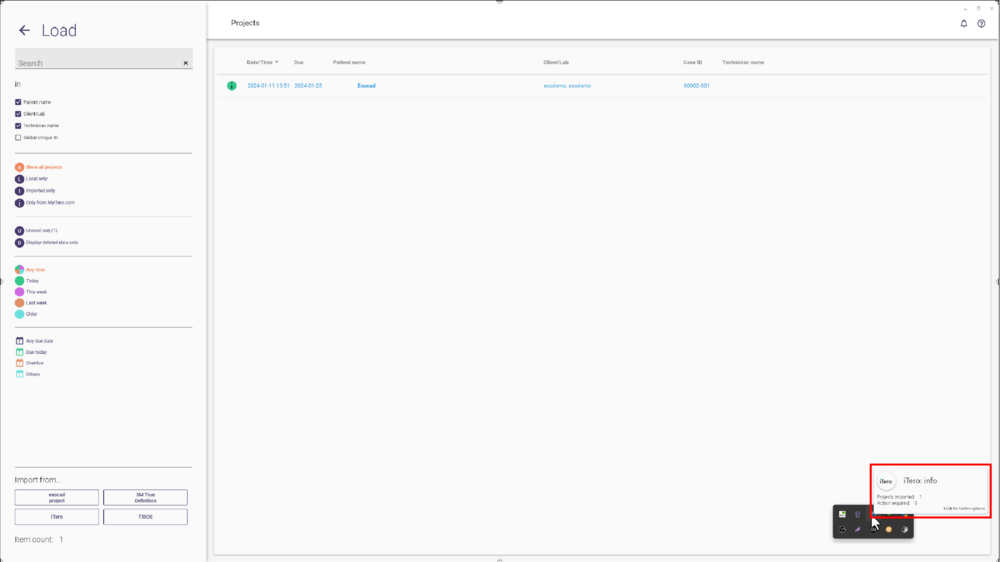
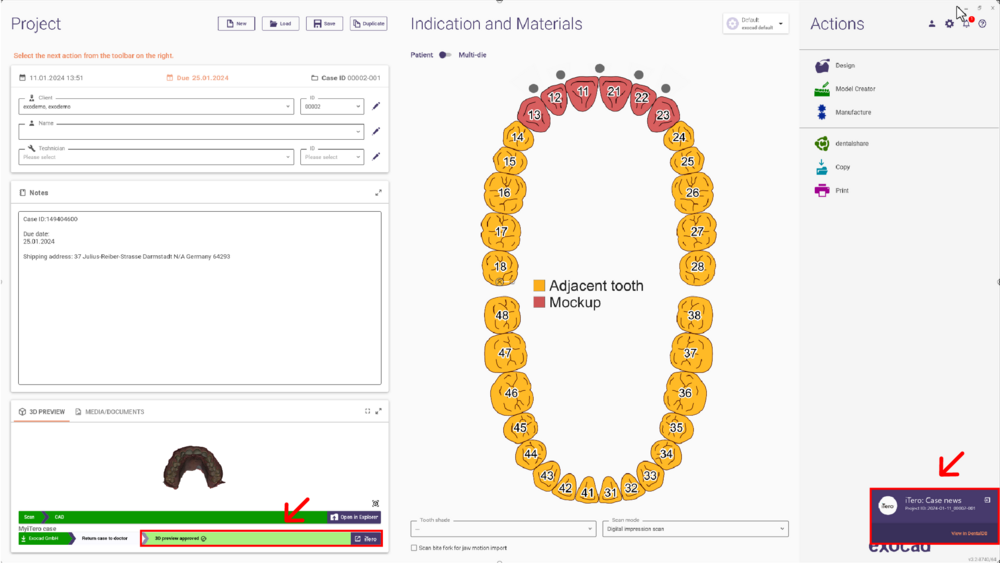
- After login, at the bottom right corner of the screen, find information status related to iTero cases.
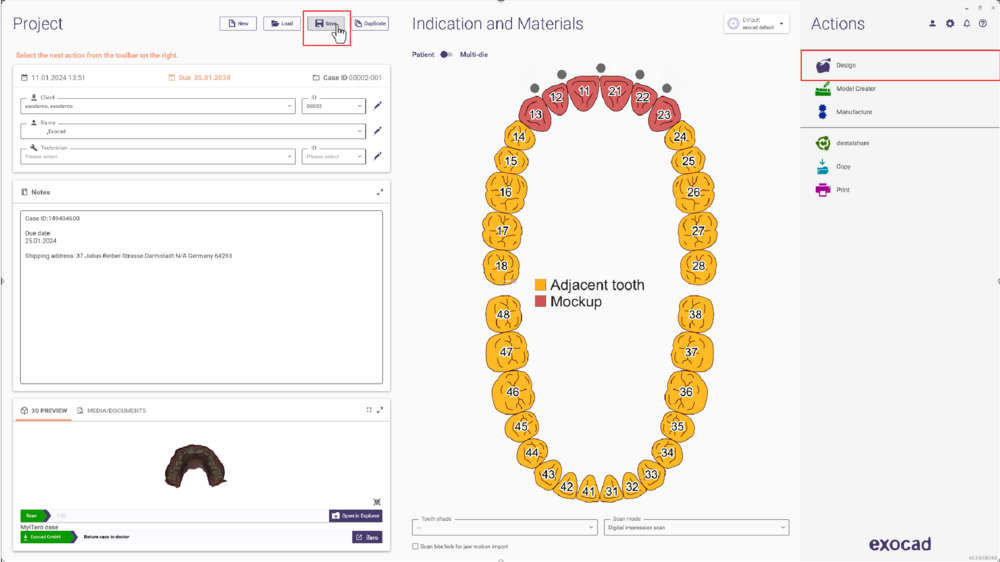
- Choose the restoration type, save the case, and initiate the design process.
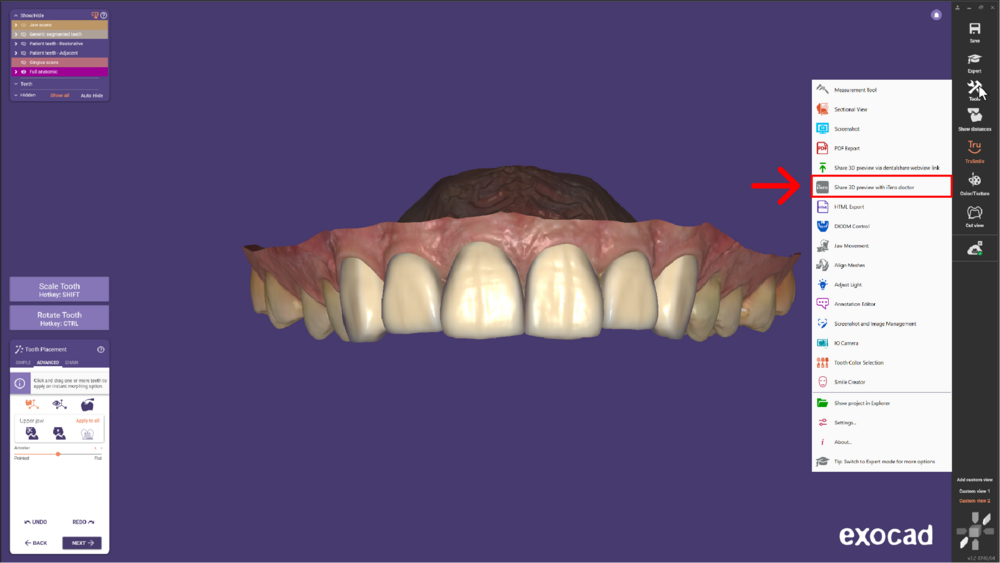
- Design the case as usual. At any point, click on Tools and select the option Share 3D preview with iTero doctor.
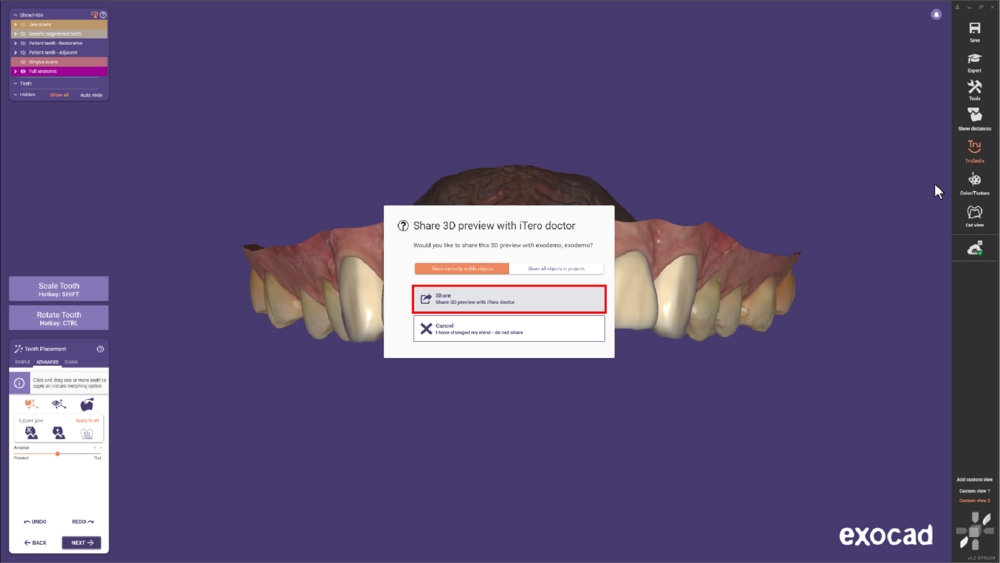
- Choose the objects to include and confirm the sharing option Share 3D preview with iTero doctor.
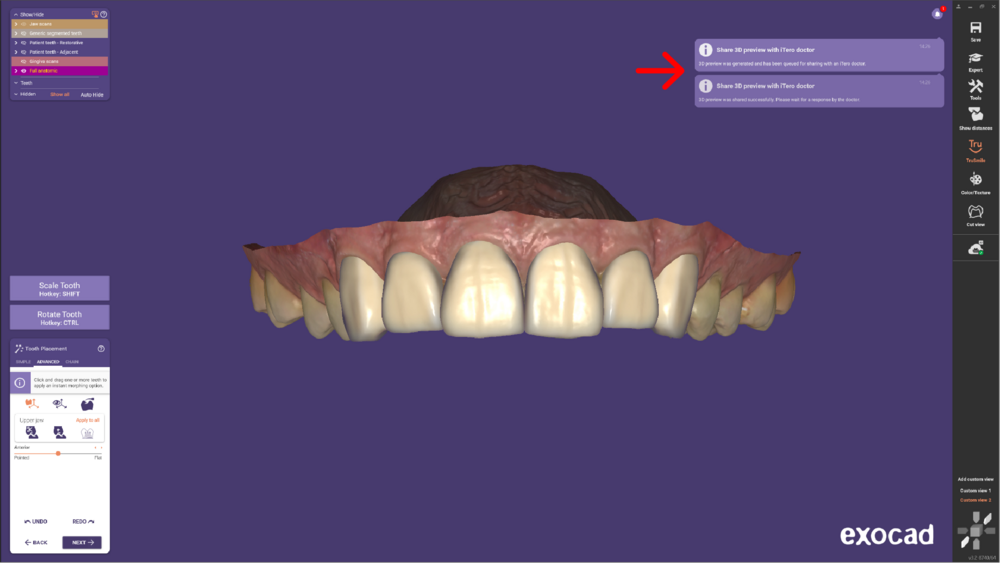
- Then, a notification will pop up informing that the 3D preview was generated and shared successfully.
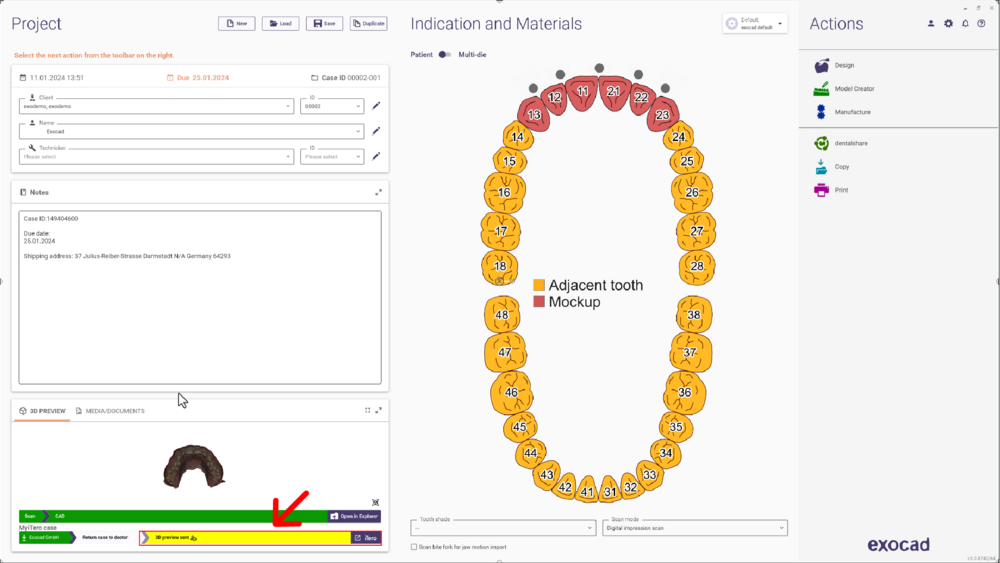
- After that, there is a status bar with the message 3D preview sent.
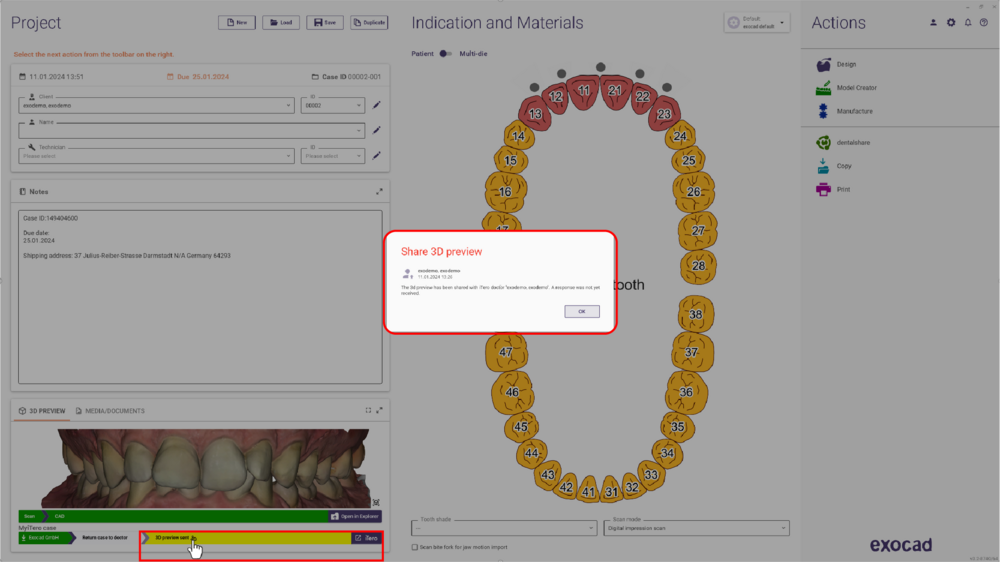
- Click on the status bar for additional information.
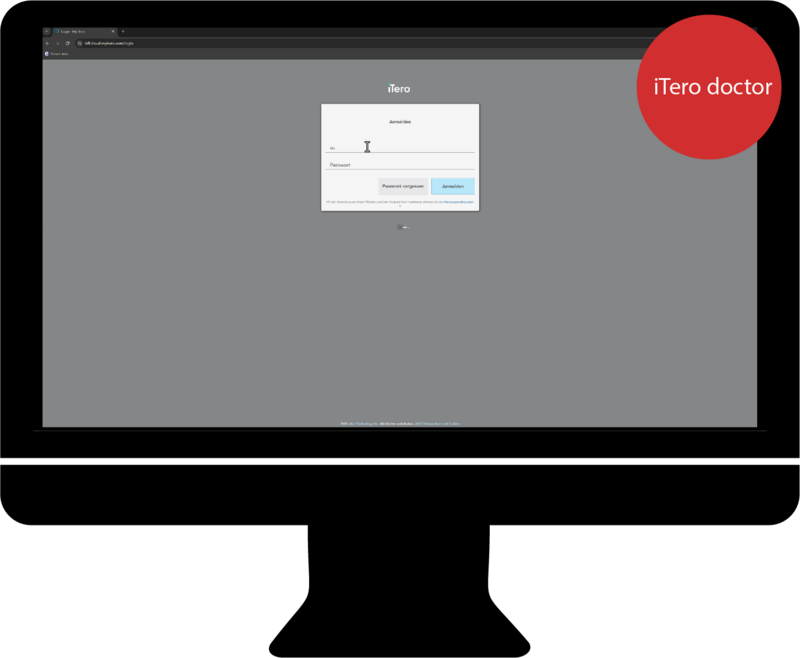
- At this point, the iTero doctor can log in to their account.
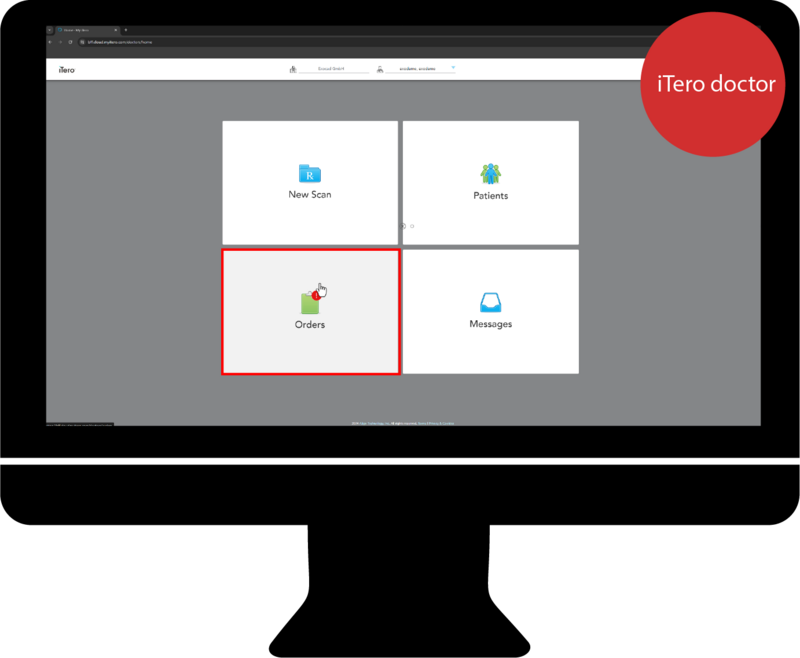
- Opens the Orders menu.
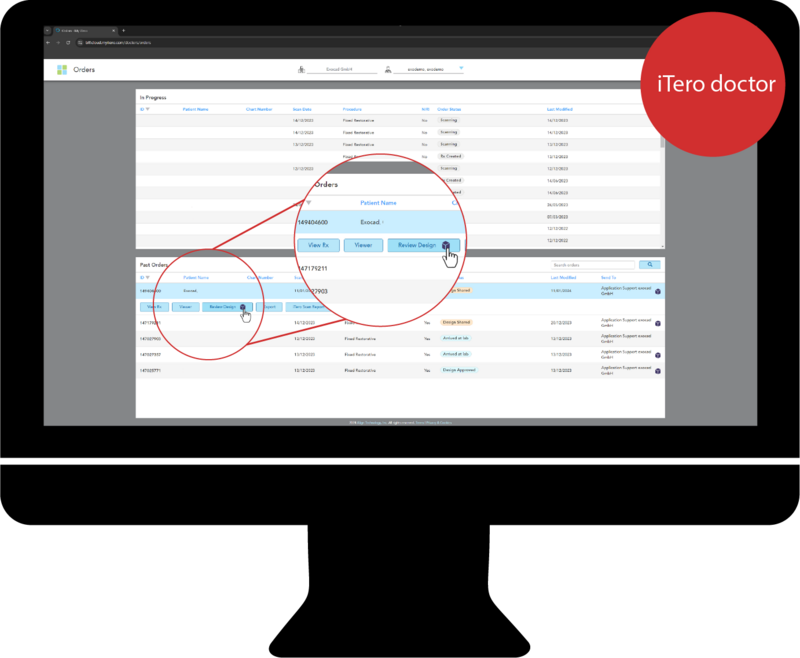
- And then, find the case and select the Review Design option.
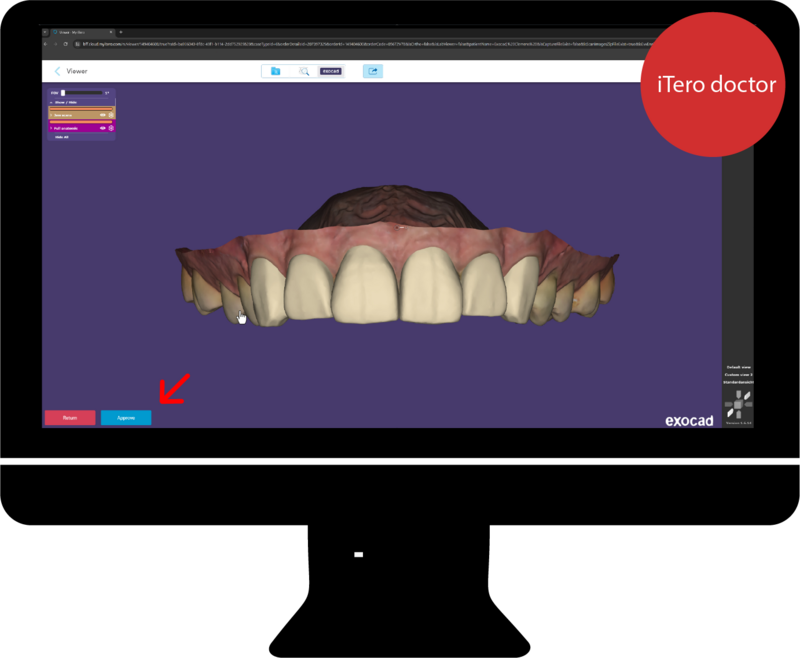
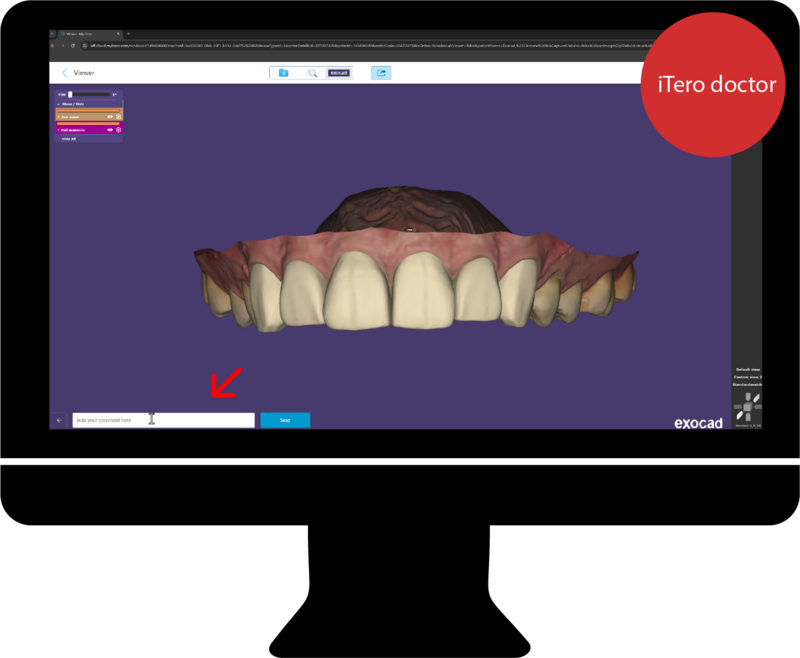
- It opens the Design and the iTero doctor can check the design using the 3D viewer. Click Approve to proceed with the production or Return to ask for improvements.
- Clicking one of the options you can add a comment about the result.
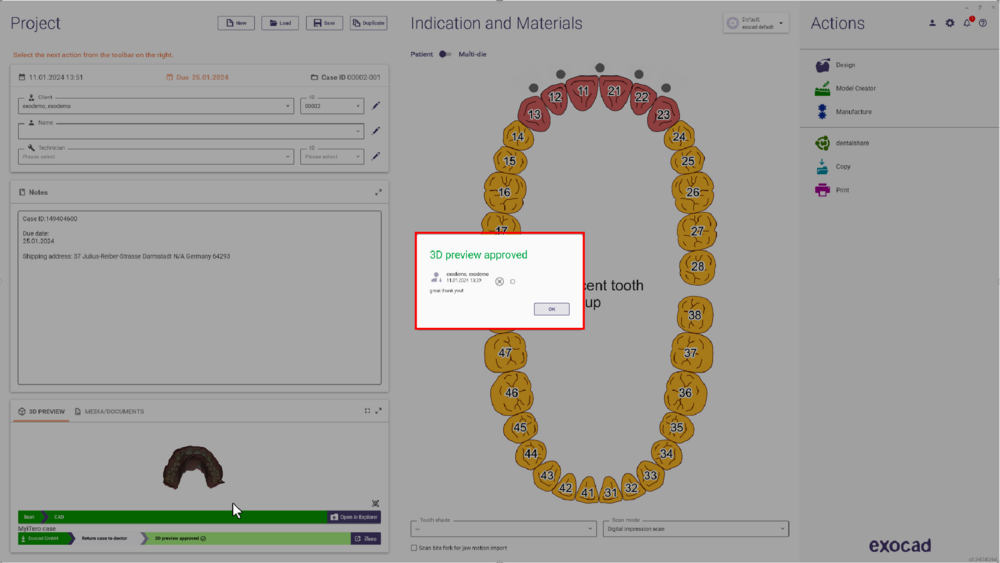
- After sending the case, the lab receives a message informing that there is news about a case. The status bar changes to 3D preview approved.
- Clicking the status bar, you can access detailed information and the message sent by the iTero doctor.
By following these steps, you enhance communication and collaboration, reducing the need for unnecessary remakes and improving the overall efficiency of the design and approval process.


