Contents
If the project is defined properly in DentalDB and the Jaw Motion Import Add-on module is activated on your machine, you can load and visualize patient-specific jaw movement data. Based on this patient-specific data, you can generate a virtual imprint and use this in place of the virtual articulator. The virtual imprint can be used in place of simulated virtual articulator movements.
| The Jaw Motion Import Module needs to be activated on your machine in order to load the jaw movement data. |
Aligning the bite fork scan
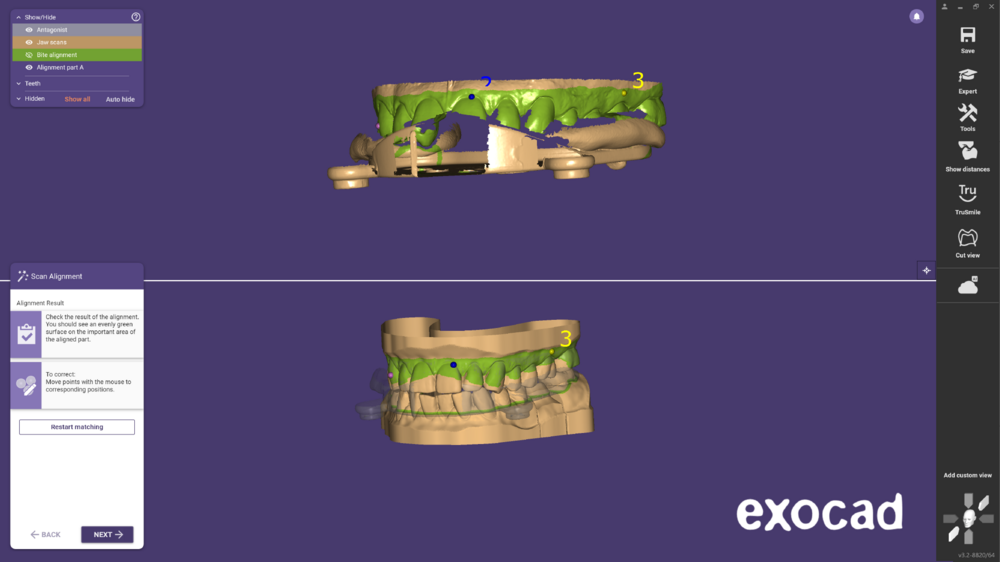
In the first wizard step, DentalCAD aligns the bite fork scan with the scan data. The Scan Alignment window and the main view display both jaw scans separately on a split-screen. If needed, rotate the scans separately in the split-screen to achieve a similar orientation. Click a common point on both jaw scans. To add a second point, click holding CTRL and DentalCAD matches the jaw scans and will update the main view and Scan Alignment window.
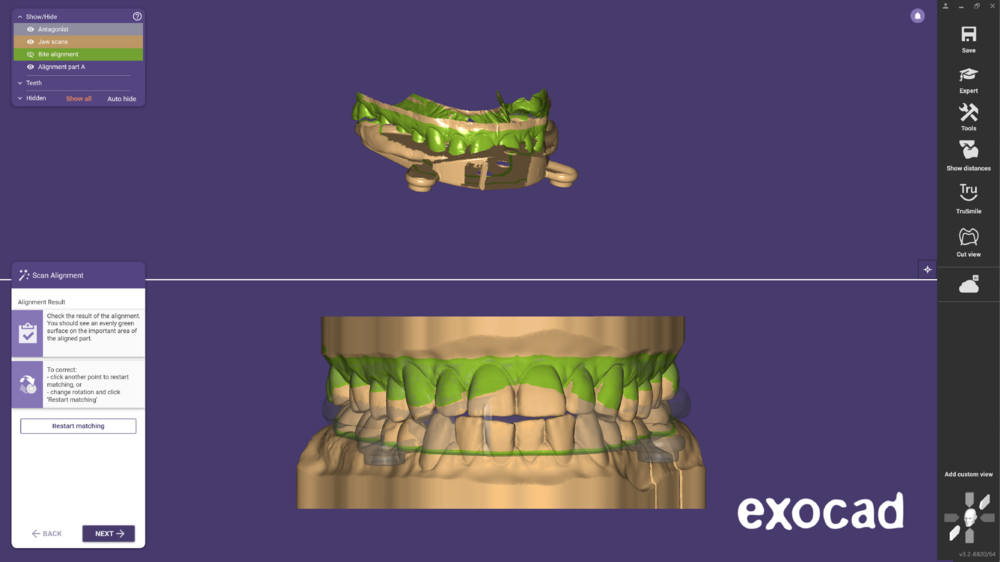 If you see an evenly green surface in the relevant area on the scans, the result is accurate. To improve the alignment result, if
necessary, you can click another point holding CTRL on the jaw scans or drag the points and restart matching.
Selecting the jaw movement type
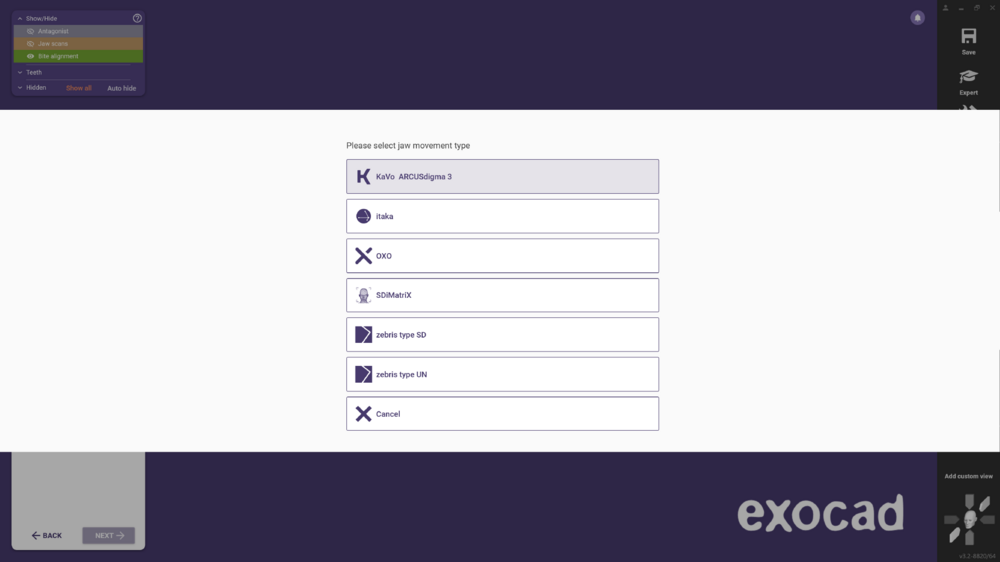
After aligning the bite fork scan, click Next to reach the jaw movement type selection dialog, where you are prompted to select a jaw movement type as shown in the figure below.
Aligning the bite fork model
After you have selected a jaw movement type, DentalCAD aligns the bite fork model with the bite fork scan.
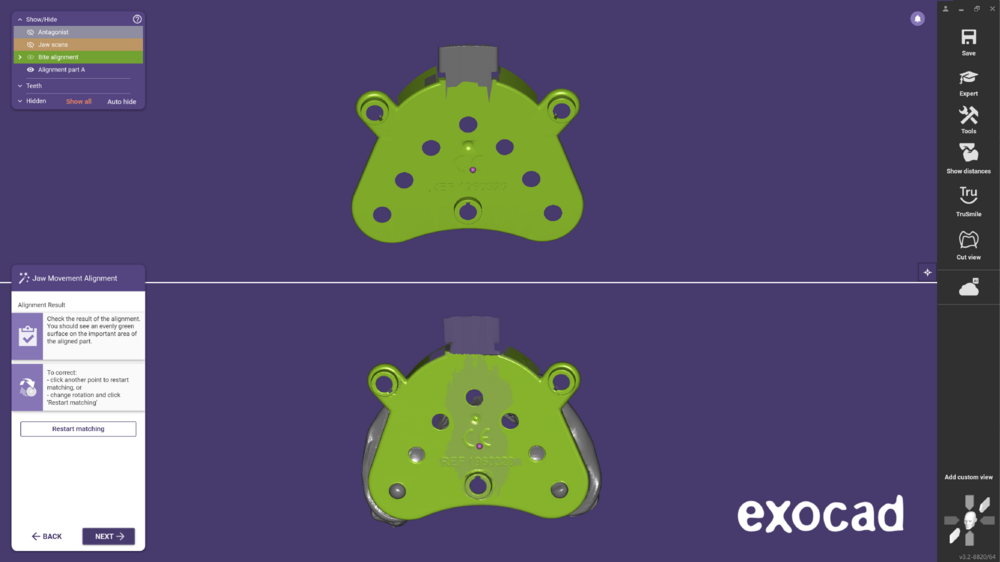 If you see an evenly green surface in the relevant area on the scans, the result is accurate. To improve the alignment result, if
necessary, you can click another point holding CTRL on the fork or drag the points and restart matching.
Loading jaw movement data
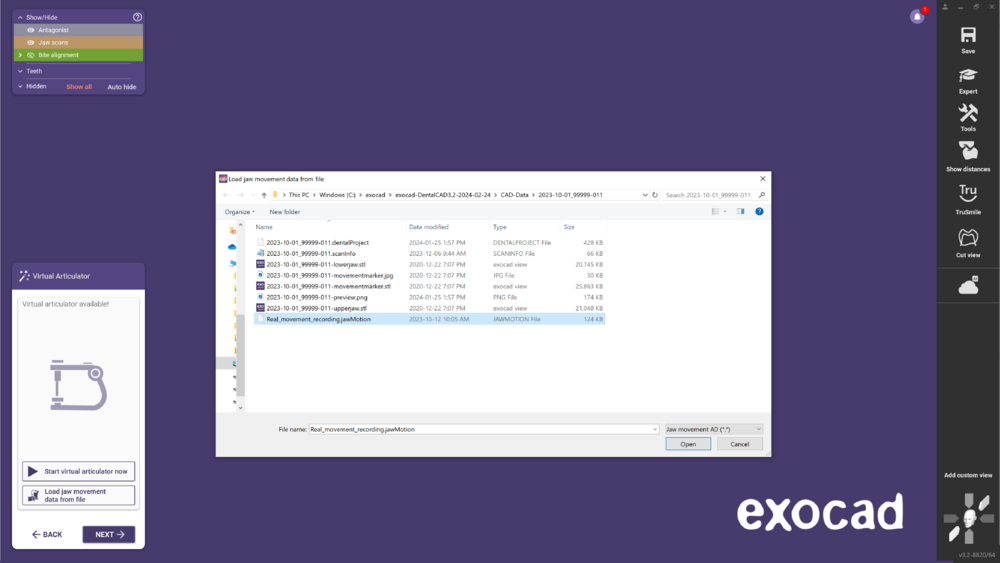 In the next wizard step, choose to start the articulator now or to Load jaw movement data from file. If you choose the latest, it opens an explorer window prompting you to load a jaw movement file. Alternatively, you can drag&drop a jaw movement file into the main view, copy&paste a jaw movement file into the main view or drag the path to a jaw movement file into the main view.
Inspecting jaw movement data and generating a virtual imprint
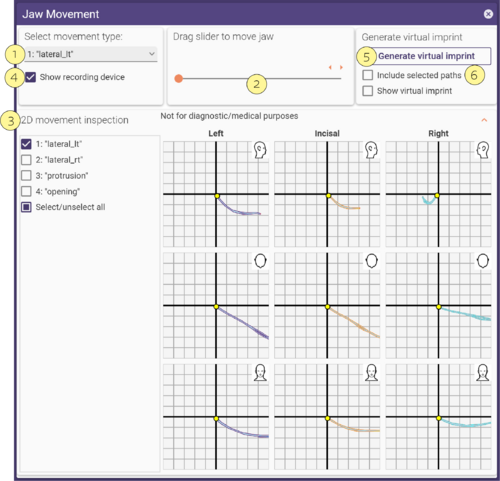
Next, you will be able to inspect the jaw movement data in the Jaw Movement window. Select the movement type you want to inspect from the drop-down menu Select movement type [1]. Note that the selectable movement types depend on the loaded jaw movement file. You can observe the visualized jaw movement in the main view by dragging the slider [2] and by expanding the 2D movement inspection section [3], where the jaw movement is visualized in a 2D movement table. In the table, you can zoom into individual cells by scrolling the mouse wheel and adjust the observable area within a cell by left-clicking and dragging. Toggling the checkbox Show recording device [4] shows/hides the bite fork model in the main view.
Clicking the button Generate virtual imprint [5] starts the process of generating a virtual imprint. You can choose which movement paths to include in the virtual imprint generation process if you have activated the checkbox. Include selected paths [6]. If the checkbox remains deactivated, only the selected movement type in [1] will be used to generate the virtual imprint.
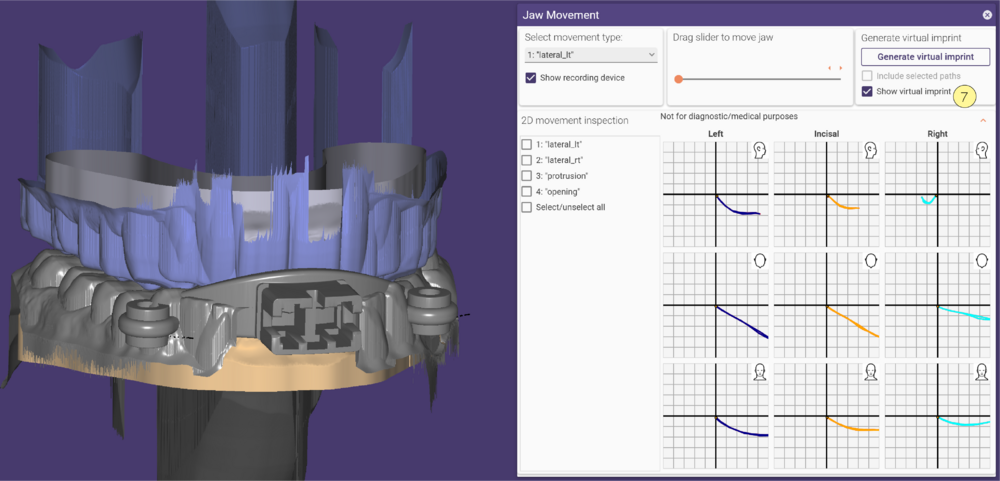
The figure above shows an example of a generated virtual imprint. Activate the checkbox Show virtual imprint [7] to visualize the virtual imprint in the main view.


