Contents
Design implant-based restorations using the immediate load workflow
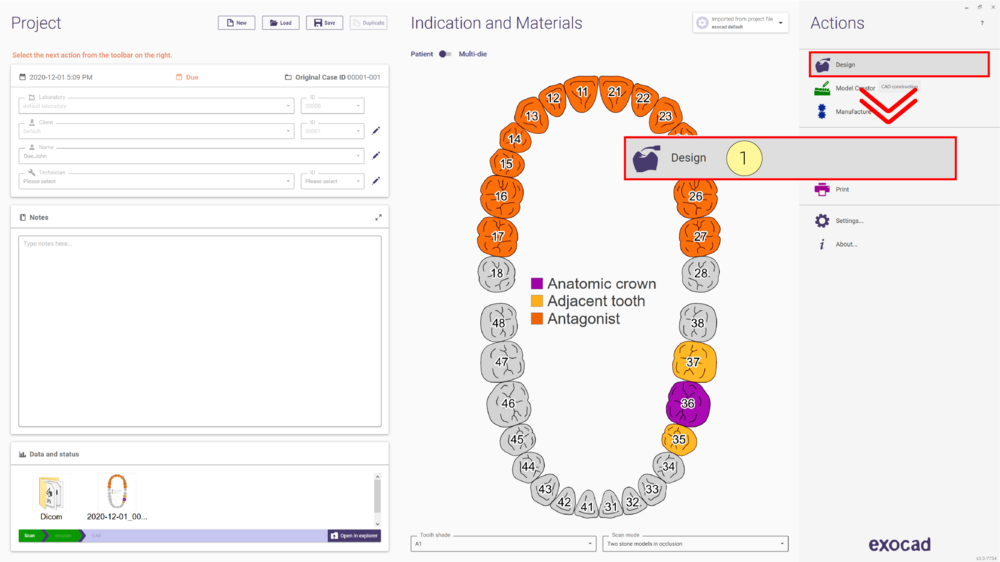
Step 1: Using the same DentalDB for exoplan and DentalCAD, finishing the implant planning you can directly click the Design [1] button to start DentalCAD.
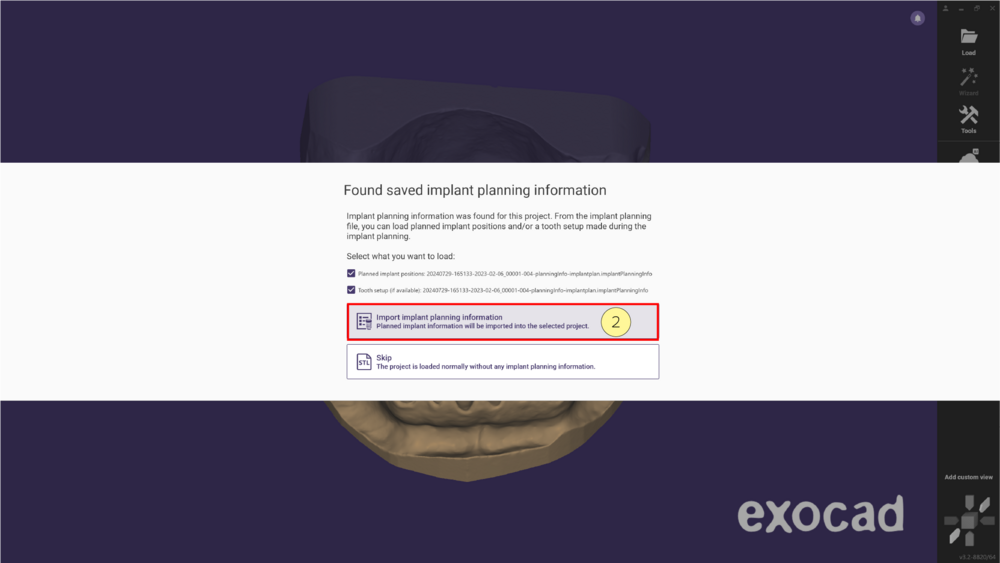
 Step 2: Implant planning information is found by the software, and you can decide by checking/unchecking the box, to import the planned implant positions and the tooth set up. After selecting the option/s click Import implant planning info file [2].
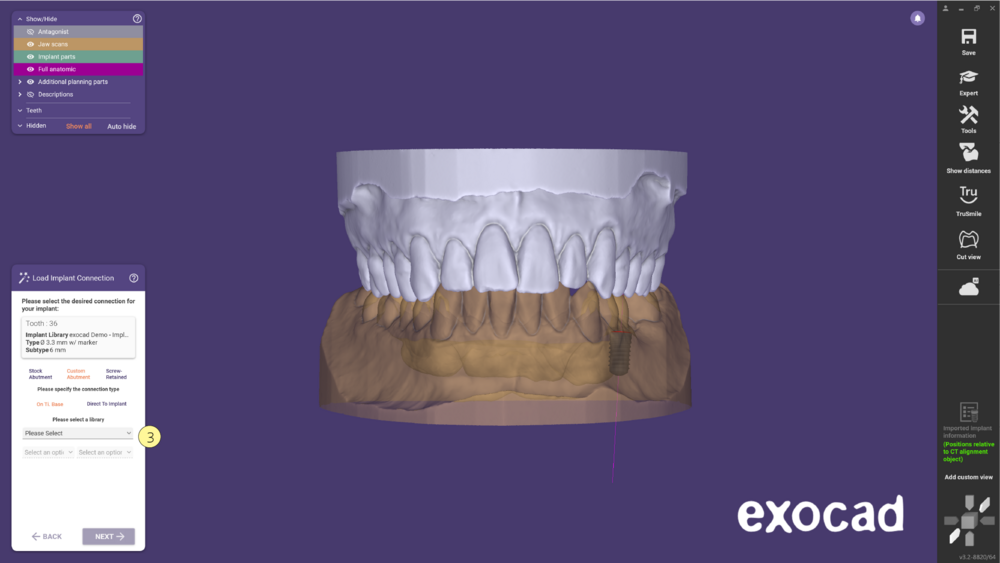
Step 3:At this point, select the desired connection for the implant, and clicking ‘’Next” the Wizard will guide you through the design process [3].
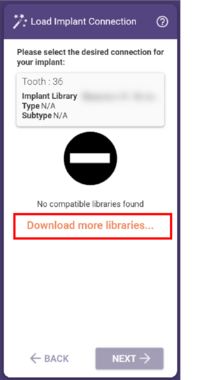
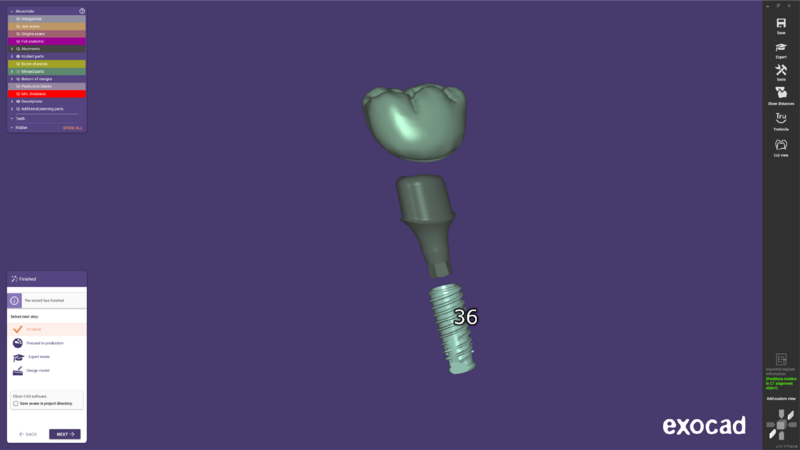
If instead of [3], you get the following message, you do not have a compatible library installed. Visit this page to be sure that the implants used have compatible components and click Download more libraries... to install them. Check
Library setup for immediate load workflow for detailed instructions on this topic.
Import implant planning into DentalDB to design implant-based restorations using the immediate load workflow
After planning the position of one or more implants using exoplan, the output data can be imported into DentalCAD to design implant-based restorations.
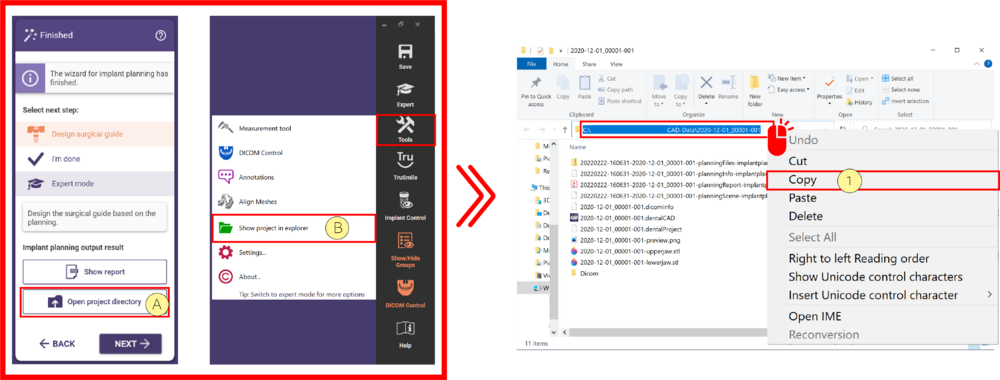
 Step 1: Import the exoplan project to DentalDB and start the design process with DentalCAD. Open the project in the file explorer window, by clicking "Open project directory" [A], or click Tools in the main toolbar and select the option ‘’Show project in explorer" [B].Then, copy the path of this folder [1].
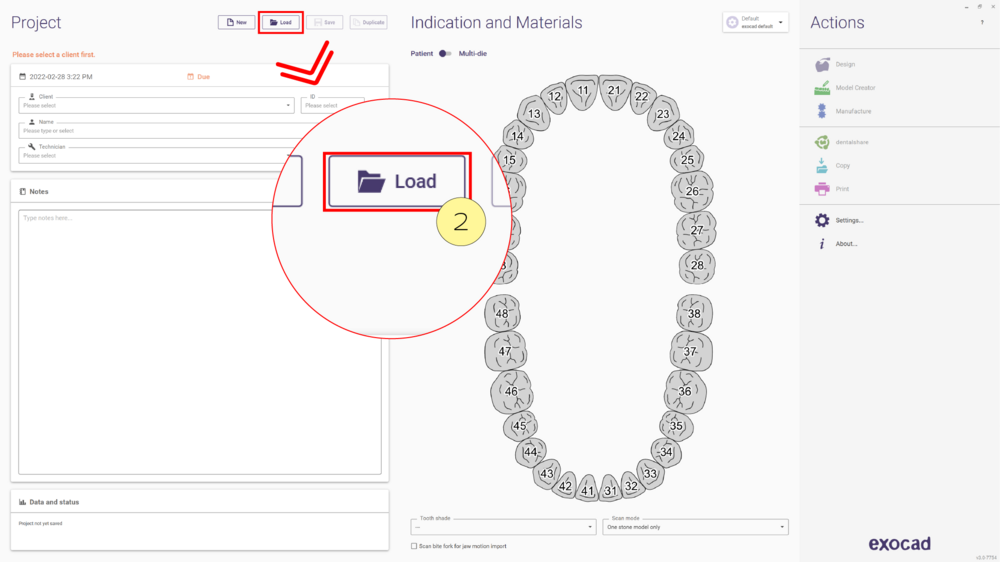
Step 2: Open the DentalDB and click Load [2].
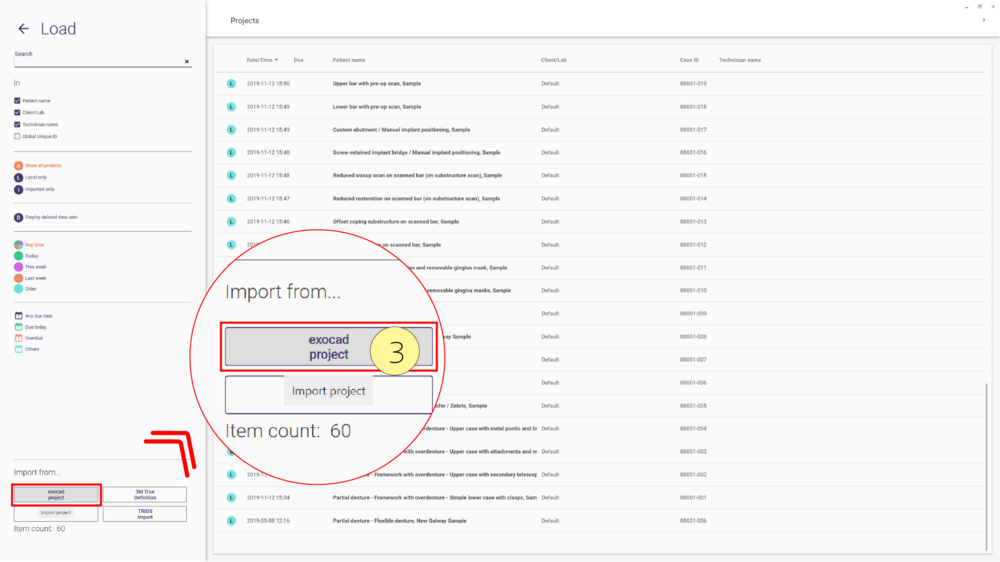
Step 3: Click import from ... exocad project [3].
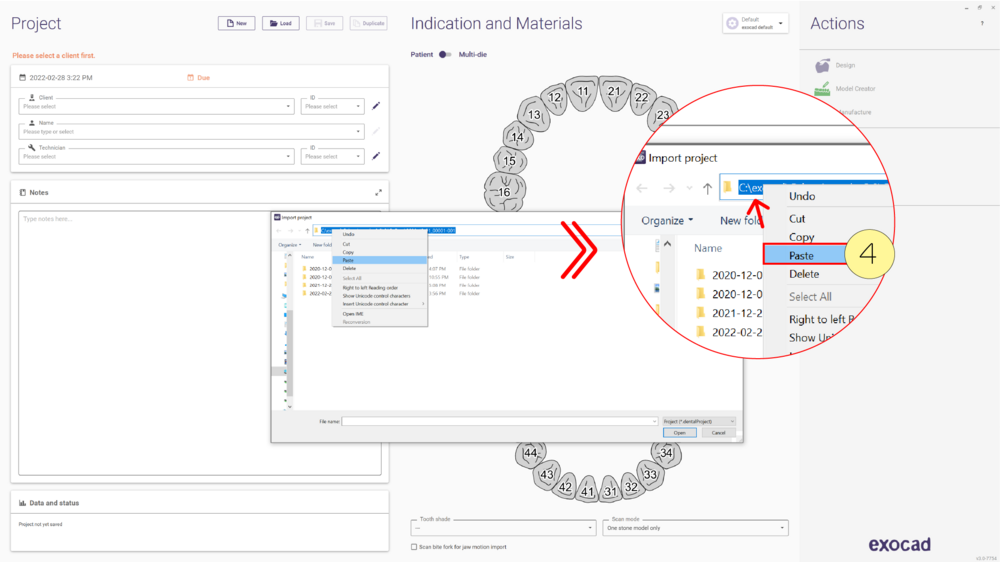
Step 4: The project window opens and Paste [4] the location copied previously in Step 6. Click enter to apply.
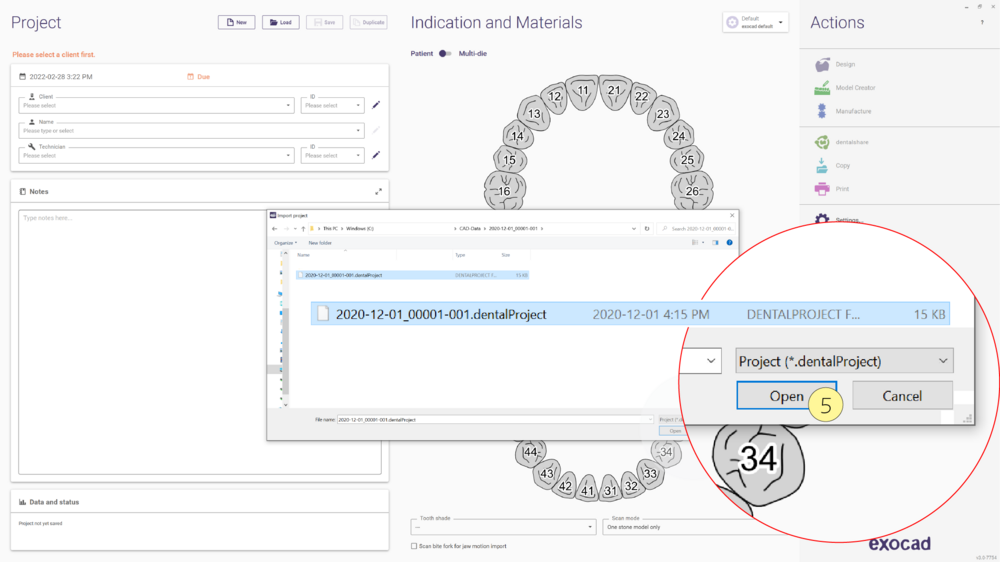
Step 5: Select the .dentalproject file and click Open [5].
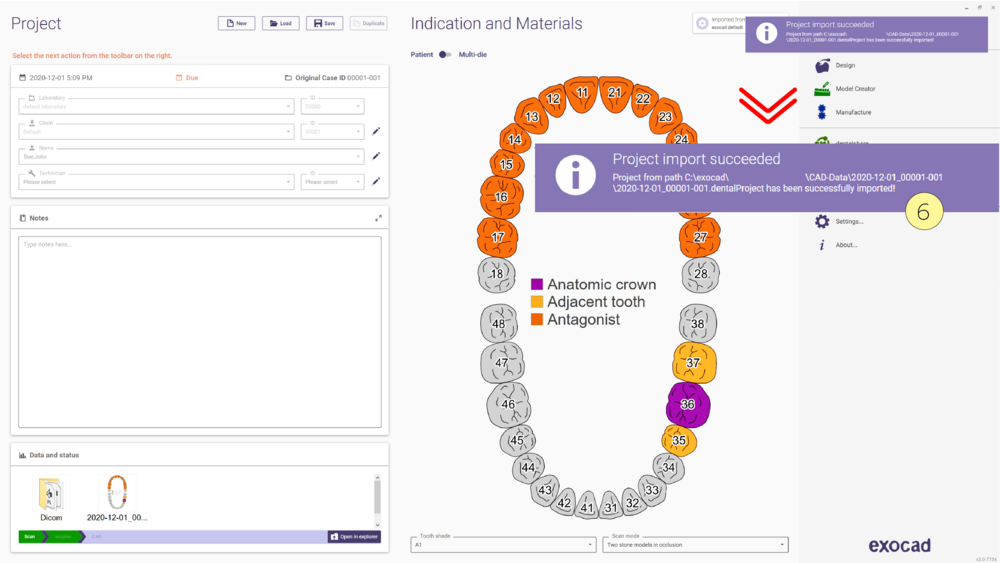
Step 6: A message informing that the project import succeeded appears [6].
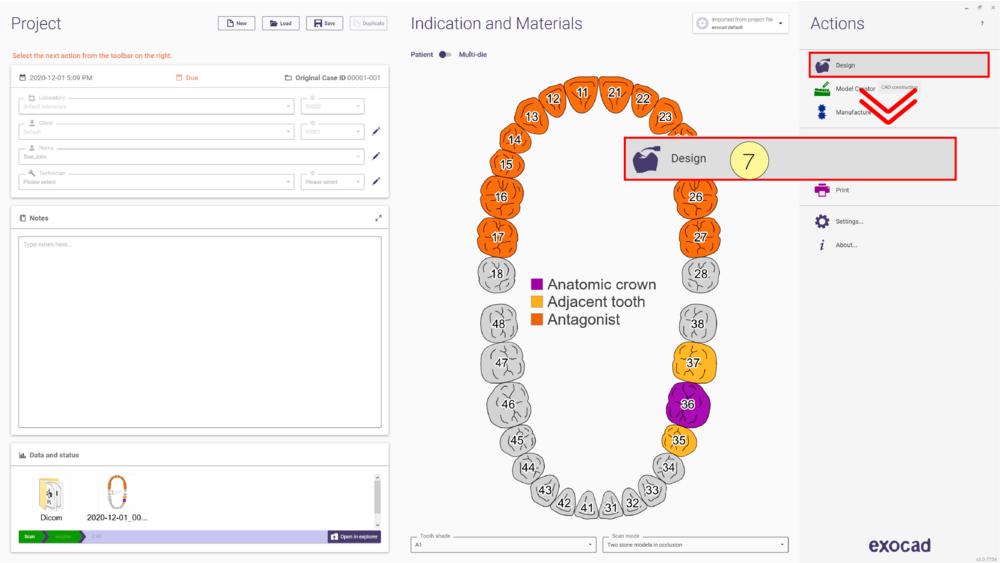
Step 7: Click the Design [7] button to start DentalCAD.
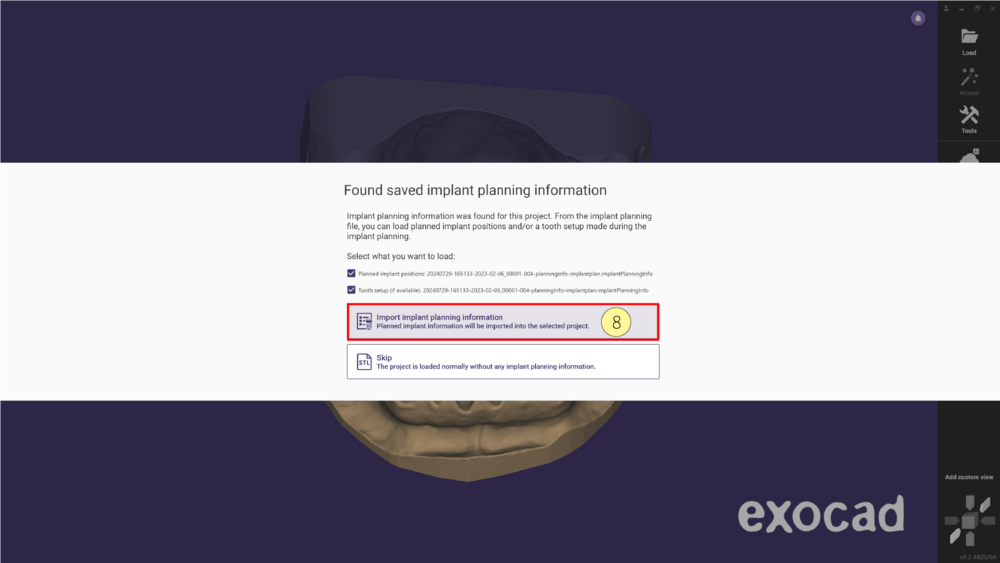
Step 8: Implant planning information is found by the software, and you can decide by checking/unchecking the box, to import the planned implant positions and the tooth set up. After selecting the option/s click Import implant planning info file [8].
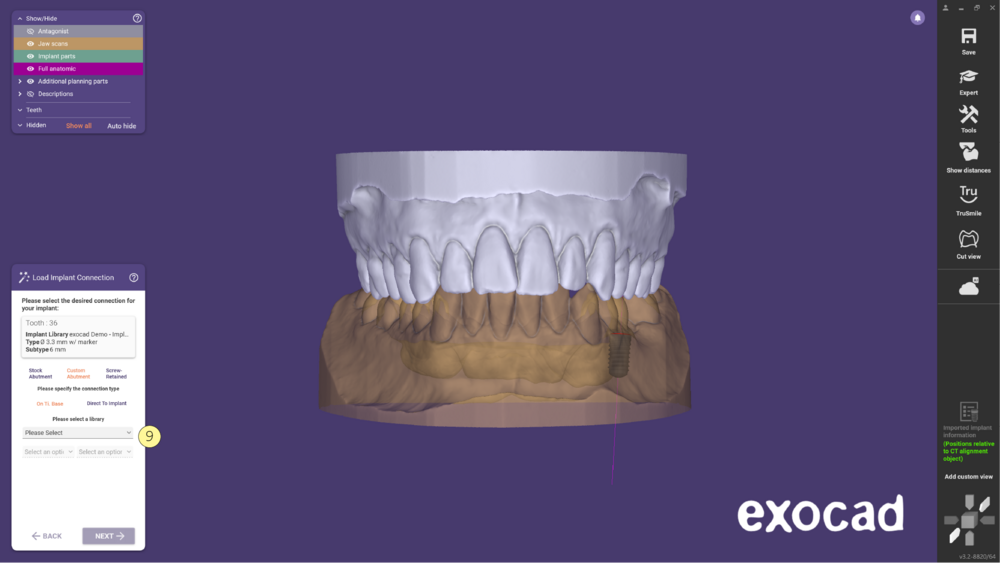
Step 9:At this point, select the desired connection for the implant, and clicking ‘’Next” the Wizard will guide you through the design process [9].
| Please contact your reseller for further information on this topic. |


