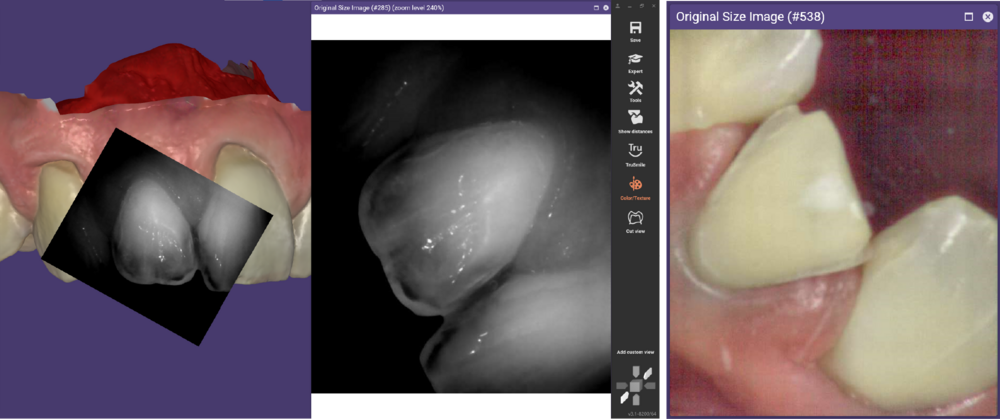
Overview
Thanks to the new Intra Oral Camera tool available in the latest version of DentalCAD software it is now possible to take advantage of the IO camera images. With NIRI (near infra-red imagining), you can take an in-depth visualization of the tooth structure namely the enamel, dentin, and internal anatomy. With this tool and receiving the data via the iTero-exocad Connector, the dental technician can improve communication with the dentist in restorative treatments.
Requirements
Please make sure you have:
- DentalCAD 3.1 Rijeka (Engine Build 8200 or higher). Note: If you have an older version (lower Engine Build number displayed in the CAD title bar), please contact your reseller to obtain an upgrade to Build 8200 or later.
- Restorative case received via the iTero-exocad Connector™ 3.1.
- Scanned data from an iTero Element 5D.
How to use it?
- After receiving a restorative case via iTero-exocad Connector, and fulfilling the requirements above, start by selecting the type of restoration in DentalDB as usual.
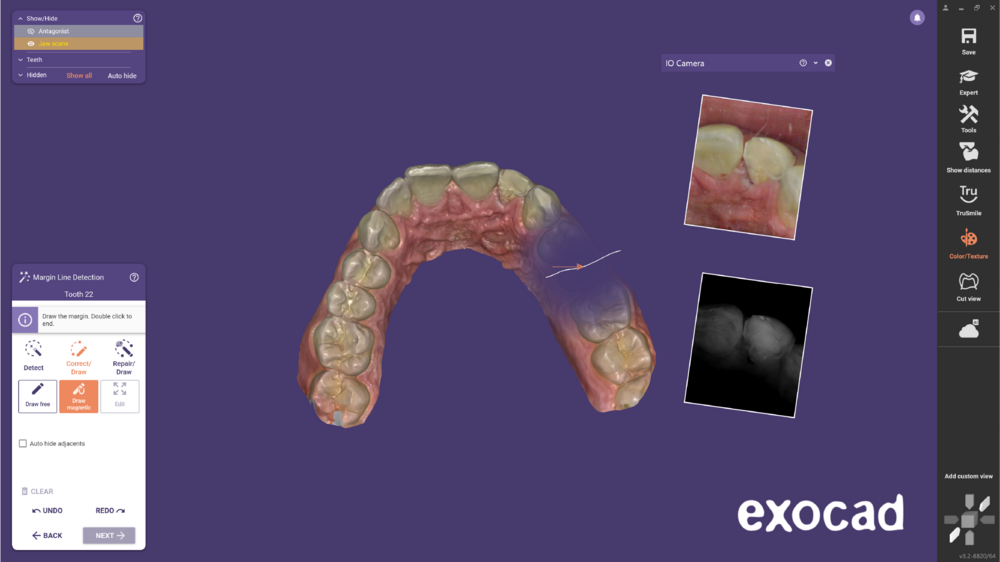
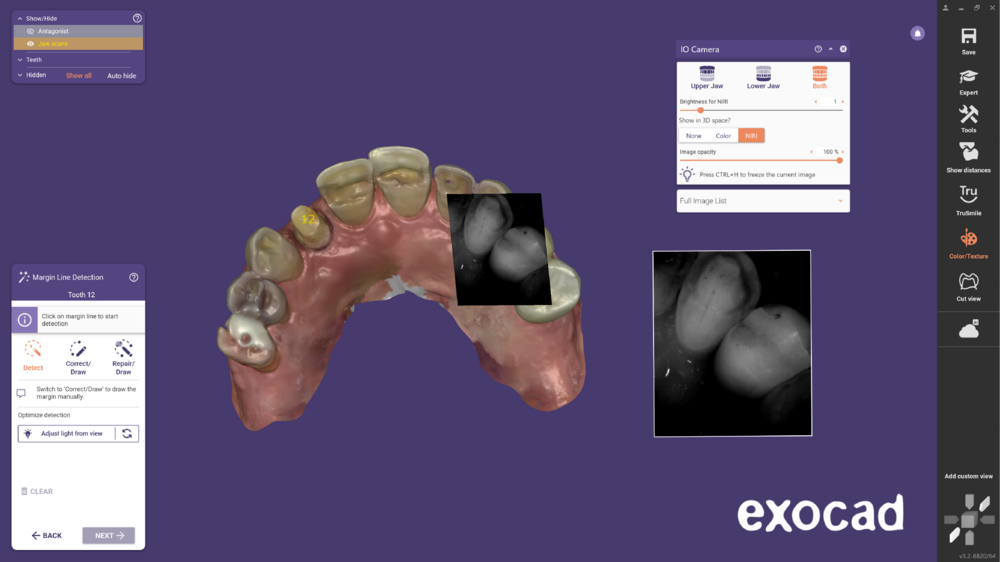
- Next, start the design process and follow the necessary Wizard steps until you get to the Margin Line Detection step. In case the scanned data is from an iTero element 5D, the DentalCAD automatically opens by default the IO Camera tool as shown below.
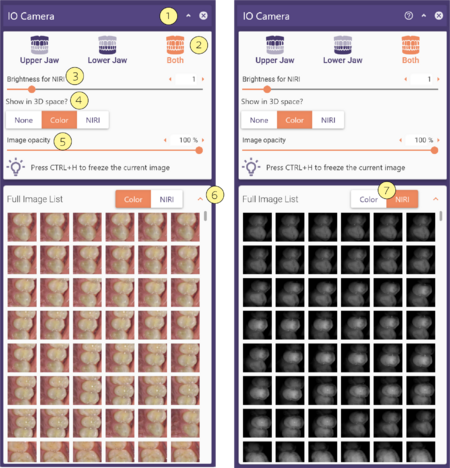
- The IO Camera window will display a unfold/fold [1] button with one or two images, color [A] and NIRI [B], depending on if the NIRI function was enabled or not during the scan of the case.
Click [1] to access the displayed options:
- [2] Select one of the options to activate Both, the Upper Jaw, and Lower Jaw.
- [3] Adjust the brightness of the NIRI image.
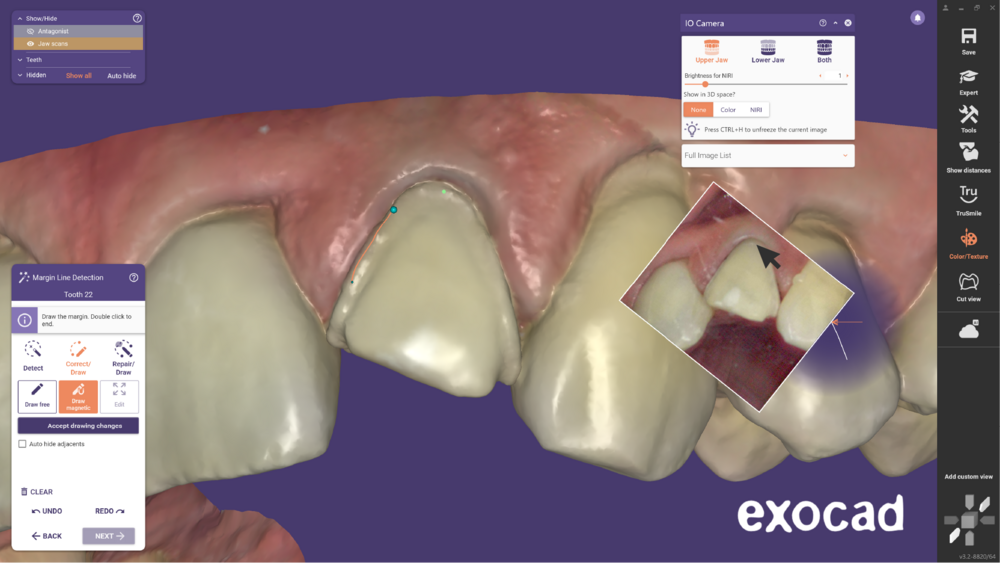
- [4] None will disable this function. Color or NIRI, the 2D/NIRI images can be placed according to their corresponding location in the 3D model, allowing for easy placement, comparison, and identification. The image displayed in the 3D space will look as [A] color or [B] NIRI.
- [5] You can also adjust the image in the 3D space opacity. This can help you define the margin line.
- [6] Fold/Unfold the Full image list to see all the stored images and select the type of visualization [7] Color or NIRI.
| Single click - Shrink the image CTRL + H – Freeze/unfreeze the current image Hold CTRL + click – Define the margin line in the current image Double-click or CTRL + SHIFT + M – Open the window in full size in a separate window Hold CTRL + move the mouse over the image – The corresponding point is highlighted on the model CTRL + right mouse – Rotate the 3D model, while over the 2D image Hold CTRL + both mouse buttons – Move the 3D model, while over the 2D image H – Hide Image in 3D space |
During the design, the IO Camera Tool can also be accessed manually by using the Tools button in the Main Toolbar.
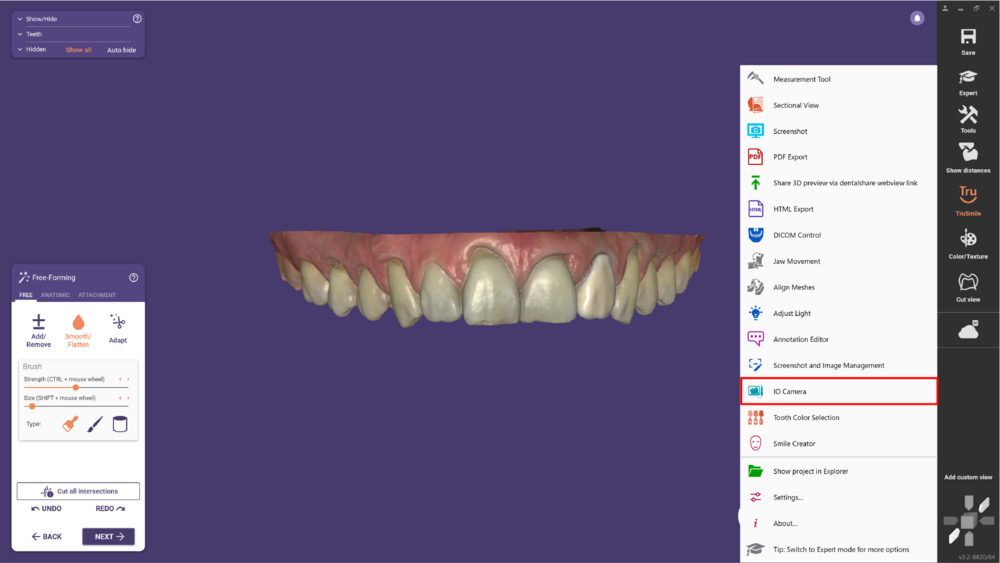
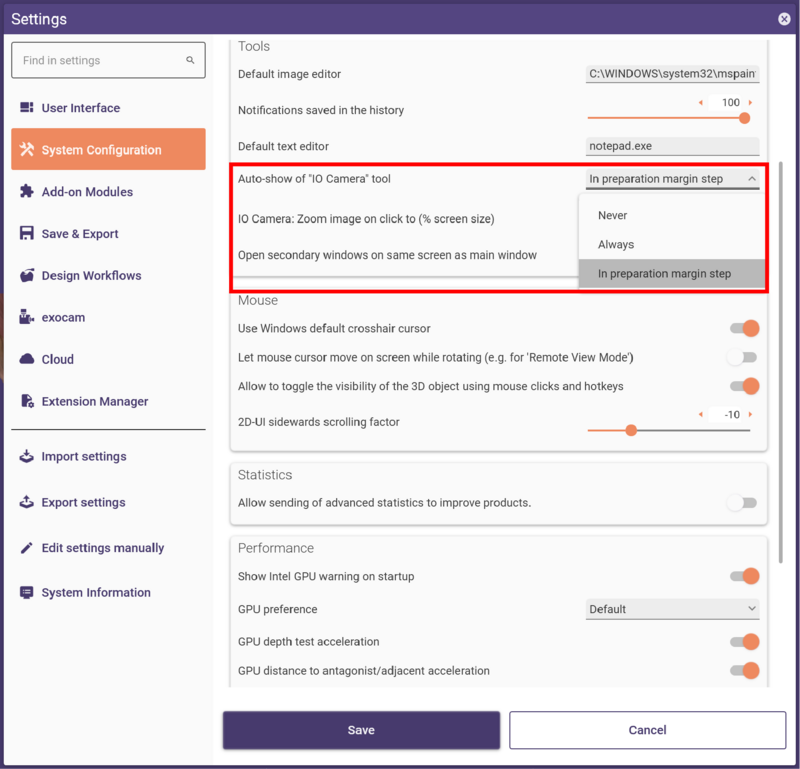
Note: Under Settings, you can choose the desired behavior of this tool. By default, you will see “In preparation margin step’’.
Applications
- Mark the margin line points over the 2D image as well as the 3D model, assisting with difficult cases of margin line tracing and dealing with under-scanned areas.
- More detailed and accurate information about the translucency and internal details of the adjacent tooth facilitates the reproduction of the restoration. It also helps with the color and shade analysis of the remaining teeth and stumps.
- Help classifying adjacent teeth as natural dentition or existing crowns supporting the decision of the material to use for the restoration e.g. adjacent monolithic zirconia or layered with porcelain.


