ExoCAM Tool configuration
Once you click on the configure tool button, you will be able to change the tooling profiles and which tools are to be used in the CAM process.It is important to understand that there are 2 separate CAM systems with different processes for tool configuration - Moduleworks and Sum3D. This list may change depending on the specific configuration of your system.
We will begin with Moduleworks CAM
A: This is the tool information including position or slot( this refers to the specific machine , which in this instance is a Roland DWX-50), tool name, tool shape, tool diameter, tool length and tool description.
B: This is the tool configuration or tool set configuration name - is customized to whatever you would like to name it.
C: This is where the name is viewed
D: This is a pulldown list of all of your customized tool configuration or tool set configuration.
E: This will allow you to create new configurations
F: This will delete the current tool configuration
When you click on D a pulldown menu appears and allows to you to change to your own configured/customized tools. These are derived from E and the renaming in C.
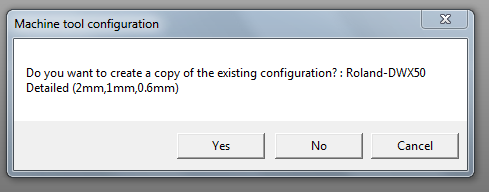
To create your own tool configuration you must click on E and a new window will appear asking you if you would like to copy a configuration which is already present.
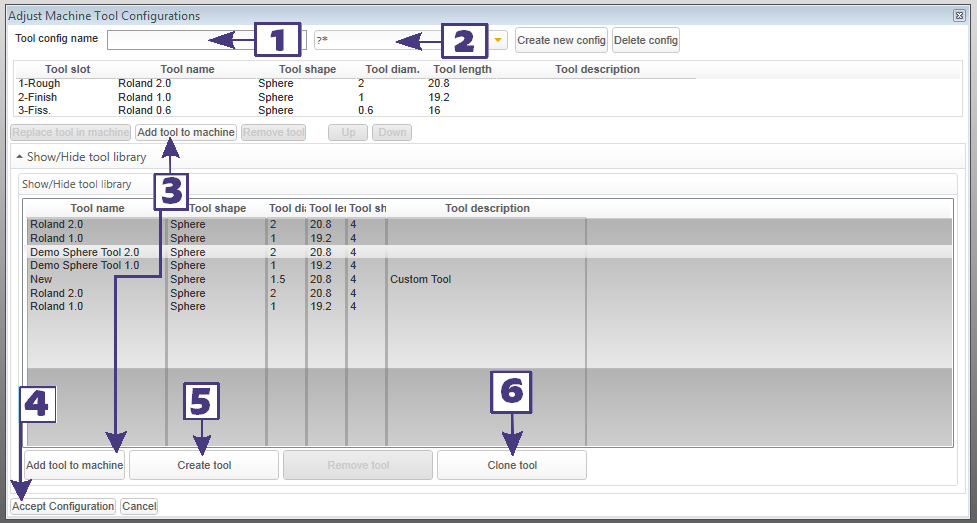
1. Add a name for your new tool configuration.
2. This will display the new name.
3. Add tool to machine.
4. Accept configuration.
5. Create tool.
6. Clone tool.
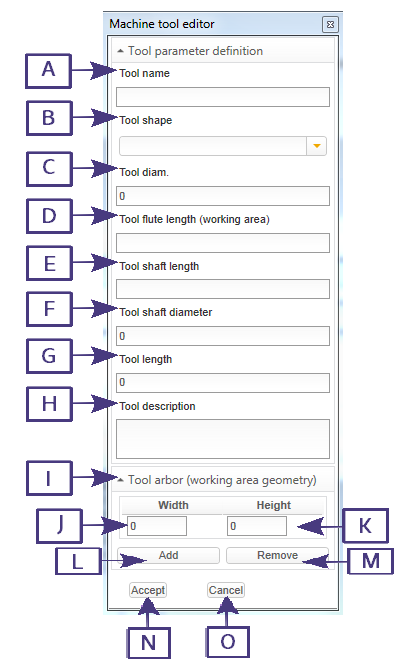
To create a new tool Click on 5 and a new window appears.
A. Add any tool name here
B. Tool shape can be unspecified or sphere (tip shape)
C. Tool Diameter
D. Tool flute length
E. Tool shaft length
F. Tool shaft diameter
G. Tool length (overall)
H. Add optional description here
I. This is the too arbor section
J. This is the tool arbor width
K.This is the tool arbor height
L. Add button (for the tool)
M. Remove button (for the tool)
N. Accept button (for this configuration)
O. Cancel button (for this configuration)
Once you input all the necessary information and click on the accept button you will see this tool appear in the Show/hide tool library along with the other tools. You can then choose which tool slot you would like this new tool to be placed.


