ExoCAM Module
Overview
The exocam module provides easy to use interface for 3 and 4 axis milling along with 5-axis simultaneous milling including tool path calculations. There is production queue and material management capabilities with the seamless integration of different CAM vendors and mills. The user can simply nest the finished restorations in a predefined area in a material of choice such as zirconia, wax, pmma, etc.
Starting exoCAM
There are 3 ways to import finished prosthesis into exoCAM.
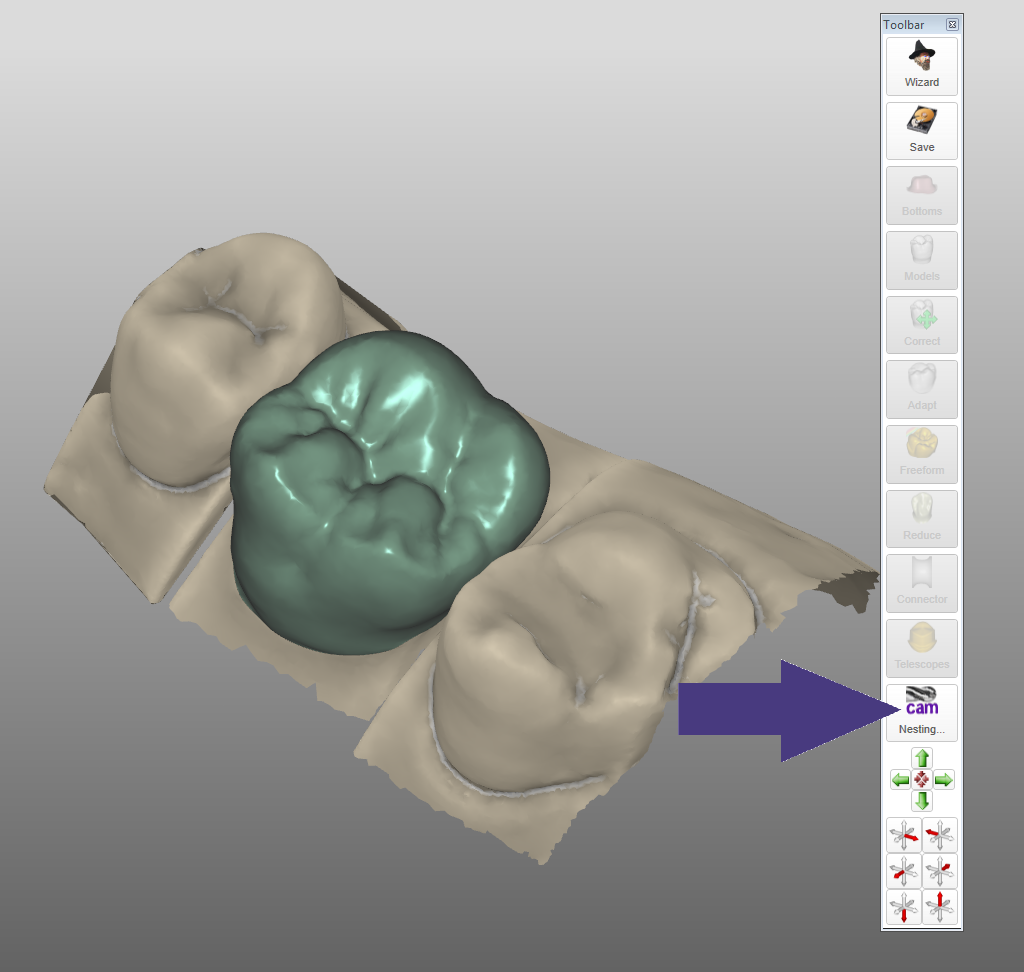
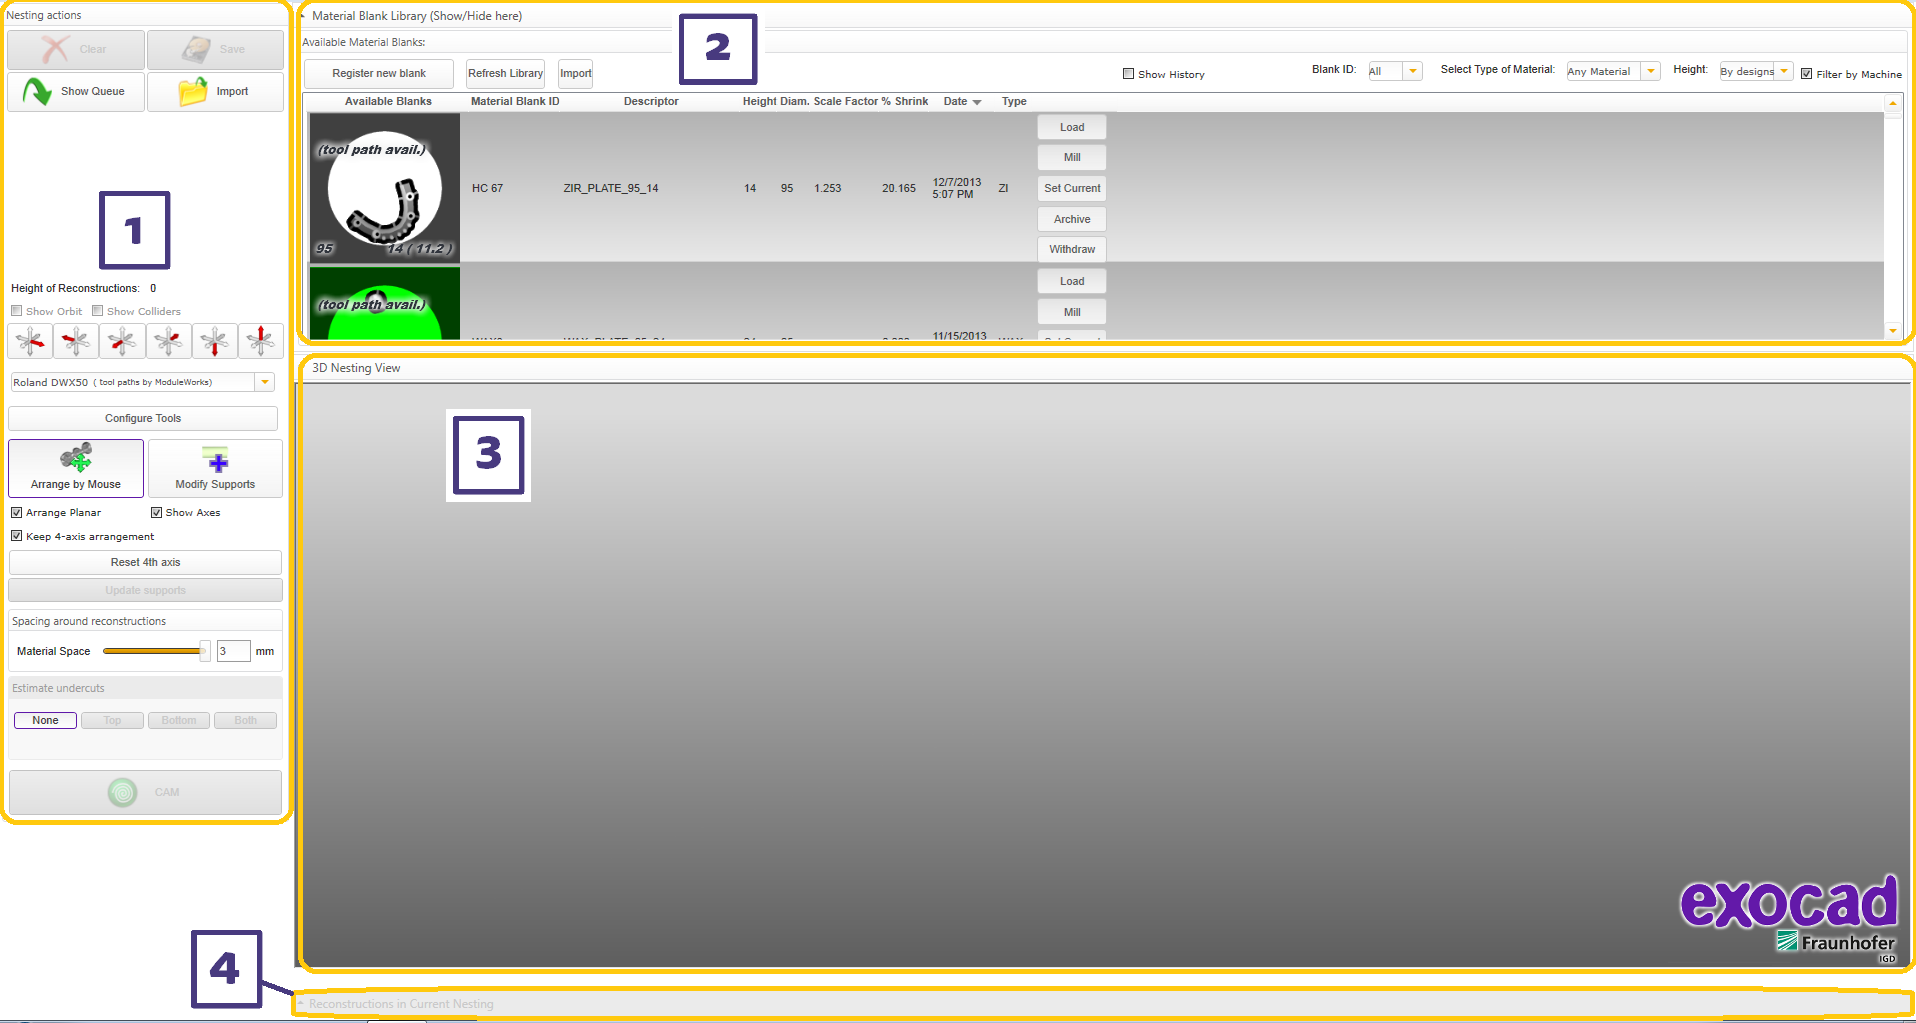
The first is in the CAD application when the prosthesis or unit is finished, on the toolbar you can click on the CAM button to launch the application. This will be a direct import. The unit will appear in the 3D Nesting view window (3) and you must choose to register a new material block or open an existing one from the Material Blanks library (2)
The second way is to right click in the background or on the prosthesis or unit of the CAD application when the prosthesis or unit is finished. You will se a window pop up, and now you can choose Enqueue to Nesting. Your finished unit is in the production queue , see "Nesting Actions". You can see the queue once you start up the CAM application or you can click on the Show Queue button. If you wish you can now continue with any other designs you may want to finish or start a new job, see "Getting started".
The third way is to do a direct import from the CAM application. This will be found below in section 1 Nesting actions or see Nesting Actions
| exoCAM will have the appropriate material and block/puck visible in the available blanks list which corresponds to the height of the unit automatically based on the entry in the Dental DB see section "Defining jobs for individual teeth" |
Here in the CAM application you will find 4 Sections : Nesting actions(1), Material Blank Library (2), 3D Nesting View (3) and Reconstructions in Current Nesting(4)

