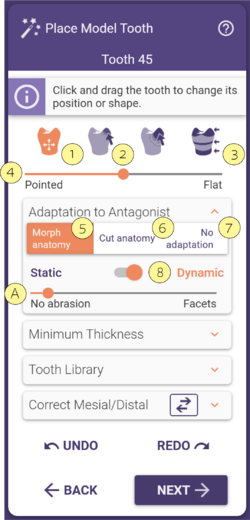
For single-tooth reconstructions that require a model tooth (e.g crowns, copings), DentalCAD provides an automatic tooth
placement proposal based on the default tooth library. DentalCAD automatically identifies the adjacent mesial and distal
teeth, selects the mesial and distal contact points, and then adjusts the model tooth to fit.
The Place Model Tooth window further contains four expandable sections:
Adaptation to Antagonist
Morph anatomy [5]: A shape preserving adaptation is applied to the antagonist.
If Cut anatomy [6] is activated, no shape preserving adaptation is applied and the tooth model is simply cut off.
Select No adaptation [7] to completely deactivate the adaptation to the antagonist.
Static/Dynamic Antagonist [8]: Static: the tooth model is cut off at the static antagonist. Dynamic: the virtual imprint is used, i.e. the model tooth is adapted/cut off according to the movement of the antagonist in the automatic articulator. Use the slider [A] to adjust the amount of abrasion on the occlusal surface, moving the slider to the left will disable abrasion.
Minimum thickness [9]
Select the minimum thickness behavior from the drop-down menu:
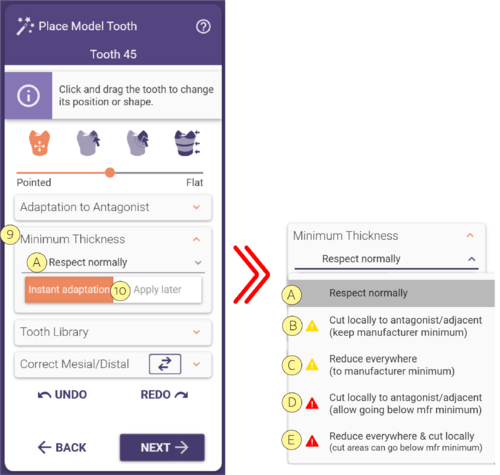
Select whether to apply the minimum thickness setting instantly or later (i.e. upon clicking Next) [10].
Keep in mind that the following options depend on the previously set value in DentalDB.
| Below manufacturer minimum | Manufacturer minimum | Current set value |
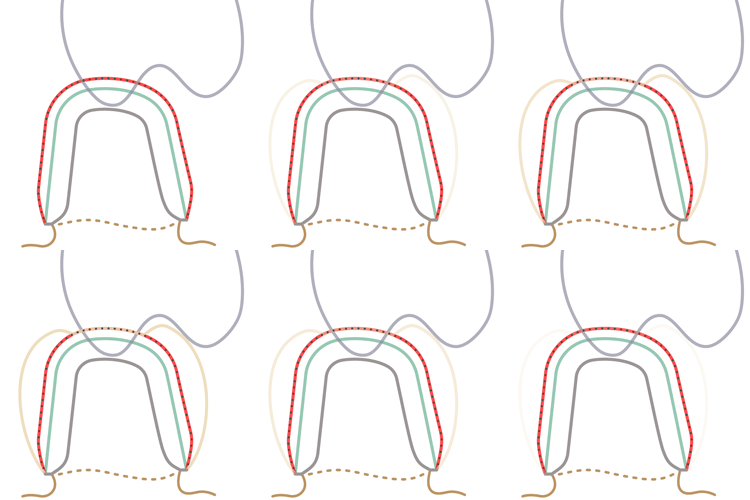 |
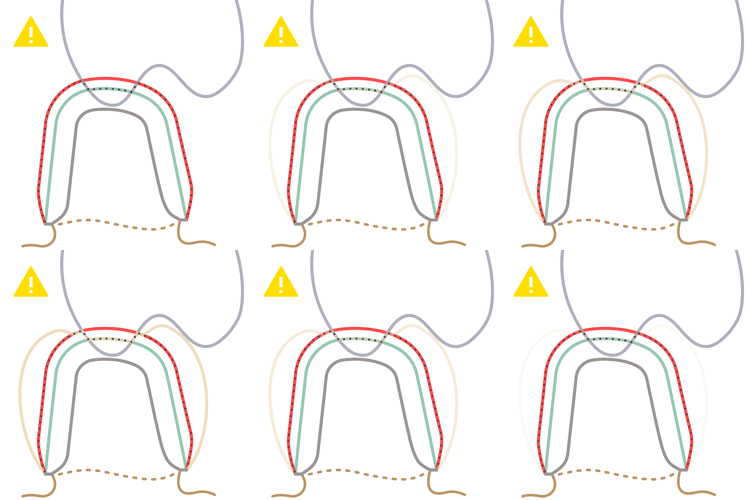
Resulting minimum thickness Current set value Manufacturer minimum Crown Bottom |
[A] Respect normally: respect the minimum thickness completely, maintaining the current set value.
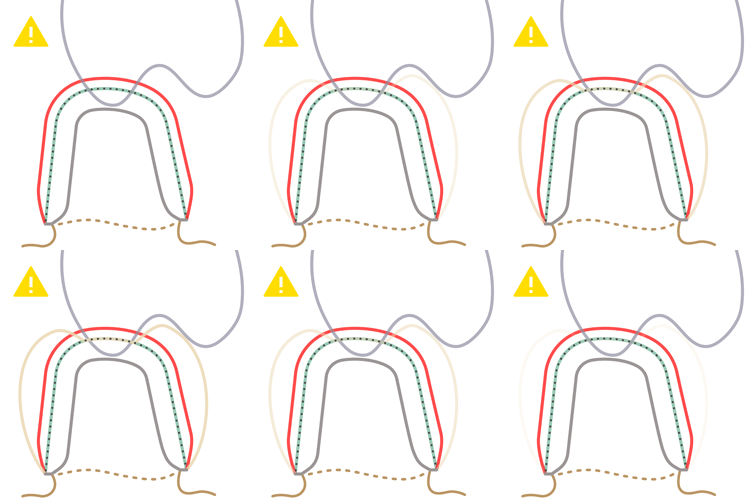
| Resulting minimum thickness Current set value Manufacturer minimum Crown Bottom |
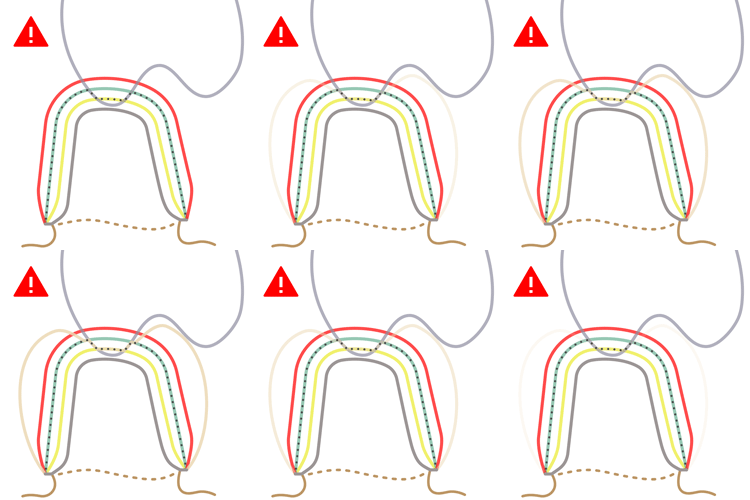
[B] Cut locally to antagonist/adjacents : cut the minimum thickness at the antagonist and approximal neighbors to the manufacturer minimum(e.g. for cases in which the minimum thickness intersects with the antagonist or approximal neighbors).
| Resulting minimum thickness Current set value Manufacturer minimum Crown Bottom |
[C] Reduce everywhere : reduce the minimum thickness to manufacturer minimum.
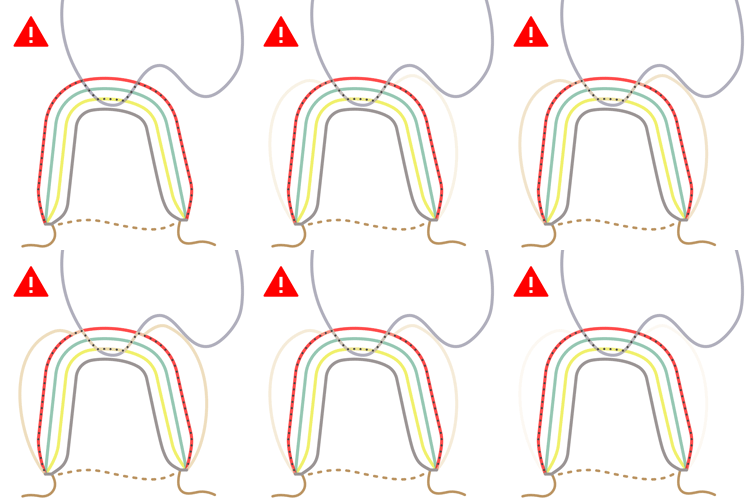
| Resulting minimum thickness Current set value Manufacturer minimum Below manufacturer minimum Crown Bottom |
[D] Cut locally to antagonist/adjacents : reduce below the manufacturer minimum keeping the current set value in areas that are sufficiently far away from antagonist/adjacent.
| Resulting minimum thickness Current set value Manufacturer minimum Below manufacturer minimum Crown Bottom |
[E] Reduce everywhere & cut locally : reduce minimum thickness globally to the manufacturer minimum value, and additionally, go below the manufacturer minimum in the areas that are too close to the antagonist/adjacent.
Tooth library
Using the library drop-down [11] , you can change the tooth library.
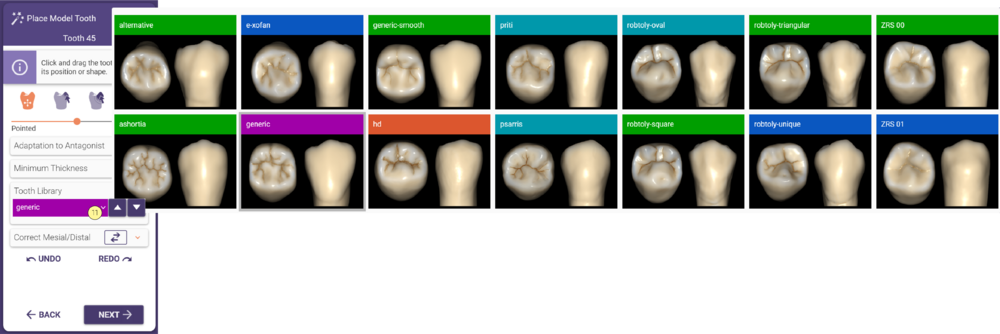 Click the arrow buttons to select the next/previous library in the list.
Correct mesial/distal
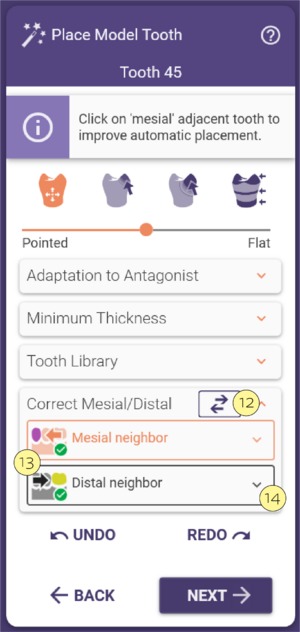
- Swap the mesial/distal neighbors using the Swap neighbor’s button [12].
- You can select new mesial/distal neighbors by expanding the section Correct Mesial/Distal, choosing the corresponding button[13], and clicking new positions on the jaw scan.
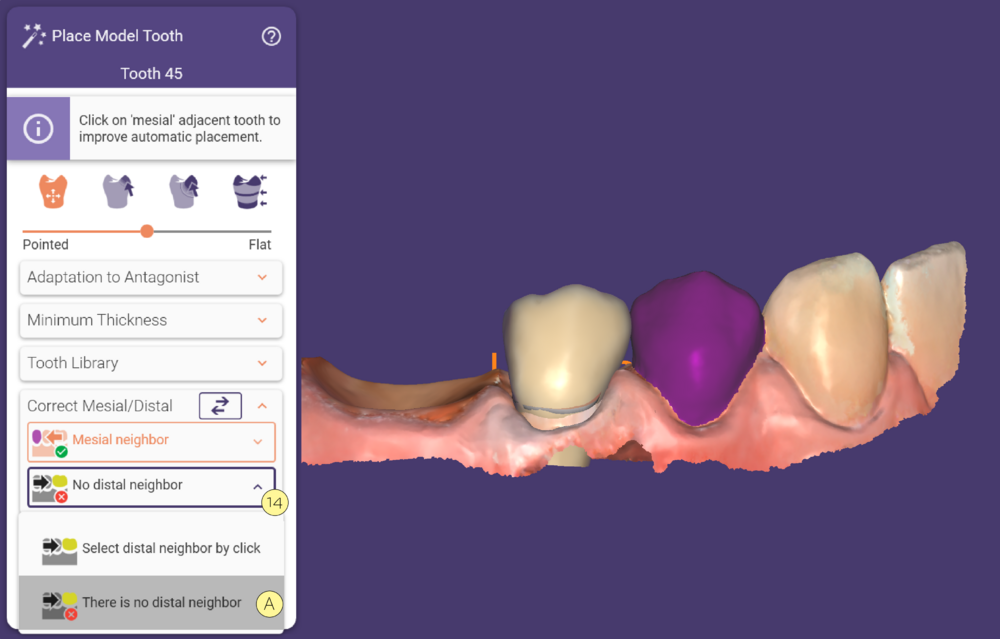
- If there is no distal or mesial neighbor tooth, click the dropdown menu [14] and select the option [A] as you can see in the example below.


