3D Nesting View
In the 3D nesting view you can see all the reconstructions or units that are in the material blank/puck that you selected from the Material Blank Library see "Material Blank Library". The block /puck can be rotaied by using the right button on the mouse including the scroll button for zooming. Right clicking on the reconstruction or unit will pop-up an new window for that specific reconstruction.
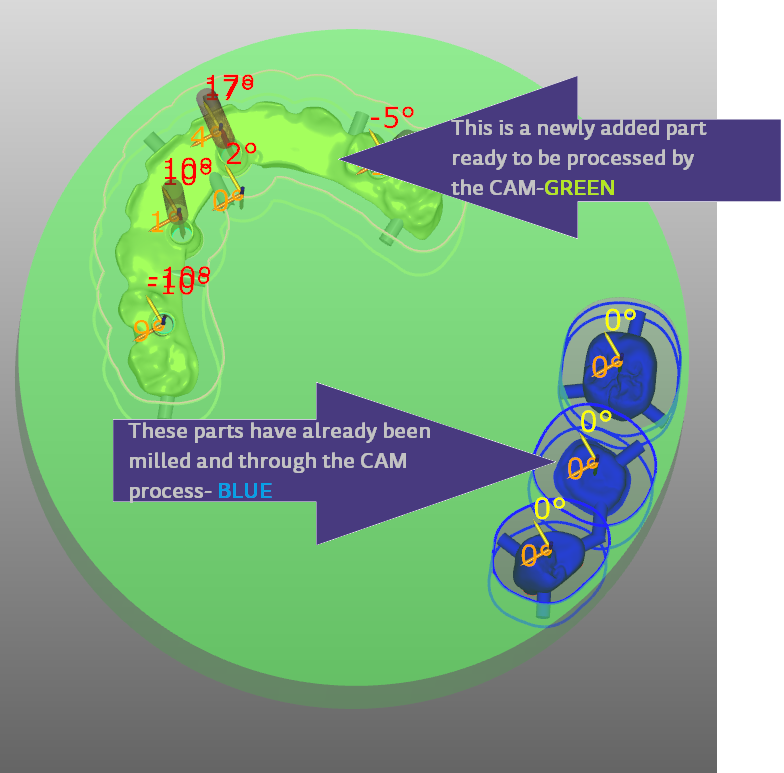
Here we see a mixed Block/Puck with reconstructions/units already milled in BLUE and newly added parts in GREEN ready for a new CAM process.
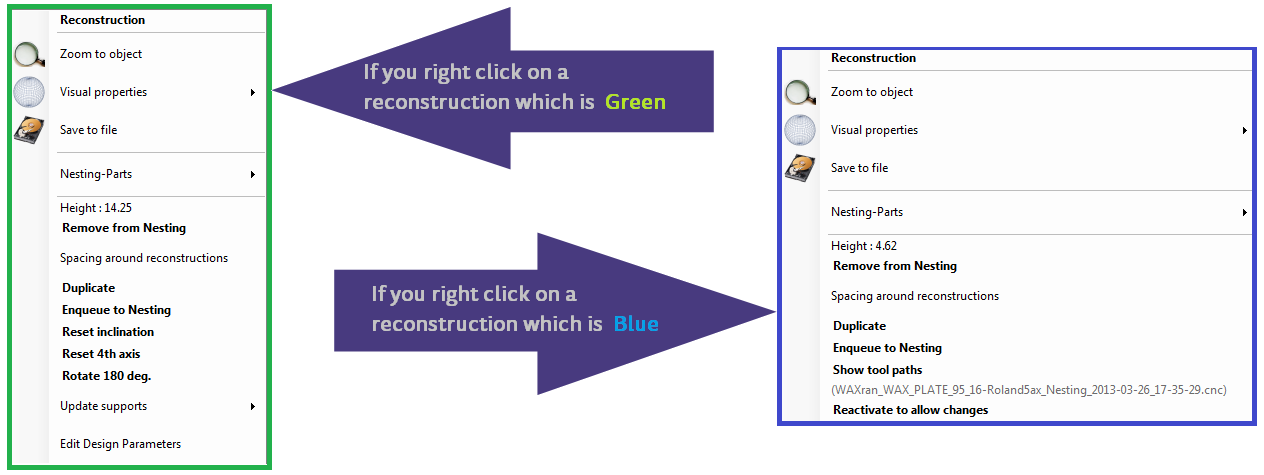
| When you right click on a GREEN part or a BLUE part you will see these 2 different windows with additional options for each. |
Tool path creator
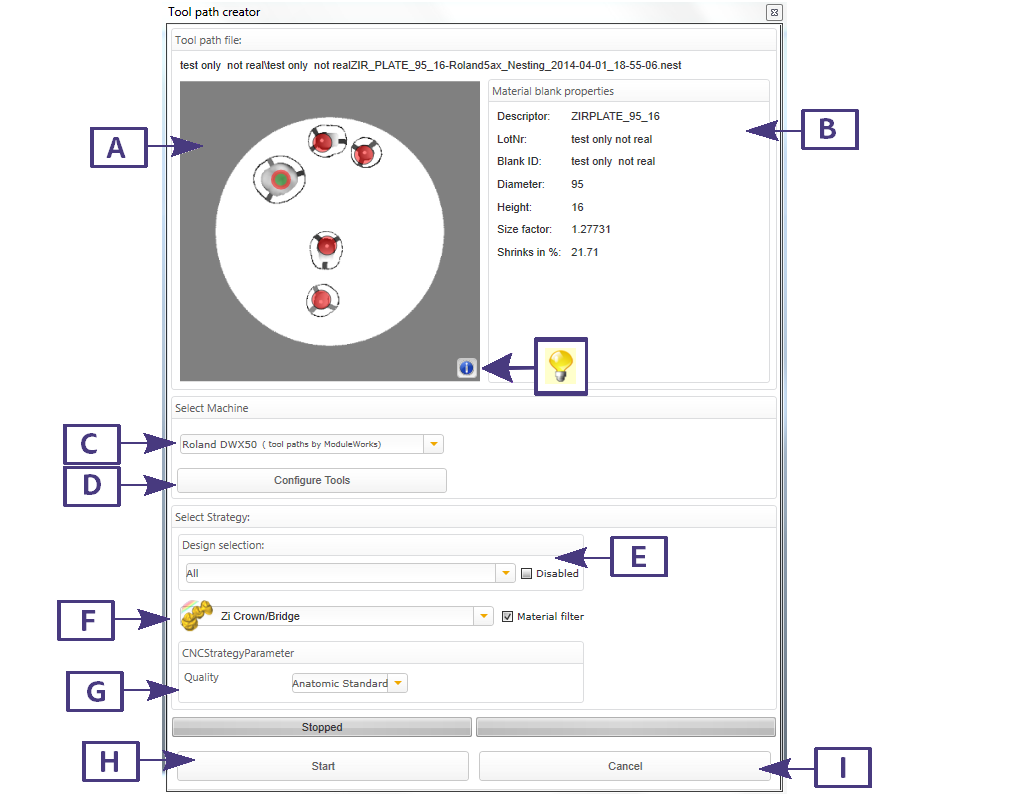
After you press the CAM button in the Nesting Actions section, a new window appears Tool path creator. Usually the reconstructions are automatically matched to a specific milling strategy and can be changed in this area.
A: This is a live picture of the nested parts which varies when the pulldown in section E is changed.
B: Material blank properties
C: Machine selection / CAM vendor
D: Configure tool
E: Design selection , available parts in pulldown menu and Disable parts checkbox
F: Strategy selection pulldown menu and Material filter checkbox
G: CNC strategy parameters / Finish Quality available changes in pulldown menu
I: Cancel button
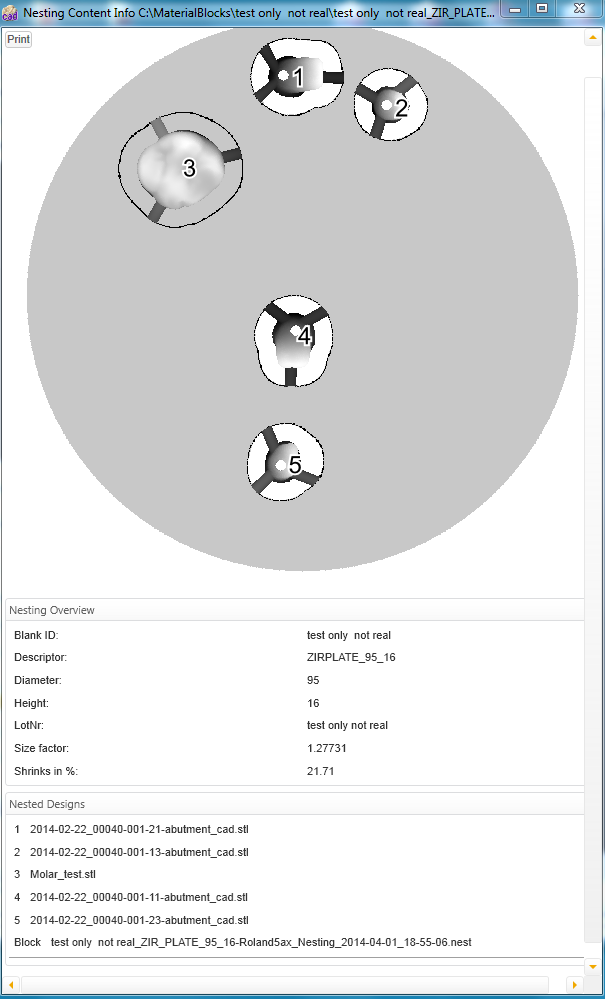
| The info button will pop up a new window and allow you to print the
Nesting content info including Nesting overview information, Nested designs information and a time stamp of the date it was generated |


