Uploading and Downloading in dentashare
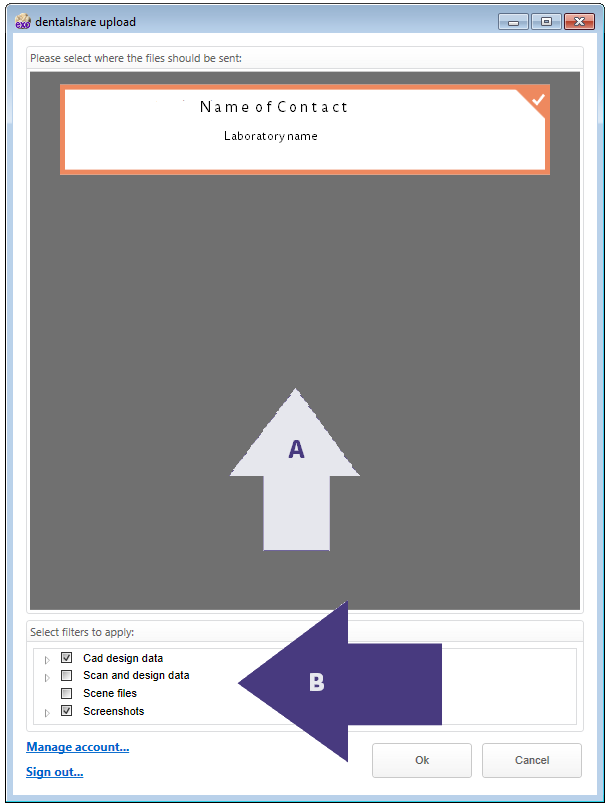
Once you have acquired your activation and are ready to send files click on a file which had been started and saved or even finished. Then click the dentalshare button and login. A new window will appear with the name of your group administrator. This window allows you to choose various users and also can choose which files are to be uploaded.
A. This area is where you will find your contacts - you can just click on name and file will be uploaded to tat customer or partner.
B. This is how to specify which files you would like to upload
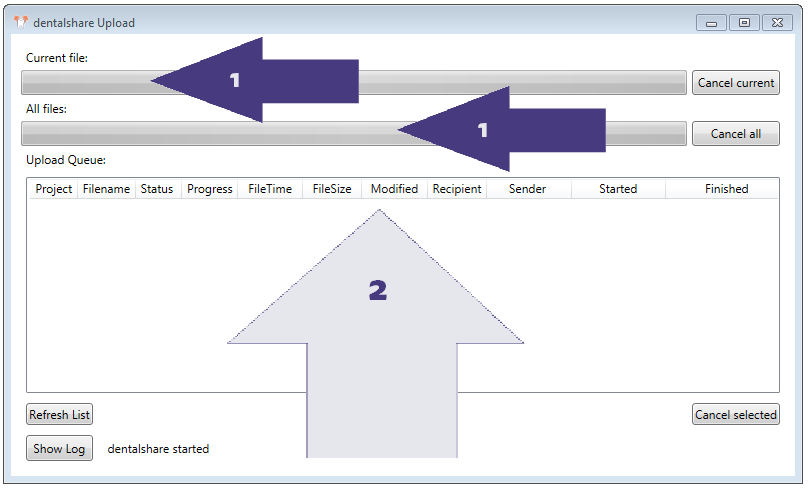
Once this is done you can check your uploads by clicking in the task bar and clicking again on the purple arrow. This will open a new window dentalshare upload
Here you will find the progress of the file/s being transferred(1) Current and All files
The Upload Queue has detailed information of the file/s(2)such as Filename, Recipient, etc.
When the DB( Data Base) is launched, dentalshare automatically launches and begins a connection for authentication, you will notice this in the task bar and there will be a notification. There are 4 colors of the dentalshare indicator Orange which indicates the starting/launching of dentalshare , Purple which indicates dentalshare uploading/downloading in progress, Green which indicates successful file uploads/downloads , and Red indicates downloader list failure authentication.
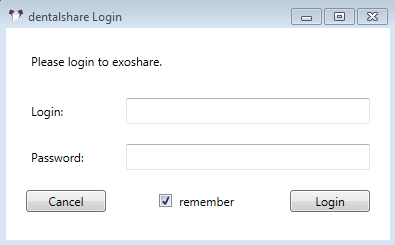
If the automatic authentication is not activated,
you can click on the orange arrow and a new widow will pop up which allows you to login or you can click on the dentalshare button to launch the main dentalshare login. See "Dentalshare"


