Contents
Smile Creator Photo Protocol
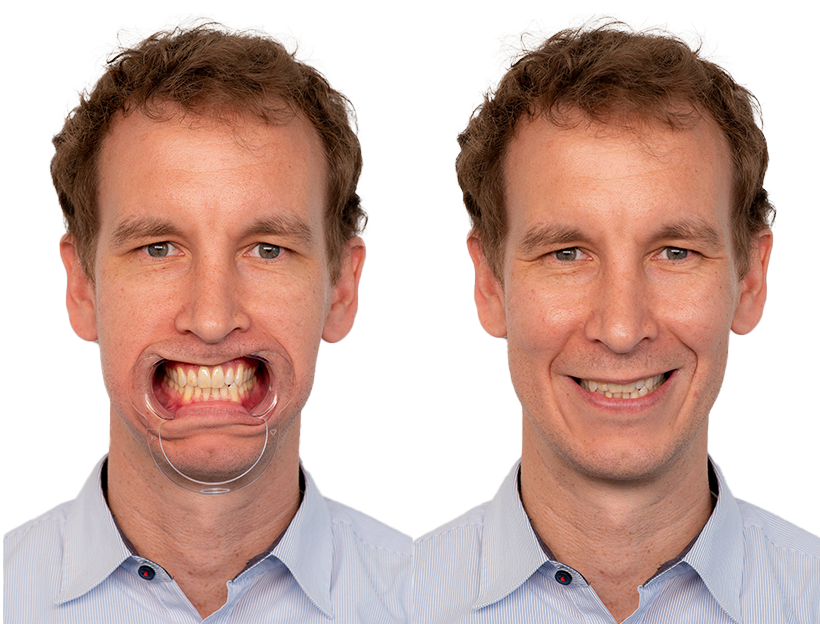
To perform oral rehabilitation using exocad Smile Creator, 2 main photos are required:
- Retracted Image
- Smile Image
Note: Both images, with and without retractor, need to be taken in the exact same position to ensure an accurate result.
Please pay attention while taking the retracted picture, it is important to retract correctly the patient's lips showing the entire buccal corridor, as you can see below. This is very important to guarantee a good result using the smile creator.
To achieve that, you may need different tools depending on the patient. For patients with narrow arches, a simple lip retractor should be enough. In the case of wide arcs, two lip retractors in a "V" shape could be used. If this is not respected you may see the retractors during the smile creator preview.

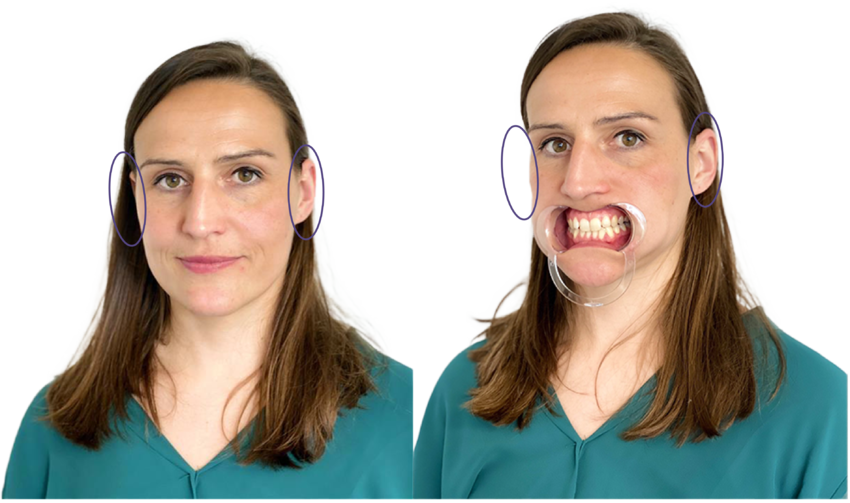
For facial photos, is very important that the face is not tilted. Use both ears as a reference and make sure they show symmetrically and are clear of any objects, including hair.
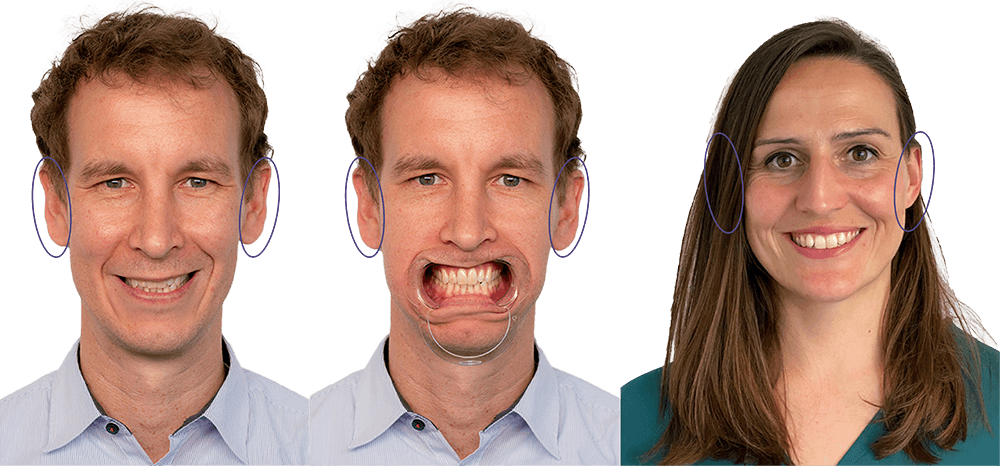
In this example, the picture was not taken with the patient-centered on the camera. In this example, it is done extremely tilted, for illustration but on everyday work, it may not be noticed, so it is important to use the ears as reference points to center the picture.
Taking a photo with a smartphone
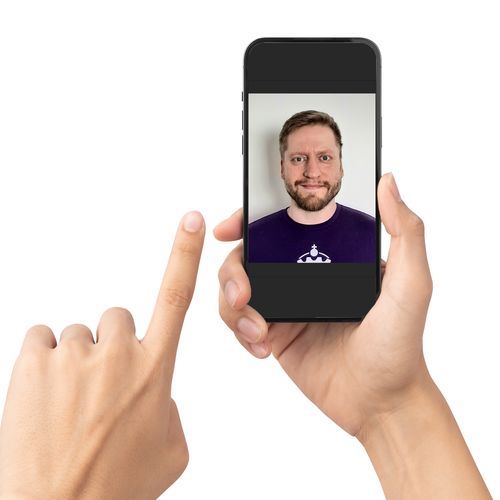
Nowadays smartphone cameras have high photo definition and can be used in dentistry and be a helper instrument for dental restoration planning.
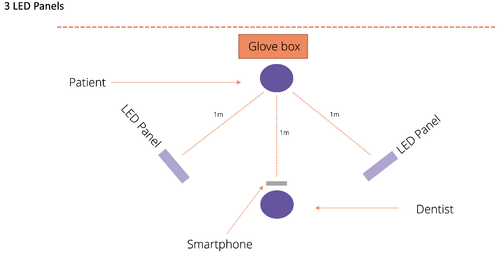
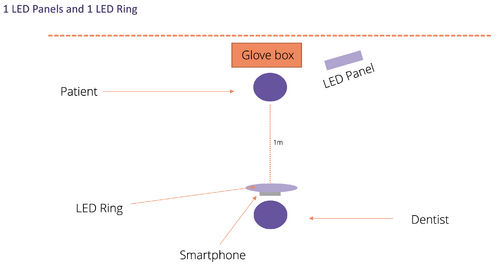
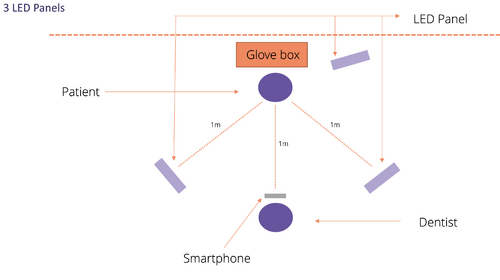
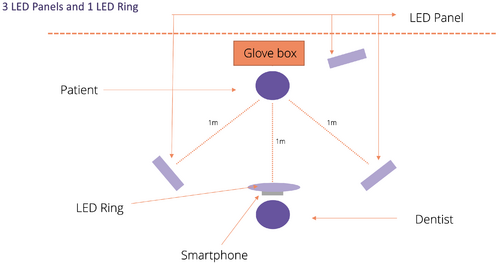
The key to good quality photos with a smartphone is the amount of lighting. For these LED panels/ring is recommended. If an LED panel is chosen, 2 are required, and they should be positioned one on each side of the patient.
The most used backgrounds are black or white and can be obtained with a black tissue (for dark backgrounds) fixed on the wall or just a white wall (for white backgrounds).
The black background is simpler to obtain because it does not cause shadows, but the white background, in case there is no light point or flash positioned on the back of the patient, the photo will come out with shadow decreasing the quality of the photo.A bright background is recommended, to improve it a LED panel or a flashpoint can be used behind the patient, towards the wall generate a nicer background.
Photo Set Minimum requirement
Advance Photo Set
How to do it
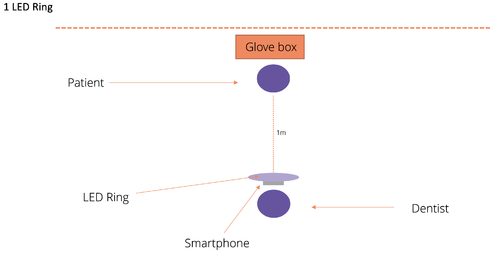
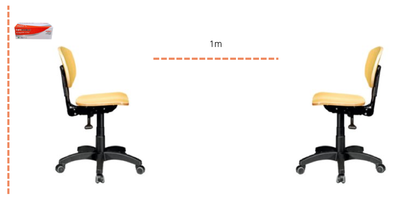
There are several ways of positioning the patient for the facial photos, the best is that the patient is sitting on a dental stool and the dentist is sitting on a dental stool of the same height in front of the patient which will facilitate an adequate focal plan of the photo.
- A glove box should be placed behind the patient's head to keep the patient's head stable and ensure the same position for Retracted and Smile Images.
- The camera lens should be level with the eye height.
Smartphone Photography
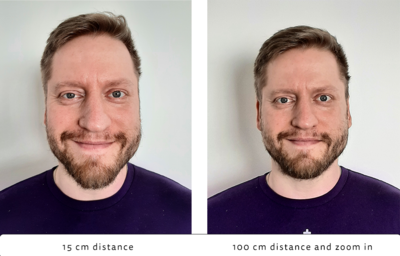
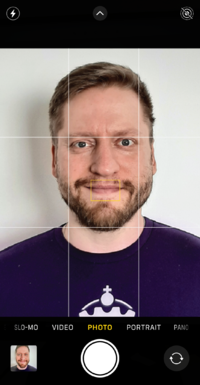
The patient should be in a comfortable position looking at the horizon with the neck supported. Make sure that the patient is not lifting the chin when smiling, as head inclination (back or forward) can influence the planning, but if the patient's head is inclined slightly to the left or right it is not so critical as exocad Smile Creator automatically corrects this positioning. With Smartphone photography, the closer you are to the patient, the greater the image distortion. Therefore, it is better to keep 1 meter and frame the patient's face using digital zoom. And the focus shall be fixed on the patient mouth.
- The relationship between the camera and the patient's face should be the same in both frontal shots for the position of the teeth to be as similar as possible. In this way, both photos can be easily aligned.


