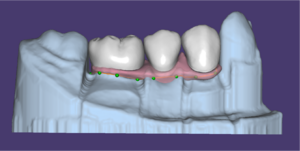
In this Wizard step, you can design a virtual gingiva. This may be necessary if the patient’s gingiva has declined considerably due to atrophy. The design of a virtual gingiva is typically recommended for larger implant-supported restorations, especially for aesthetic reasons.
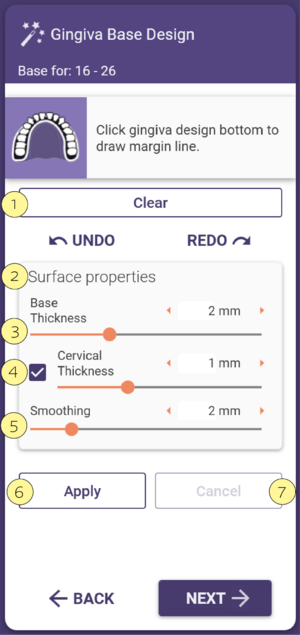
First, you must draw a margin line as shown in the depiction in the upper left corner of the wizard window. Do this by clicking points around the model (on the gingiva and/or teeth). Avoid sharp edges in the margin line. Using the sliders in the Surface properties section [2], you can influence the design of the virtual gingiva:
- Base Thickness [3]: Define the base thickness of the virtual gingiva.
- Cervical Thickness [4]: If the checkbox Gingiva around model teeth is activated, you can define the cervical thickness of the virtual gingiva, i.e. the gingiva’s thickness around the tooth neck.
- Smoothing [5]: Define the amount of smoothing that will be applied to the virtual gingiva.
To delete the designed virtual gingiva and restart the design process from scratch, click Clear [1].
When satisfied with the design, you can click Next to proceed to the next Wizard step.


