Multi-Tooth Segmentation can help to automatically detect where teeth are in a 3D scan. It’s also a prerequisite for other workflow automations like automated bite splint design or new cloud based TruSmile Photo features.
Key Benefits
- Automatically detect teeth and segment them
- Streamlines workflows, reducing manual segmentation effort
- Automated bite splint design
- Enables TruSmile Photo Features
Eligibility
You can start testing exocad’s Multi-ToothSegmentation if you:
- Use exocad DentalCAD Engine Build 9036 or later, with my.exocad integration
- Have Cloud Integration enabled in your exocad software configuration (see below for details)
Note: When you use Cloud Operations, you agree to additional Terms & Conditions and to the respective Privacy Policy.
Configuration Options
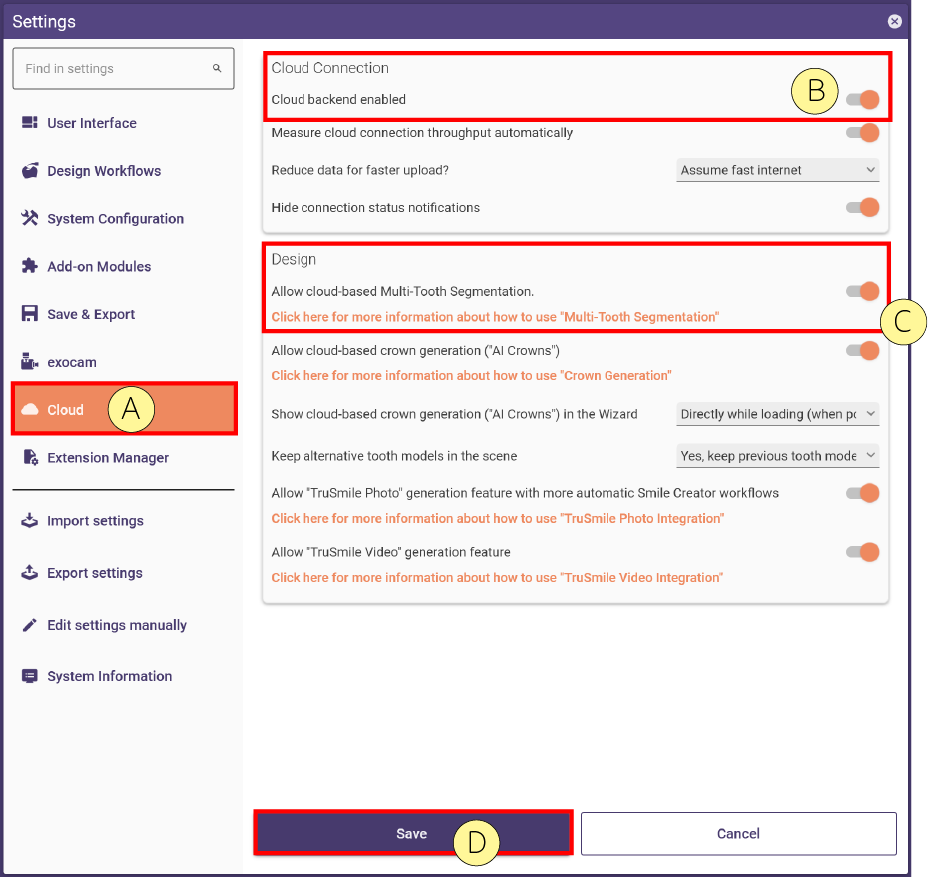
To activate the Multi-Tooth Segmentation, ensure the required settings are enabled in DentalCAD, located under:
Tools → Settings → Cloud [A]→ Enable Cloud backend enabled [B] and Allow cloud-based Multi-Tooth Segmentation [C] → Save [D]

Step-by-Step Instructions
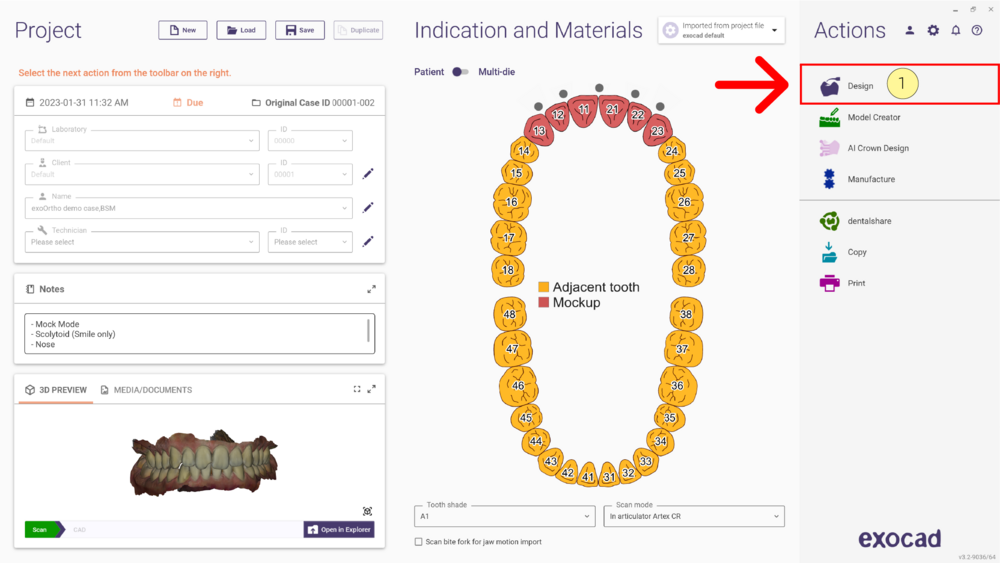
- Step 1: Open DentalDB, define the indication and materials as usual, and launch DentalCAD by clicking the Design [1] button.
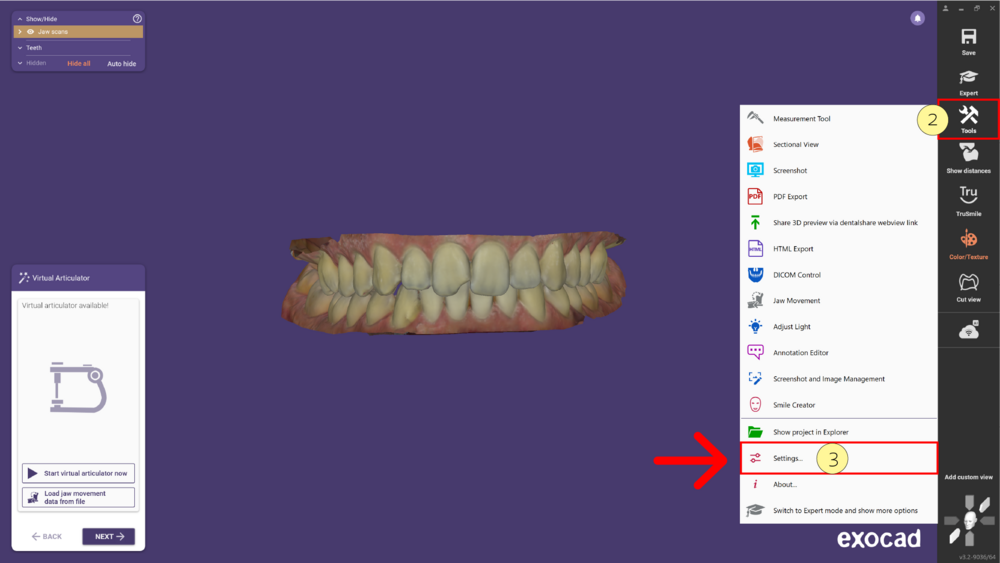
- Step 2: In DentalCAD, click Tools [2] in the toolbar and select Settings [3] from the dropdown menu.
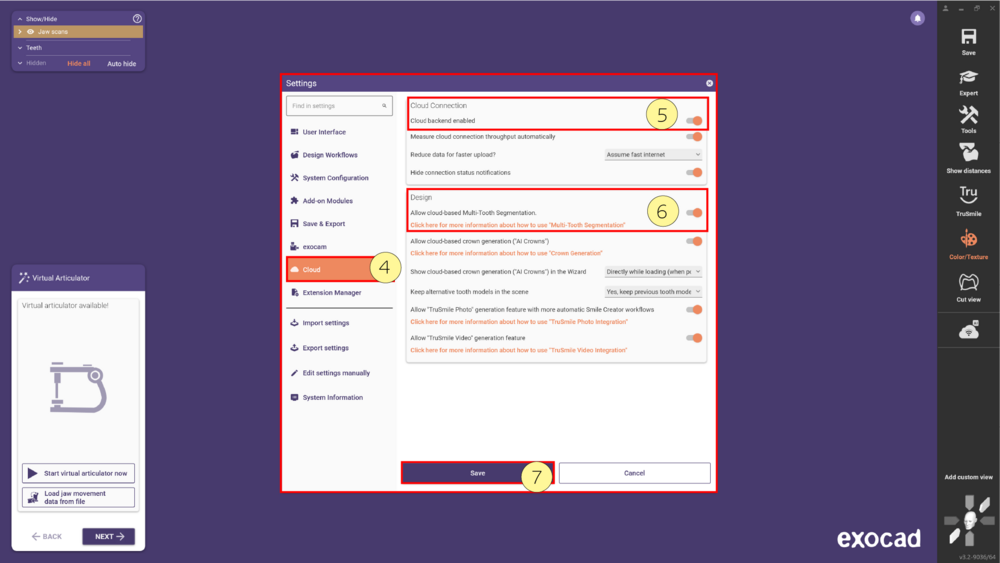
- Step 3: In the Settings menu, navigate to Cloud [4]. Here enable the Cloud backend enabled [5] and the Allow cloud-based Multi-Tooth Segmentation [6] options. Then click Save [7], and restart the application for the changes to take effect.


